Step 1To set up the timezone, go to Settings > General menu in the WordPress Dashboard.Step 2You'll see Time zone dropdown where you can select your preferred time zone.Additionally, you can choose a major city within your time zone.You can also set up the date...
WordPress Tutorials for Beginners and Intermediate Users
We have provided multiple WordPress tutorials for you to get step by step instructions on how to do common things in WordPress. Refer back to this page often as we will have WP Tutoring content updated weekly.
View our online WordPress Tutorial and video.
Deleting comments in WordPress
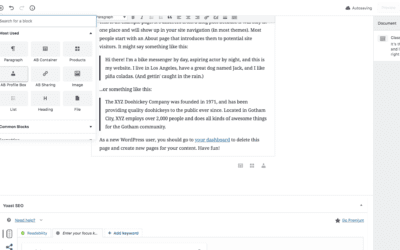
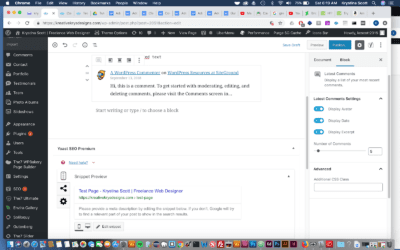
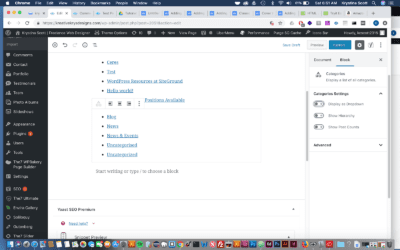
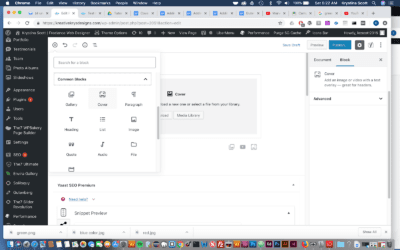
We don't want to show unnecessary comments on our blog posts. In order to delete comments, follow the steps below: Interactive Tutorial on Managing Comments, (includes deleting comments - sound enabled) 1. In order to manage comments, you must first click comments...
How to Disable the Block Editor in WordPress Disable (Gutenberg)
Download the Disable the Block Editor Tutorial Pdf Disable the Block Editor Table of ContentsDisable the Block Editor (Gutenberg) with the Classic Editor PluginDisable the Block Editor (Gutenberg) with the Disable Gutenberg PluginDisable the Block Editor (Gutenberg),...
The WordPress Block Editor – Is it Time to Switch?
The WordPress Block Editor love it or hate it In December of 2018, the new editing experience for WordPress, was introduced. It instantly caused polarization in the WordPress community because it was replacing a tried and true Microsoft Office inspired editor named...
Creating a new post
The whole purpose of having an amazing WordPress site is to be able to create content. Here is the process of creating a new post in WP. Step 1Click the Posts menu in the WordPress Dashboard Navigation menu. Click Add New link from the Posts menu in the left-hand side...
How to Add a Separator Block in WordPress
Step 1Hover your mouse over the Add Block icon (the plus sign in the upper left hand corner within the Gutenberg editor). Scroll to Layout Elements. Select Seperator Block.Step 2The Separator block will appear. You’ll see a short line. On the right, you will see a...
Adding Testimonials in Gutenberg
Step 1First select the page where you want your testimonials to appear. Click on the plus sign icon in the upper left hand corner. From there, select the Atomic Icons from the drop down menu. Click on AB Testimonial.Step 2Enter the text you would like to use. Select...
Adding a Button in Gutenberg
https://youtu.be/90w6UjpvYso Step 1Hover your mouse over the Add Block icon (the plus sign in the upper left hand corner within the Gutenberg editor).Step 2 Select Blocks. Then scroll to Layout Elements. Under that section you will see Button. Select Button.Hint: You...
Using the More Block in Gutenberg
The "more" block is used when you want to include a short introduction of piece of content on a page or post. It will help create separation from the rest of your content. Step 1Step 1 First go to the page where you would like to add the more block. Click on the plus...
Using the Separator Block in Gutenberg
The Separator block is used when you want to create a break of ideas or sections with a horizontal separator. Step 1First go to the page where you would like to add the separator. Click on the plus sign icon in the upper left hand corner. From there, select the Layout...
How to use Gutenberg Products Block
If you have an woocommerce website, you may want to allow customers a preview of products you’re selling. A products block would be ideal for you to use. The products block is similar to the products short code. The Products block allows you to insert any...
Adding an audio file in Gutenberg
https://youtu.be/Bd47W9lqal0 View the above video to see how to add an audio file in WordPress Step 1Hover your mouse over the Add Block icon (the plus sign in the upper left hand corner within the Gutenberg editor).Step 2Select Blocks. Then scroll to Common Blocks....
Adding a table in Gutenberg
Step 1Hover your mouse over the Add Block icon (the plus sign in the upper left hand corner within the Gutenberg editor).Step 2Select Blocks. Then scroll to Format. Under that section you will see Table. Select Table.Hint: You can also type “table” in the search bar...
Adding a Verse in Gutenberg
Step 1Hover your mouse over the Add Block icon (the plus sign in the upperleft hand corner within the Gutenberg editor).Step 2Select Blocks. Then scroll to Formatting. Under that section you will see Verse. Select Verse.Hint: You can also type “verse” in the search...
Moving a Block in Gutenberg
Step 1First hover your cursor over the block you would like to move. When you hover a block, you will see arrows on the left side of the block. The arrows will allow you to adjust your blocks (clicking the up arrow will move it up by one space, click the down arrow...
Getting an Article’s Word Count in Gutenberg
Step 1Hover your mouse over the information icon(the circle with an “i” inside of it.). When you click on it, you will get information about your page (headings used, word count, paragraphs, etc.) This is a really handy tool as you're creating your amazing...
Adding a file in Gutenberg
Step 1Hover your mouse over the Add Block icon (the plus sign in the upper left hand corner within the Gutenberg editor).Step 2Select Blocks. Then scroll to Common Blocks. Under that section you will see File. Select File.Hint: You can also type “file” in the search...
Using the Sharing Icons Block in Gutenberg
Step 1From the Dashboard to to Plugins > Install new and search for the Atomic Blocks Plugin Step 2First go to the page where you would like to post your social media share icons. Click on the plus sign icon in the upper left hand corner. From there, select the...
Enjoying our WordPress Tutorials? You'll love our one - on - one Training
Using the Author Block in Gutenberg
The Author Profile block lets you add a user profile box to your page with an avatar, name, title, profile text and social media links. The block also comes with several settings to help you customize it in many ways. This particular block is from...
WordPress 5.5 – The best edition yet.
WordPress 5.5 is rolling out a new update on August 11, 2020. The core software is still in development but you can take a look and test it out via the beta test version. If you plan on testing it out, it’s best practice to perform a backup of your website before...
Privacy Policy Tool in WordPress
To protect yourself, your business, and the data of your website’s visitors it’s highly recommended to place a privacy policy on your website. The Privacy Policy Tool in WordPress will help you and your website visitors understand all the ways your website collects...
How to use WordPress Health Check
Ever encountered a Wordpress issue and have no idea on how to start? Wish you could pinpoint where the exact issue is without having to spend hours investigating? A broken Wordpress site can be scary and it can be even more stressful if you don’t even know where to...
OVER 13 Places to get Gutenberg Blocks for WordPress 5.0
Gutenberg Blocks for WordPress 5.0 Gutenberg is here and many people have started using it for their online editing experience. Out of the box, there are alot of great blocks build into Gutenberg, but there are bound to be some times where you're looking for a...
Adding a Code Block to Gutenberg- WordPress 5.0
There may be some times when you want to show some computer code to your readers. In the past that may have been hit or miss because the code may have executable instructions in it that would make the formatting inconsistent. The Code Block in Gutenberg...
Adding the Archive Widget to Gutenberg- WordPress 5.0
The archive block places a listing of the archived posts on your site. Step 1- Choose the archive block by either typing into the search bar or scrolling down to the "widgets" category in the block selector. Choose the Archive B``lock underneath the...
Adding a Page Break in Gutenberg- WordPress 5.0
Adding a Page Break in the Gutenberg Editor can be a great way to break up long content. Step 1 - In the block selector under the Layout Category choose Page Break Step 2 - You'll now have a line that you can use to separate your content into a multi-page experience. ...
Adding Preformatted Text to Gutenberg- WordPress 5.0
A preformatted block allows you to add text that respects your spacing and tabs, and also allows particular styling. Step 1- Hover your mouse over the Add Block icon (the plus sign in the upper left hand corner within the Gutenberg editor). Scroll to Formatting....
Adding a Quote in Gutenberg- WordPress 5.0
A quote block allows you to give quoted text visual emphasis. This is a great way to show visual difference in your content and make reading more interesting. Step 1- Hover your mouse over the Add Block icon (the plus sign in the upper left hand corner within...
Adding a Heading to Gutenberg – WordPress 5.0
Step 1- Hover your mouse over the Add Block icon (the plus sign in the upper left hand corner within the Gutenberg editor). Scroll to Common Blocks. Select Heading. Choosing the Heading Block from the Common Blocks Setting Step 2 -A heading block with appear. Enter...
Adding HTML to Gutenberg – WordPress 5.0
A custom HTML block allows you to add HTML to Gutenberg and preview it as you edit. Those who have used the classic editor should remember the 'text' tab. This essentially recreates this as a block. Step 1 - Hover your mouse over the Add Block icon (the...
Adding the Latest Posts Block to Gutenberg- WordPress 5.0
Adding the latest posts block to Gutenberg allows you to display a list of your most recent posts. This effectively replaces the Recent Posts Widget. Step 1- Hover your mouse over the Add Block icon (the plus sign in the upper left hand corner within the...
Adding Latest Comments to Gutenberg – WordPress 5.0
A latest comments block allows you to display a list of your most recent blog post comments. This is essentially the Recent Comments Widget available to you in a block that can be added anywhere in the content of your post. Step 1- Hover your mouse over the Add Block...
Embedding Youtube and Vimeo videos in Gutenberg WordPress 5.0
Embedding Youtube and Vimeo videos in Gutenberg is even easier than it was with the classic WordPress editor. Embed Blocks allow you to add content from other websites (videos from YouTube, tweets from Twitter, an event from meetup.com, etc.) into your own...
Adding a Media & Text Block in Gutenberg
AKA - placing text beside an image in WordPress 5.0 This is the block that we've all been waiting for! For anyone who has been using the Gutenberg editor, placing text beside an image or video was extremely frustrating and difficult. In fact there was a...
Using the Classic Block in Gutenberg
The classic block allows you to use the familiar classic WordPress editor within a Gutenberg block. If you convert a post from the Classic Editor,( pre WordPress 5.0), to Gutenberg, your whole post will show up in one Classic Block. This...
Adding a Category Block in Gutenberg
A category block allows you to display a list of all of your post categories. Think of this as a block version of the popular category widget. Step 1- Hover your mouse over the Add Block icon (the plus sign in the upper left hand corner within the Gutenberg...
We have been Tutoring WordPress Users Since 2012 - Get Live Help!!
How to keep google from indexing your site
When you're in the process of building your amazing WordPress site, you definitely don't want to have google and other search engines indexing it and displaying your partially completed work. This is how to keep that from happening. STEP 1 The first step is to...
How to change the number of blog posts on your blog page
There may be times when you want to edit the number of blog posts that are showing on your page. The "look" of your site may require more or less blog posts. There is an easy way to change that value in WordPress. By Default WordPress shows 10 posts...
Updating a WordPress Plugin
Updating a WordPress Plugin As you grow your WordPress site, you'll begin to notice that at least once weekly, you'll need to update your plugins, (actually more frequently for many sites.) Here's how to do it. Step 1: Open your site's dashboard in your favorite...
WordPress Site Documentation Service
Does your WP Site have alot of custom areas that you don't understand? Did your developer just give you a site with no manual or anything to get you started? We will create a Custom WordPress Training Manual For your site as a PDF that you'll be able to use for...
Change the Post Author in WordPress
Sometimes you might have to change the author of a post because of personnel changes, or a site migration. Here is how you can Change the Post Author in WordPress from the "All Posts" screen. Step 1: Go to "All Posts" in your WordPress Dashboard. Step 2: Check the...
Creating a gallery in WordPress
We can create gallery in WordPress very easily. Let's do it by following the instructions below: Creating a gallery in WordPress STEP 1 : To create a gallery, open the page or post editor of your website and click on Add Media STEP 2 : Click Create Gallery and select...
Removing the wordpress admin user account
Sometimes we need to remove users from our WordPress website. It's very easy. Follow the steps below to do that: Removing the wordpress admin user account STEP 1 : To delete an user, go to Users > All Users menu in the WordPress Dashboard. STEP 2 : In that page...
How to install a free theme
There are lots of free themes in wordpress.org website. We can easily install the themes and activate by following the steps below: How to install a free theme STEP 1 : Login to your WordPress Dashboard and go to Appearance > Themes. STEP 2 : Click Add New Theme....
Import and Export WordPress Data
WordPress is a strong blogging CMS with lots of useful features. Import-Export option is one of them. We can easily export the blogs, pages, media files etc. from one site to another. Follow the steps below to do this. Import and Export WordPress Data Export WordPress...
Changing your WordPress Themes
Changing your Wordpress Themes Clicking on the Dashboard >> Appearance menu option will default you at the Themes screen. To preview of your site in another theme (that isn’t currently active), you can click the Live Preview button associated with the theme. To...
WordPress Dashboard
WordPress is one of the most popular CMS in the modern web world. About 26% of websites are build with this CMS. If you want to learn how the back-end of this CMS works, this tutorial is for you! In this Tutorial we'll learn about different features, options etc.....
Setting the Date Format in WordPress
There are different types of date format which we can use in our WordPress site. The steps are given below: Setting the Date Format in WordPress STEP 1 : To set up the date format, go to Settings > General menu in the WordPress Dashboard. STEP 2 : You'll see Date...
Setting WordPress Starting day of the Week
The starting day of the week is not the same in all countries. So we need to change that to match our local system. Follow the steps bellow to set up the starting day of your site: Setting WordPress Starting day of the Week STEP 1 : To set up the starting day, go to...
Updating WordPress site tagline
Your site tagline is an important for part of site identity and seo. Follow the instructions to update or edit the site tagline: Updating WordPress site tagline STEP 1 : To update the site title, go to Settings > General menu in the WordPress Dashboard. STEP 2 :...
Setting the WordPress Admin email address
WordPress admin email the place where all the site status or notifications are sent. We can easily set up the admin email by following the steps below: Setting the WordPress Admin email address STEP 1 : To update the site title, go to Settings > General menu in the...
Setting the Default WordPress Language
The WordPress website dashboard language not the same in all countries. So we can change the default English Language to our own language by following the steps below: Setting the Default WordPress Language STEP 1 : To set up the default language, go to Settings >...
Set the Default Post Category in WordPress
Setting the default post category is a handy feature in WordPress. This will keep you from having everything under "uncategorized" in your posts. Follow the steps below to do that: Set the Default Post Category in WordPress You will need to create a category in...
Set the Default Post Format in WordPress
There are different types of post formats in WordPress. We can set the default post format by following the steps below: Set the Default Post Format in WordPress STEP 1 : To set the default post category, go to Settings > Writing menu in the WordPress Dashboard....
Setting the Front Page of Your WordPress Site
Most WordPress sites implement a front page(home page). We can set the front page of a WordPress website by following the instructions below: Setting the Front Page of Your WordPress Site STEP 1 : To set the front page, go to Settings > Reading menu in the...
Setting the Post page of your WordPress Site
Your blog page is a key component for your site visitors. We can determine the blog page by following the instructions below: Setting the Post page of your WordPress Site STEP 1 : To set the blog page, go to Settings > Reading menu in the WordPress Dashboard. STEP...
Setting the number of blog posts per page in WordPress
Showing all blog posts in one page doesn't look good always. We can limit the number of blog posts for per page by following the steps below: Setting the number of blog posts per page in WordPress STEP 1 : To set the blog post number, go to Settings > Reading menu...
Updating Your WordPress Site Title
Site title is very important for SEO of a website. We can edit or update the site title by following the steps below: Updating Your WordPress Site Title STEP 1 : To update the site title, go to Settings > General menu in the WordPress Dashboard. STEP 2 : You'll see...
Adding a Widget to a Sidebar
We can show content in the sidebar by adding widgets. Follow the steps below to add a widget to a sidebar: Adding a Widget to a Sidebar STEP 1 : Go to Appearance > Widgets page. STEP 2 : Drag and drop your desired widgets to the sidebar area. You can add Search,...
What are WordPress Sidebars
What are WordPress Sidebars Sidebars in WordPress are referred to a widget-ready area used by WordPress themes and plugins to display information. There are different kinds of sidebars like: Vertical sidebar, Horizontal sidebar etc.. The usage of sidebars varies and...
What are WordPress Widgets
What are WordPress Widgets WordPress Widgets are designed to provide a simple and easy-to-use way of giving design and structure control of the WordPress Theme to the user, which is now available on properly "widgetized" WordPress Themes to include the header, footer,...
Adding a Title Attribute in WordPress
Title attribute is a tooltip text for an element. It is shown as a tooltip text when the mouse moves over the element. We cat add this attribute to images, text etc.. The process is the same for image or text. Follow the steps below to add title attribute to an image:...
Renaming a menu item in WordPress
Sometimes we need to rename menu items in WordPress. Follow the instructions below to do that: Renaming a menu item in WordPress STEP 1 : To rename a menu item in WordPress, find the Menus menu in the WordPress Dashboard Navigation menu. STEP 2 : Click on your desired...
Assigning a Menu Location in WordPress
We can assign the menu location in WordPress to show them in particular part of the website. Follow the steps below to do that: Assigning a Menu Location in WordPress STEP 1 : To assign a menu in WordPress, find the Menus menu in the WordPress Dashboard Navigation...
Creating a Menu in WordPress
Menu is an important part of any website. We can create a menu in WordPress by following the steps below: Creating a Menu in WordPress STEP 1 : To create a menu in WordPress, find the Menus menu in the WordPress Dashboard Navigation menu. STEP 2 : Provide the name of...
Deleting a menu item in WordPress
Sometimes we need to delete unnecessary menu items from WordPress menu. Follow the steps below to do that: Deleting a menu item in WordPress STEP 1 : To delete a menu item in WordPress, find the Menus menu in the WordPress Dashboard Navigation menu. STEP 2 : Select...