WordPress Tutorial for Beginners
WordPress 101 Class for those starting out with WordPress – Learn How to use WordPress for Free
Our Basic WordPress Tutorial will help you master the world’s most popular content management system.
WordPress Website Tutorials ♦ WordPress Tutorial Videos ♦ Live one-on one WordPress Training
(844) WP-TUTOR – (844) 978-8867
WordPress Tutorial – A Tale of 2 WordPress’
Sometimes there is confusion between WordPress.Com and WordPress as open-source software (known mostly as WordPress.org). WordPress.Com is an online SAAS (software as a service) that runs WordPress. Think of it as a WordPress version of Wix or Squarespace. WordPress.Org is the actual WordPress software package that you can install on any web host and run. Essentially making your own personal install of WordPress. There are pros and cons to each. (Note: this manual will focus only on the WordPress.org version. Although there are many similarities between the two, WordPress.Com users can also get a lot out of this manual.
Pros of WordPress.Com
- Cutting edge WordPress Code
- No worrying about website maintenance
- No worrying about managing domain names, or other overly technical items
- No Worrying about security, etc…
Cons of WordPress.Com
- You are limited as far as which plugins and themes that you can use
- You are not able to change any of the underlying code for the site
- You are not able to fine tune the performance of your site
- You have to pay for some items instead of installing free alternatives
You can learn more at WordPress.Org
Pro’s of a WordPress.org installation
- You can install WordPress on any webhost that you choose.
- You have ultimate flexibility in terms of exporting your content in case you need to
- You can access and edit the underlying code
- You can write custom functionality
- You have an almost unlimited choice of plugins and themes you can install on your site
Con’s of WordPress.Org
- You are responsible for updating WordPress core, themes, and plugins
- Too much freedom may can be dangerous, adding sketchy or unknown plugins and themes may crash your site, or pose a security risk.
WordPress Tutorial for Beginners- How to Practice Using WordPress for Free!
One of the most important parts of learning WordPress is to have an environment to practice on.
You can purchase a web hosting account and then install WordPress, but if you’re just looking for a quick and easy way to create your site without cost or the fear of “blowing something up”, then try Local by Flywheel.
The video below introduces this really cool program.
LOGGING INTO WORDPRESS
Let’s Get Started on Making a Great Site!
In order to get to the backend or Admin area of WordPress you have to Log In. There are generally 2 different url’s that will take you into your WordPress dashboard.
As an example, if your WP site is called mycatblog.com, you can login to your site at:
http://www.mycatblog.com/wp-admin or http://www.mycatblog.com/wp-login.php
What is the difference between the two? Essentially nothing – both will get you access to the screen below.
If your install is a typical WP install, you will see the following screen:

Logging in is a simple process
- Enter Your Username or Email address in the top field
- Enter your password in the bottom field•
- Click the blue ‘Log In’ button
If you are on a private device, (for example your home computer) you can check “Remember Me” and your login info will be saved on the device.
Power Tip
You should never have the word ‘admin’ as your login. Hackers are well aware of that default password and if they find your site has an ‘admin’ username, they can keep trying to login to your site until they gain access.
If you need to delete the admin user to secure your site click the tutorial below:
WordPress Tutorial: Removing the WordPress admin user account
1. After typing wp-admin after your domain name, type your Username or Email Address in the first box.
2. In the next box type in your Password
3. Click Remember Me if you want WordPress to remember your username or email address for the next time you login.
4. Click on the Log In button in order to go to the WordPress Dashboard
5. You should now see the WordPress Dashboard.
Here’s an interactive tutorial
https://www.iorad.com/player/1843670/Login-to-the-Dashboard
INTRO TO THE DASHBOARD
WordPress Admin Dashboard Tutorial for Beginners
What is the Dashboard in WordPress?
The Dashboard is the “Command Center” of WordPress. It allows you to configure all of your options such as what theme to use, plugins, and which pages are on your site. Only persons with a login can access the dashboard, site visitors will not have access to it.
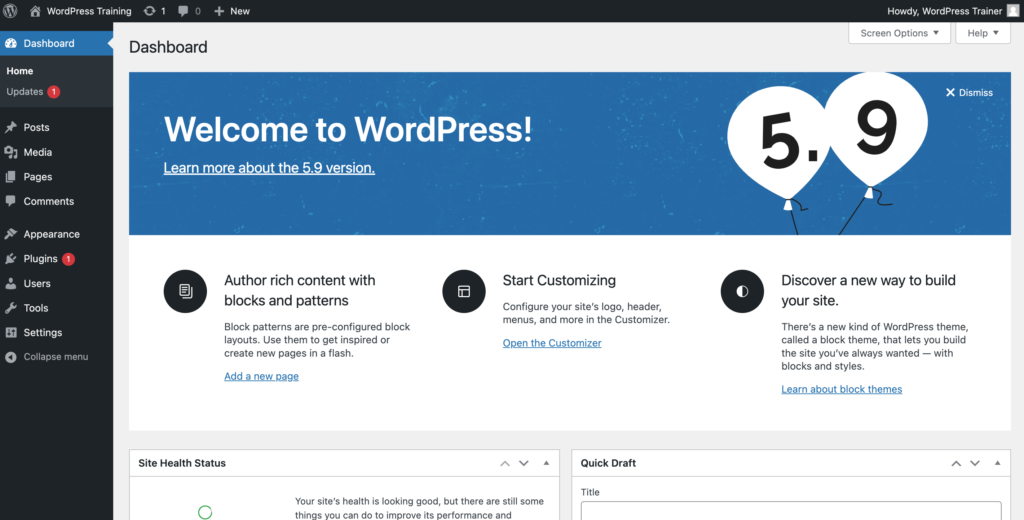
Now that you’ve successfully logged in, you should be looking at your WordPress dashboard. Below is a screenshot of an Admin user dashboard.
The WordPress Dashboard is where you’ll administer your site

There are 3 main areas on a WordPress Dashboard – They are shown in the sections below:
- Admin Bar (Toolbar)
- Admin Menu
- Dashboard Meta Boxes
WORDPRESS ADMIN BAR (TOOLBAR)

1 – WordPress Links
This link provides shortcuts to the following:
- WordPress.Org
- Documentation
- Support Forum
- Feedback
2 – View Site Link
If you click the site title here, you will get a “Visit Site” dropdown that will allow you to go to the frontend of your site.
3 – Number of Updates
This icon shows how many WordPress Core, Theme, and Plugin updates are available. Clicking it will take you to the updates page.
4 – Number of Comments
These are the number of comments that you have for moderation (either editing, approving, declining, or deleting.)
5 – Quick Links
By clicking on “+New” you will get a dropdown showing shortcuts to create a new Post, Media Item, Page, or User
6 & 7 – User Information
This is where you can click to view/edit your profile information or Logout. Number 7 is where your gravatar picture is located if you have configured one.
Don’t forget the Toolbar Tabs!
The Screen Options and Help tabs underneath the toolbar in the upper right corner are extremely helpful. The content of these tabs changes depending on which screen you’re on in the WordPress Admin.

THE WORDPRESS DASHBOARD MENU
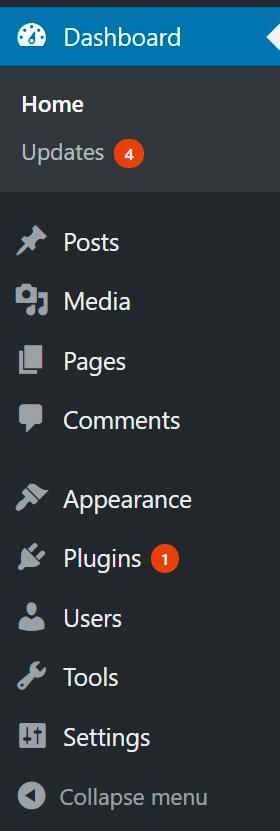
Dashboard
The Dashboard is the “control center” for your WordPress site. From here you can manage every part of your WordPress site.
Posts
This is where you can create a new Blog Post. You can also update your Categories and Post Tags.
Media
This is where all your uploaded images, documents or files are stored. You can browse through your Media library, as well as edit and update the files.
Pages
WordPress pages are used for common content such as “about us”, “contact us”, etc… WordPress pages are what allows WP to act as a website instead of just a blog.
Comments
If you allow comments on your site, you will be able to manage them in this section. You can approve, delete, or modify comments that come into your blog. Of course in the “settings” area, you can disable comments on your site.
Appearance
Appearance is where you make changes to your themes, widgets, etc… You’ll be spending a good amount of time interfacing with this page when you want to change the way your site looks, or change its layout.
Plugins
Plugins are like “apps” for your WordPress site. They are miniature programs that add or extend the functionality of WordPress. An example might be a contact form plugin that allows your visitors to send you an email.
Tools
This is essentially the “utilities” area of WordPress – it allows you to import and export various data as well as other site features.
Collapse Menu
The left-facing arrow at the bottom of the menu will “collapse” the menu. Instead of the full wording, you’ll only see the icons. Clicking this again will give you the full menu again.
Users
This is a list of all of the users,(people who have a login)- on the site. WordPress has various “user roles” that allow permissions for each user.
Settings
This section mainly contains the “global settings” for your site. This area contains things such as your site title, url and other important settings.
The WordPress Menu will have more icons added as you install plugins. As we’ll learn later, plugins are like “apps” for your WordPress site. Various plugins, such as contact form plugins, will place an additional icon on the left menu for easy access to the functions
WAIT A MINUTE!
DASHBOARD WIDGETS
These default widget boxes show various important items about your site.
1. Welcome to WordPress
This meta box has quick links to take you to various areas in the backend of your site.

2. Activity
Shows recent activity such as what was last published, etc…

3. At a Glance
Here you can see the “stats” for your site such as how many posts and pages you have as well as the theme and version of WordPress you are running.

4. WordPress News
News about the WordPress Community

5. Quick Draft
A meta box that allows you to quickly type up a draft post, which is a good way to jot down quick ideas. Dashboard Widgets can be:
- Moved around by clicking and dragging them to a different position
- Collapsed by clicking the arrow on the top right of the meta box
- Or removed from the dashboard by unchecking the checkbox found in the screen options page.

THE WORDPRESS UPDATES SCREEN
WordPress Video Tutorial on How to Update Plugins/ Themes / Core
There are 3 areas in WordPress that need to be updated on a regular basis:

How do I know when I need to update WordPress?
There are two places to see if you have WP updates. One is in the toolbar with a number, and the other is in the dashboard menu.
If you hover over the toolbar number, you’ll see a description showing how many plugins, themes, or if WordPress core needs updating. If you see an orange number in the left menu, it also lets you know that WordPress needs updating.
Important!
Before performing WordPress updates, you should always have a reliable backup in place. Updating any of these 3 components can cause your site to crash.
WordPress has improved significantly on detecting whether or not a plugin or theme update will “break” your site, but it is still wise to have a backup and a restore procedure in place. If you don’t feel comfortable doing it, speak to a WordPress expert.
Do you need a staging site?
If your webhost offers it, you might want to look into a “staging site”. A staging site is an exact copy of your site that is hidden from the “outside world”.
This site can be used to test WordPress core, plugin, and theme updates without causing harm to your live site. Once you have had a successful update on staging, you can more confidently update your “live” site.
THE 3 TYPES OF WORDPRESS UPDATES

WordPress Core
Think of WordPress Core Updates like updating the operating system on your computer, (Microsoft Windows or OSX for example). WordPress core files are what makes WordPress “run” behind the scenes. Generally you’ll have to do a WordPress core update 3-4 times per year. These updates are extremely important and should be performed as soon as possible because generally there are security and performance updates involved.

WordPress Plugins
You can compare updating WordPress plugins to updating an application on your computer, (Microsoft Word, Outlook, Chrome, etc..) Almost every WordPress site has at least a few plugins that expand the functionality of their website. Depending on the types of plugins you have installed and your hosting environment, you will want to make sure your site is backed up before you update your plugins.

WordPress Themes
Themes should be updated with caution also – they of course can change the look of your site, but can also change functionality as well. It is suggested that you use a child theme if there are alot of customizations to your site that have been made.
WordPress Tutorial for Beginners by WP-Tutoring.Com – Copyright 2022
WORDPRESS SETTINGS
Now that We’re in, we need to adjust basic settings
What does the Settings Page do?
The WordPress Settings page is where you configure important items for your WordPress site – Things such as site title, whether or not people can register for your site, permalinks, etc… are configured here.
Settings are Generally Global
Things that you configure here are “global” in scope, which just means that it affects the whole site. For example, the site title that is set in the general page applies to the site as a whole.
Settings Can Be Extended by Plugins
Plugins can add, (or take away) settings on the WordPress site. Many plugins actually add functionality to this settings page in order to keep everything in one area for the user.
Some examples of settings that are configured here:
- Language that your WordPress blog/website uses.
- Whether or not visitors can leave comments on blog posts or pages
- The default sizes of images on your site.
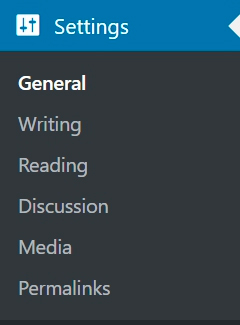
GENERAL SETTINGS PAGE
DASHBOARD >> SETTINGS >> GENERAL

Site Title
Pretty self-explanatory – The title of your site goes here
Tagline
This is a subheading for your site. Based on your theme, this may or may not show up on the front of your site
WordPress Address (URL)
This is the directory that WordPress’ core files are installed. In most cases, it is the root directory of your site, (example: mysite.com)
Site Address (URL)
This is the url of the site, it should only be different than the WP address if the directories are different, (generally this setting and the WordPress Address are the same)
Sometimes the WordPress files are installed in a different directory. For example, the website might be www.mysite.com, but the WordPress core files may be located at www.mysite.com/wp – This is perfectly fine, and in some cases enhances security, because hackers won’t necessarily know which directory WordPress is installed in. For the vast majority of WP sites, having the WordPress and Site Address URL’s the same is perfectly fine
Email Address
This is the default administrative email address and it will be used by the site to notify you of important things happening with the site, such as new user signups, or password changes. This email is also used as a default by many plugins when an alternate email address is not available.
Membership
Checking this box allows visitors to register on your site. For instance, if you have content that you want users to sign up for, you’ll have to check this button to allow registration access.
Default User Role
If membership is enabled, this is the user role that will be set for a new site member by default.
Timezone
Choose a city that is in your timezone to set WordPress time locally. If this is not set, the blog time will be based on the server WordPress is hosted on- For instance, if your server is hosted in California, and you are in New York, any admin emails sent from WordPress will have California time, this could be very confusing.
Date Format / Time Format
You’ll be able to choose how you want dates to be displayed in the admin area and the rest of the site using these radio buttons. You can do the same with how times are displayed.
Week Starts On
This dropdown sets which day is the first day of the week. This is handy especially if there is a calendar plugin that you are using. The day that is set here will be the first day on that calendar.
WRITING SETTINGS PAGE
DASHBOARD >> SETTINGS >> WRITING

Formatting
Convert emoticons to graphics. This means WP will change semicolons, dash, and parenthesis to a smiley face icon. You can also have WP automatically fix certain XHTML issues,(coding issues) automatically.
Default Post Category
WordPress has categories that posts are placed into. When you create a new site, there is only one category named “uncategorized”. All of the new posts on your site will be placed in the default category listed here. You will have to add a new category in order to change this default category.
Default Post Format
There are multiple formats that WordPress has built in for posts. They can be described further on WordPress.Org.
Post via Email
You can post to your site by sending an email to an email address that is configured in this area.
Update Services
When you create a new WordPress post, you can have certain RSS feed services receive the news that you have posted. You can determine which services you want to be contacted.
READING SETTINGS PAGE
DASHBOARD >> SETTINGS >> READING

Front page displays
WordPress by default shows your blog posts on the front page of your site. That is great if you’re running a blog. If you want to create an actual site, you’ll want to change the front page of your site to a page, (Home for example). In order to change from a blog page to a static page, just click “A static page” and from the dropdown choose a page for the front page. You can also choose a page that shows your post. Many people create a page named “blog” and set that as the posts page.
Blog pages show at most
This setting determines how many posts are shown on blog pages at a time. For instance, you may want to only show 5 blog posts at a time, this is where you would set that value.
Syndication feeds show the most recent
Syndication here stands for RSS, (really simple syndication). RSS feeds provide a way for other sites to be able to pull in your posts. You can control how many posts are in your RSS feed.
For each article in a feed show
Here is where you can choose whether to show your whole article or just a portion of the article in your RSS feed.
Search Engine Visibility
This is a very important checkbox. By checking this box, you are telling google, yahoo, bing and other search engines NOT to put your site in their index. This can be useful while you are building your site, but once you are done, you should uncheck this box so that it can be indexed by search engines.
DISCUSSION SETTINGS PAGE
DASHBOARD >> SETTINGS >> DISCUSSION

Default article settings
- Attempt to notify blogs – This is used to send a message to any other WP blogs that you link to in your articles so that they’re aware of the link. They may reciprocate that link if the author chooses to. (double check)
- Allow link notifications…– This setting will allow you to know if another blog links to one of your articles.
- Allow people to comment on new articles – This will allow people to post comments on your site.
Other comment settings
- Comment author must fill out name and email – If someone wants to comment on your site, they must put in at least these two pieces of information – unchecking this box will allow anonymous commenting.
- Users must be registered…. – Before someone can make a comment, they will have to register on your site and login.
- Automatically close comments…. – This will keep people from posting new comments after the number of days set here.
- Enable threaded (nested comments)…. – This sets how many levels you can set in the comments. Think of this as an outline – you can keep going until you have a set number of sub levels – for ex.
- level 1
- level 2
- level 3
- level 4 …. you can set how far that can go on this setting
- Break comments into pages – If you get a hot topic, you may have a never-ending page of comments. This setting allows you to break the comments into pages based on the number of comments.
Email me whenever
- Anyone posts a comment – you can be notified if a comment is posted on your site.
- A comment is held for moderation – If you decide to look over comments before they are posted on your site, based on certain configuration settings, you’ll get an email.
Before a comment appears
Here you can choose manual or automatic approval based on if a person already has an approved comment.
Comment Moderation
Sometimes you’ll get persons who want to promote their own products/services on your blog. They generally have alot of links in the comments going out to places outside of your site. You can keep their comment from being posted if it has over the number of links that you set here. you can also set a list of words to keep it in moderation – for example “sale” or “buy”
Comment Blacklist
This is a list of words that will cause a comment to go straight to the trash.
Note: this matches inside words as well, so “food” would flag “dogfood”, so carefully think about the moderation and blacklist words.
Avatars
When making comments, a person’s avatar (an icon or graphic that they’ve chosen to represent themselves online at gravatar.com), can be displayed this allows it to be seen.
Maximum Rating
This allows you to give a maturity rating on your blogs content.
Default Avatar
If a person hasn’t created an avatar, but you have enabled avatars for your comments, this is the image that will be seen.
MEDIA SETTINGS PAGE
DASHBOARD >> SETTINGS >> MEDIA

Image Sizes
In WordPress there are 3 default image sizes, thumbnail, medium, and large. Every image that you upload to your site has 3 additional copies of the image made in these sizes. By changing these settings, you can change the default sizes of your images.
Note: After adjusting the sizes here, you may need to use the regenerate thumbnails plugin in order to apply the new sizes to your images.
Uploading files
This checkbox allows you to upload images based on month and year – so the structure would be
www.mysite.com/wp-content/uploads/year/month/mypicture.jpg
so march of 2016 would be:
www.mysite.com/wp-content/uploads/2016/3/mypicture.jpg
PERMALINKS SETTINGS PAGE
DASHBOARD >> SETTINGS >> PERMALINKS
What are permailinks??
Permalinks are the permanent urls for your posts and pages. Essentially you can think of them as the website address for your content, or what someone linking to your blog post would put into their article. WordPress allows you to choose different formats for your permalinks so that it will be easier for others to find your content. This is also important for SEO ,(Search Engine Optimization).

Common Settings
Each one of the permalink settings is shown along with an example of what your url structure would look like. For most websites, the “post name” structure is the best. As a matter of fact, certain plugins will not work if the “post name” structure is not chosen.
WordPress Tutorial for Beginners by WP-Tutoring.Com – Copyright 2021
APPEARANCE SETTINGS
Now that We’ve set things globally, let’s spruce things up.

WHAT DOES THE APPEARANCE SETTING DO?
The Appearance section allows you to change the way your site looks and feels, through special customization screens, widgets, menus, and header, and background configuration.
The links shown on this page can change
Depending on the theme and plugins you have installed on your site, you can have more or less links than what is shown by default.
Links can also change due to user roles
User roles also affect what you are able to see and configure on this page. For instance, the editor selection is only available to an administrator-level user role because it allows editing of the underlying PHP, CSS, HTML, and javascript code that make your website run. That is one of the reasons that not everyone should have administrator access to your site.
Many of these settings can also be changed via the “Customizer”
The customizer is a slideout menu that is designed to allow you to change the majority of the settings here in Appearance, however it is still good to know how to access the items from here as well in order to get more “fine-tuned” control of some items.
THEMES
DASHBOARD >> APPEARANCE >> THEMES

The links shown on this page can change
On the Themes Screen, you can use the search box to search for themes that are already installed on your site, or you can add a new theme. You can also see if your theme(s) needs to be updated.
If you click on one of the themes, you have the option to make the theme active, deactivate, or delete.
Links can also change due to user roles
User roles also affect what you are able to see and configure on this page. For instance, the editor selection is only available to an administrator-level user role because it allows editing of the underlying PHP, CSS, HTML, and javascript code that make your website run. That is one of the reasons that not everyone should have administrator access to your site.
CUSTOMIZE PAGE
DASHBOARD >> APPEARANCE >> CUSTOMIZE
Now We’re getting to the REAL Customizations!
Clicking on the customize section underneath appearance will bring you to the theme customizer. The customizer has a menu that allows you to change many of the items that affect the look of your site.
The customizer changes based on the theme that you are using. The one shown here is for the default Twenty Seventeen theme. If you activate another theme however, you’ll see more or fewer options on this menu. By default, each theme will have at least the following:
- Site Identity
- Colors
- Header Media
- Menus
Again, the rest of the items are optional and may or may not show up depending on the theme you’re using.

The WordPress Customizer for the Twenty Seventeen Theme

Visual Editing Capabilities
The beauty of the theme customizer is that it allows you to see your edits “real-time” instead of having to make backend changes, save them, and then view the frontend. This gives you a much better idea of how your edits affect the look and layout of your site.
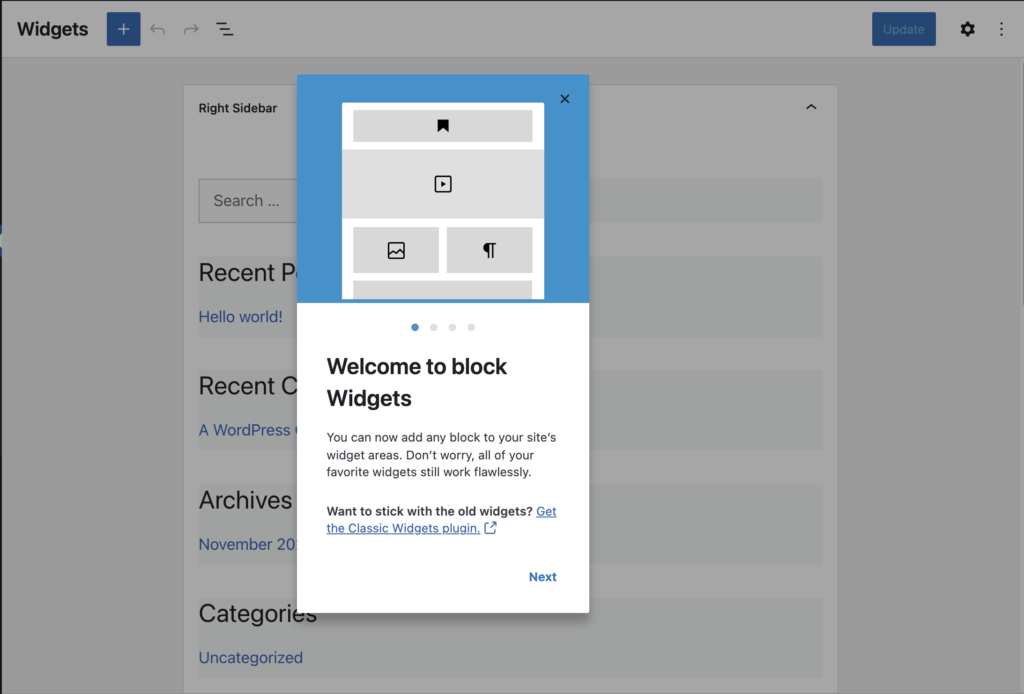
BLOCK WIDGETS (WordPress 5.8+)
DASHBOARD >> APPEARANCE >> WIDGETS
As an extra step to move toward Full Site Editing,(FSE) WordPress has introduced Block Widgets. Block widgets work essentially the same way as the old widgets, however, you can add Blocks to the widget areas on your site instead of the traditional widgets.
Wait – I’m Confused. What is a Widget Area?
A widget area is basically a place in your WordPress site that allows you to place dynamically generated content, (widgets) into your site. Think of a blog post for instance. Very often there is a sidebar, (widget area) to the right or left of the content. Depending on the theme that you use, you can place items in the sidebar such as ads, recent posts, or a mailing list signup. Block widgets function the same way except we are adding blocks instead of traditional widgets.
Why is this a good thing?
Block widgets are great for a number of reasons:
- Block widgets modernize the way WordPress works with content
- They allow you to get closer to full site editing using blocks
- You have more power to customize your widgets
- Pretty much any properly coded block can be added to any widget area
Let’s explain the 3rd point a little more:
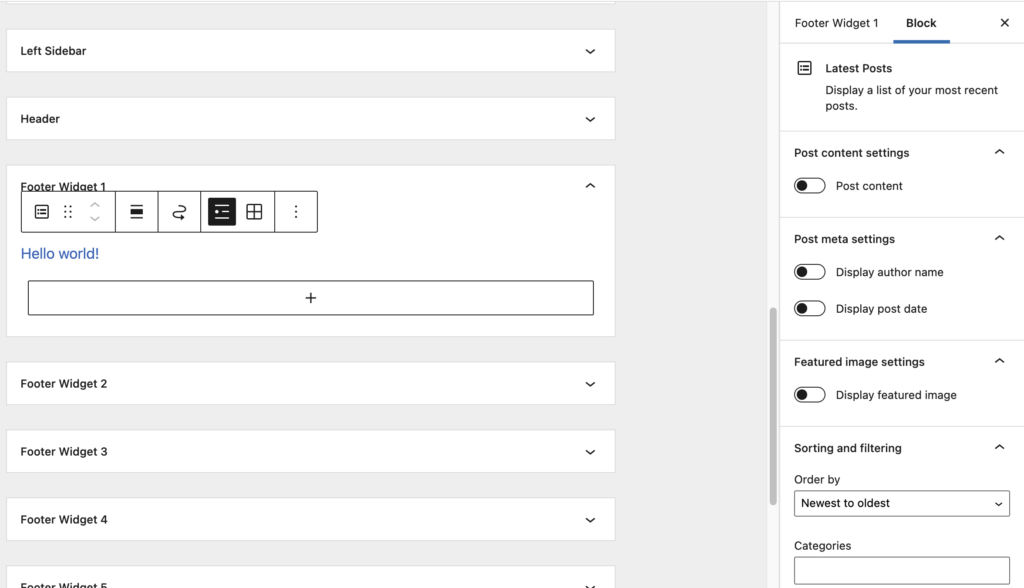
In the image above, a “Latest Posts” widget was added to the “Footer Widget 1”. On the right side of the screen, you’ll see multiple configuration options such as whether or not to include the author name, date of the posts, featured image, etc.
The previous version of the Widget editor didn’t allow for such configuration of widgets with out adding an additional plugin that provided those options. With widget blocks, all of this is provided by default.
Lastly, ANY block can be added to ANY widget area. This greatly expands the possibilities for you to create dynamic webpages.
WordPress Tutorial for Beginners by WP-Tutoring.Com – Copyright 2021
WIDGETS PAGE (Classic WordPress 5.7 and below)
DASHBOARD >> APPEARANCE >> WIDGETS

Widgets
Widgets are pieces of code that can be inserted into Widget Areas. Various items such as post calendars, categories, and recent comments can be placed into certain predefined areas on your website.
Widget Area
Widget areas, (formerly known as sidebars), are pre-defined areas on your website that you can drop in widgets. Based on the theme you use, you can have multiple widget areas that can be in the header, sidebars, content areas, and even footers of your website. Widget areas are quick ways to add content to your website in certain areas without having to code,( or hire a coder).
As an example, you may need to add a search bar to your site, so that people can easily search your site’s articles. You can easily drag a search box from the available widgets to the widget area in order to allow the search bar to show up. The second way to do it is to click on “search” in the available widgets column and then choose which widget area you want the search bar to show up in.
Default WordPress Widgets
Below are examples of the Default WordPress Widgets. Based on the plugins and/or theme that you have installed, you may have more or less widgets than these.
MENU SETTINGS PAGE
DASHBOARD >> APPEARANCE >> MENU

Image taken from WordPress Codex
No website is any good without menus – WordPress allows you to easily add Pages, Categories, and Links to your site. Additionally, you can have multiple menu locations such as the header and footer of your site. With the use of plugins, you can even show different users different menus.
Here are some step by step Menu Tutorials:
WordPress Tutorials:
WP Tutorial – Creating a Menu in WordPress
WordPress Tutorial – Assigning a Menu Location in WordPress
WP Tutorial – Adding a Page to the WordPress Menu
WP Tutorial – Adding Categories to the WordPress Menu
WordPress Tutorial – Adding a Menu Location in WordPress
Assigning a Menu Location in WordPress
STEP 1 : To assign a menu in WordPress, find the Menus menu in the WordPress Dashboard Navigation menu.

STEP 2 : Select the pages that you want to show in the menu and click Add to Menu.

STEP 3 : Go to the bottom of the page and find the Menu Settings.
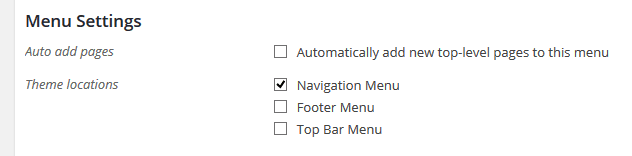
STEP 4 : Select the menu location and save.
HEADER SETTINGS PAGE
DASHBOARD >> APPEARANCE >> HEADER

Clicking on Header will generally take you to the WordPress Customizer in most themes. In the 2017 theme for example, you will see the following:
- The Header Video allows you to upload a video in mp4 format and have it play on your header’s background. Twenty Seventeen allows you to upload a video for the header, which is a popular website addition.
- The Header image allows you to upload an image of a certain size to your header. Depending on the theme, it can be a “fullscreen” header, or a “banner” style that goes across the top.
- To change the header image, you click on “add new image.” You can then use the media library to add your desired image to your header.
The best thing about the customizer is you can see how your changes will look “real-time” before you publish them to your site.
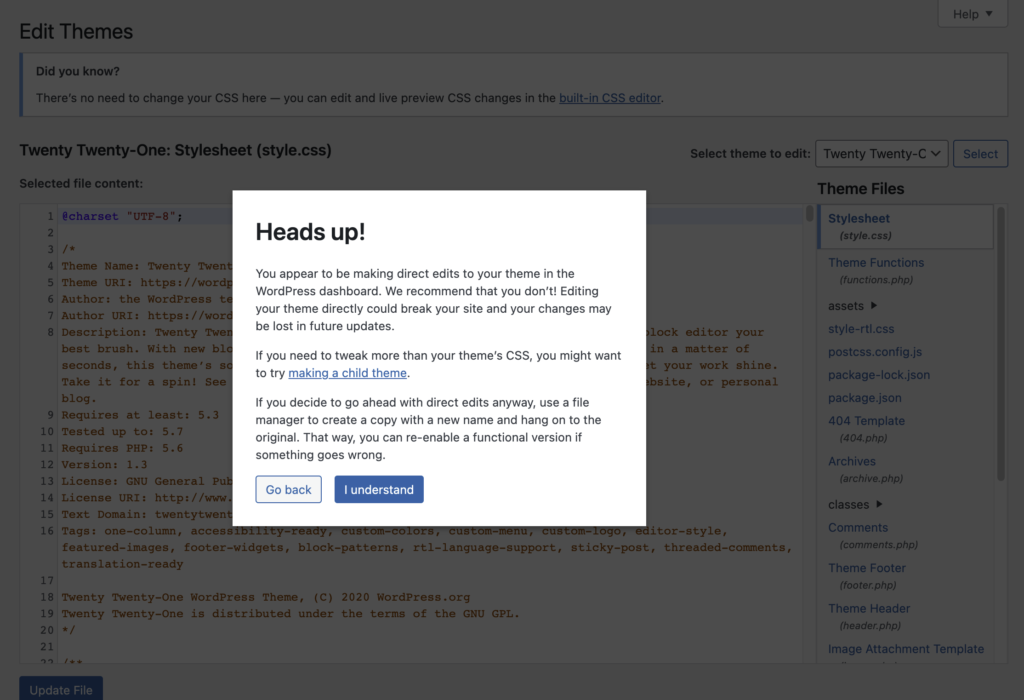
EDITOR SETTINGS PAGE
DASHBOARD >> APPEARANCE >> THEME EDITOR
Extremely Important!!
If you are not comfortable editing CSS, HTML, PHP, or Javascript – Do not change anything in the editor settings page. This is one of the easiest ways to break a WordPress site.
If you do decide to modify code through the theme editor, you may see an error message. In newer versions of WordPress, it checks to see if the changes that you make might crash the site. You should still make a backup of your site before making any changes to this code.
ADMINISTRATION EMAIL VERIFICATION
SETTINGS >> GENERAL
With the release of WordPress 5.3, a new screen appears after a website administrator logs in to the back end of a WordPress website. This will appear once every 6 months.
Four options will appear
- The site’s email is verified as correct: After clicking “The email is correct” button, the user is taken to the Dashboard with an admin notice saying “Thank you for verifying”. The screen will be hidden for 6 months from all administrators.
- The site’s email needs to be changed: After clicking the “Update” button, the user is taken to the Settings > General page where they can update the site’s email address. Administrators will be presented with the verification screen the next time they log in.
- The user clicks “Remind me later ”: the user is taken to the Dashboard. Administrators will see the screen again after 3 days have passed.
- The user clicks “Remind me later ”: the user is taken to the Dashboard. Administrators will see the screen again after 3 days have passed.

Image from WordPress Codex

Love our Free WordPress Tutorial? Get more WP Goodness.
Download the 60+ Page WordPress Tutorial PDF
Get all this great WP Tutorial material in PDF Format.
Get Live WordPress Tutoring & Training Online
Get Online WordPress Training tailored to your specific needs.
Get WordPress Deals
We’ve procured some special deals for you through our affiliate partners.
WordPress Tutorial for Beginners by WP-Tutoring.Com – Copyright 2021
WORDPRESS TOOLS
Let’s use WordPress utilities to take care of our site.

WORDPRESS TOOLS
Dashboard >> Tools
The Tools page is where you can import and export information to and from your WordPress site. You can also grab portions of the web to publish to your WP site.

Press This
From the Description:
“Press This is a little tool that lets you grab bits of the web and create new posts with ease”
Think of it as a mini “bookmark” that can pull pieces of info from the web and then you can make a full blog post from it.
Import
You can import information from other platforms on this page. If you have a blog or website on one of the shown platforms you can import the data in this section.


Export
Sometimes you’ll need to move your website info to another host or location. You can export that information from this page. The exports will be in .wxr format, which is just a WordPress specific .xml (data) file.
WordPress Tutorial for Beginners by WP-Tutoring.Com – Copyright 2021
ADMINISTRATION EMAIL VERIFICATION
SETTINGS >> GENERAL
To protect yourself, your business, and the data of your website’s visitors it’s highly recommended to place a privacy policy on your website. Your privacy policy page needs to list all the ways your website collects user information. Many countries are required by law to disclose this information to their visitors. Some ways your site may collect user information are collecting email addresses, Google Analytics tracking. WordPress comes with a basic privacy policy page generator that anyone can use and edit for their business.
WHAT IS GDPR AND COPPA?
GDPR
The General Data Protection Regulation (GDPR) is a legal framework that sets guidelines for the collection and processing of personal information from individuals who live in the European Union (EU).
COPPA
COPPA imposes certain requirements on operators of websites or online services directed to children under 13 years of age, and on operators of other websites or online services that have actual knowledge that they are collecting personal information online from a child under 13 years of age.
STEP 1:
First go to Settings > Privacy. WordPress provides a privacy policy page draft for you. You can either select to use the draft or generate a new version.

STEP 2:
You can edit the page like any other WordPress page. Make sure you list all the ways your website collects date and save it. Make sure to Publish this page when you’re finished editing this.

STEP 3:
Once you’re finished, make sure you list a link to your privacy page in your footer and/or main navigation.

SITE HEALTH TOOL
DASHBOARD >> TOOLS >> SITE HEALTH
What is the Site Health Tool??
The site health tool is an error reporting system that will notify you if have any errors on your website. The report will provide a list of suggested improvements and detailed explanations.
To access your health check report you will need to go to WordPress Dashboard > Tools > Site Health. When you access the report you will see a list of tests performed and the results of each test. If you have any errors on your website, you will see a list of suggested improvements and detailed explanations on how to fix them. These detailed reports will help cut development time by providing detailed information to you, so you don’t have to spend time running multiple tests and audits. Not only will this tool fix current issues, it can also allow you to be proactive in preventing any future potential errors for your WordPress website (suggestions will be listed as recommended improvements).


As the site health tool becomes more popular, plugin authors may place notices here in order to denote issues with a particular plugin or highlight issues with your hosting environment.
Tips To Get A Good Site Health Score
- Use good quality WordPress Hosting
- Get a SSL certificate
- Keep your WordPress plugins and theme updated
- Use Latest version of PHP
- Use latest version of MySQL
RECOVERY MODE
Sometimes you will face errors where you can’t access the backend normally. WordPress 5.2 introduced a feature called Recovery Mode. When a fatal error occurs, an email will be sent to the admin email address, informing the admin of the issue and will provide a secret link that will give you backend access. Once logged in, recovery mode will activate and you will be able to run tests to remove the fatal error. Once you believe you fixed the issue, you can exit recovery mode by clicking the orange “Exit Recovery Mode” button.

WordPress Tutorial for Beginners by WP-Tutoring.Com – Copyright 2021
INTRO TO POSTS AND PAGES
WHAT IS A WORDPRESS POST?
WordPress Posts are a way to add “articles” to you website. They are normally linked together to create a “Blog”. Below are characteristics of posts:
- Posts are listed in chronological order on a blog archive page
- Can use tags and categories

WHAT IS A WORDPRESS PAGE?
WordPress Pages are static pages and not listed by date.
- Do not use tags or categories
- Can be found in the Archives, Categories, Recent Posts, and other widgets.

THE BLOCK ( GUTENBERG ) EDITOR

WHAT IS GUTENBERG?
Gutenberg is a codename that is being used for the replacement to the normal WordPress Editor. Starting with WordPress 5.0, Gutenberg will be the standard way to create and edit WP Content.
Gutenberg is based on “Blocks”
Gutenberg puts mostly everything in “blocks” of content that can be easily edited and manipulated. It is designed to give you a truly “What you see is what you get experience”.
Blocks can be re-arranged
Gutenberg blocks can be re-arranged on the page in order to allow you flexibility in your page layout. If you have an image for example, you can move its “block” up and down on the page based on where you need it.
Gutenberg is now known as the Block Editor – even though the names are used interchangeably.
- The latest version of Gutenberg can be installed from the WordPress repository – https://wordpress.org/plugins/gutenberg/.
- Since WordPress 5.0 – Gutenberg has been the core experience for WordPress content editing.
Gutenberg (Block Editor) Pros
- The editor is native to WordPress, so you don’t need to install any additional plugins
- Compared to other page builders Gutenberg is very fast
- Items can be moved around relatively easily
- The interface is very clean
- More blocks are being developed weekly
- Copy and paste from other applications such as Microsoft Word is much improved over the classic editor.
Gutenberg (Block Editor) Cons
- The block editor is still a little rough around the edges in some spots
- There is still some accessibility work that needs to be done
- The full site editing experience is still being developed unlike some other page builders
- Some plugins have not yet been optimized to work with the new block interface, (although that is changing VERY quickly)
TYPES OF BLOCKS IN THE GUTENBERG EDITOR
Default Text Blocks in the Gutenberg Editor
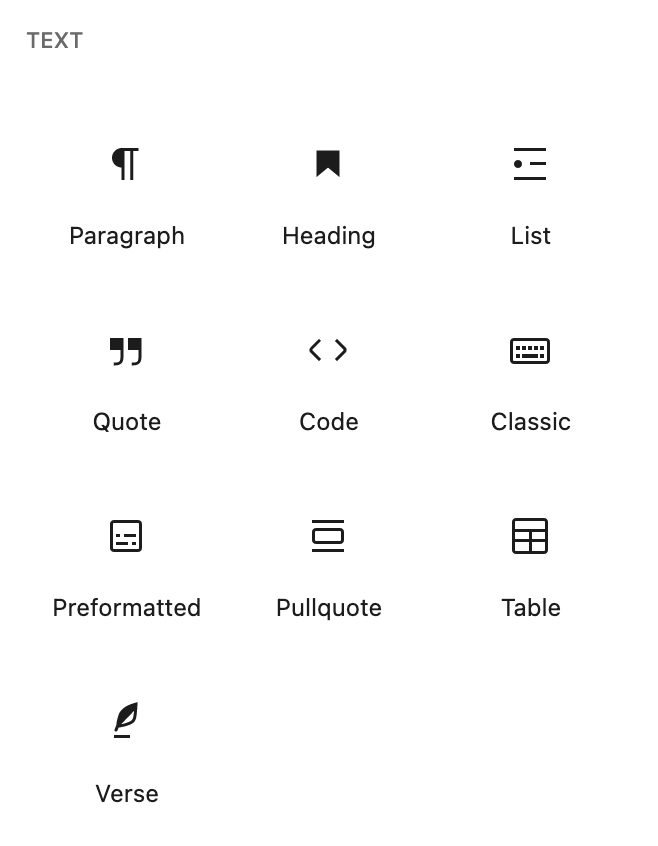
This set of blocks is focused on creating text on your page or post.
- Paragraph Block – The basic building block for text
- Heading – Introduces new sections and organizes content
- List – Create a bulleted or numbered list
- Quote – Give Quoted text visual emphasis – the look depends on your theme
- Code – a block that helps display any programming code as it was intended
- Classic – a block that uses the classic WordPress editor
- Preformatted – Text that respects the spacing that you give it
- Pullquote – A quote with special visual interest
- Table – Insert a table block for charts and data
- Verse – For poetry or song lyrics
WordPress Default Media Blocks
This set of blocks is focused on adding media to your page or post.
(remember, media in WordPress consists of images, audio, video and documents)
- Image – insert an image to make a visual statement
- Gallery – Display multiple images in a grid format
- Audio – Embed a simple audio player
- Cover – Insert an image with a text overlay
- File – Add a link to a downloadable file
- Media & Text – Set media and text side by side
- Video – Embed a video from the media library or upload one

WordPress Design Blocks
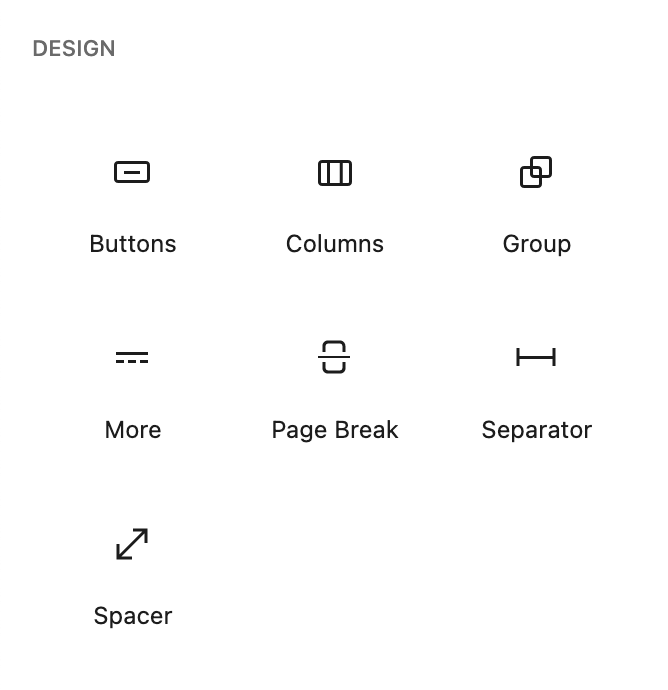
- Buttons – you can create links in the shape of a button for your users to click
- Columns – This block allows you to make multiple columns to display your content.
- Group – You can combine multiple blocks into one large block that can be moved as one.
- More– Content that is typed before this block will show as an excerpt in the WordPress archive pages.
- Page Break – this block will allow your content to be broken into multiple pages.
- Separator – Create horizontal separation between blocks
- Spacer – The spacer block allows you to space between blocks and customize the height
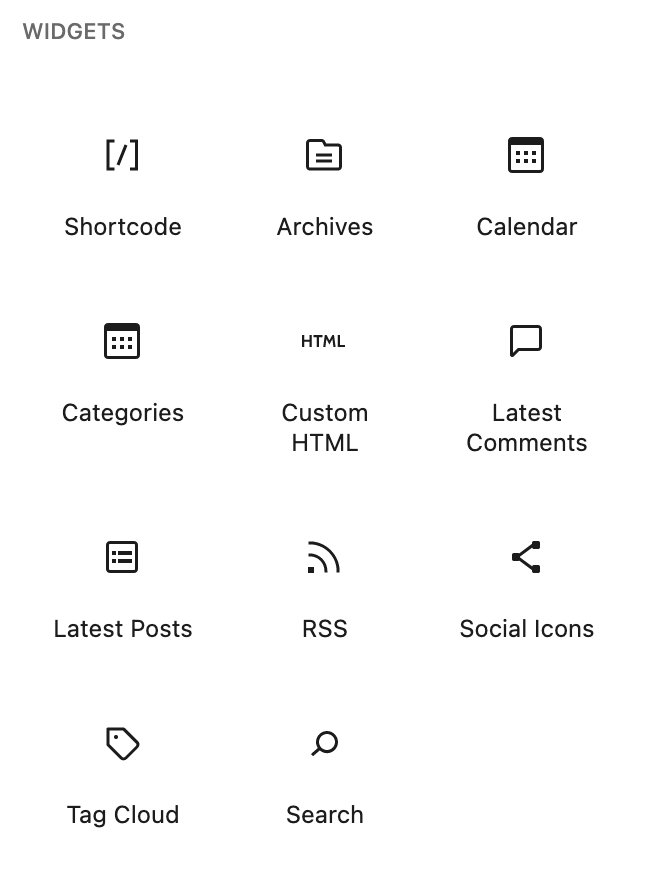
WordPress Widget Blocks
- Shortcode Block– The shortcode block allows you to insert shortcodes into your content
- Archive Block– This will display a monthly archive of your posts
- Calendar Block– This displays a calendar with the dates of your blog posts underlined
- Categories – This block will display a list of categories in either a bulleted or dropdown format
- Custom HTML – If you need to add HTML to your document, you would use this block to do so
- Latest Posts – This displays a list of your latest posts – you can choose how many are shown
- RSS – This block will allow you to display entries from any RSS or ATOM feed
- Social Icons – Display Facebook, Twitter, Instagram, and other social icons in your document and set custom colors if desired
- Tag Cloud – This displays a “cloud” of your most popular tags, with the most popular tags being larger, and less popular ones being smaller.
- Search– This block will display a search box that your visitors can use.
WordPress Embed Blocks
These blocks will rich embed various content into your document based on the type of embed you choose.
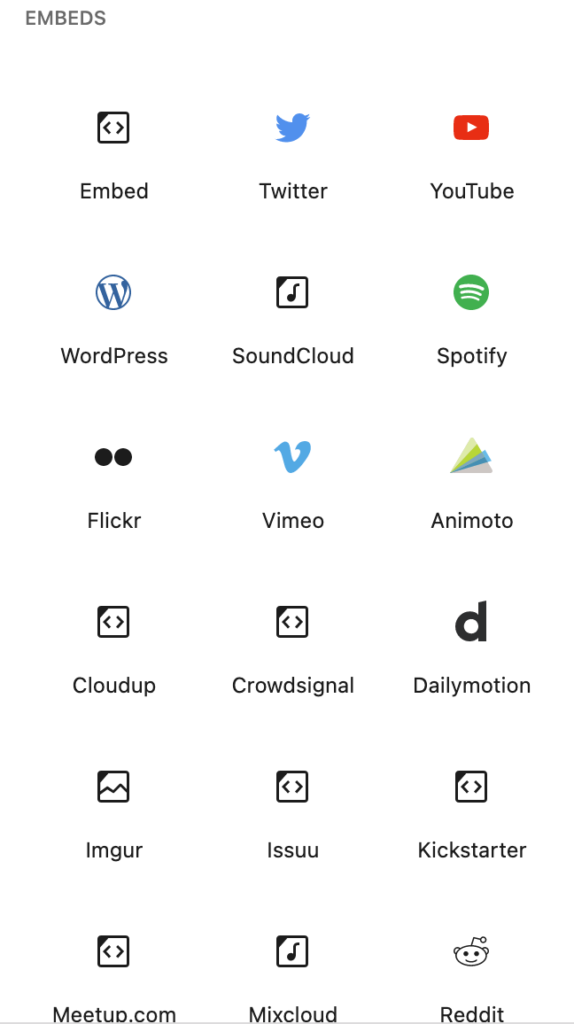
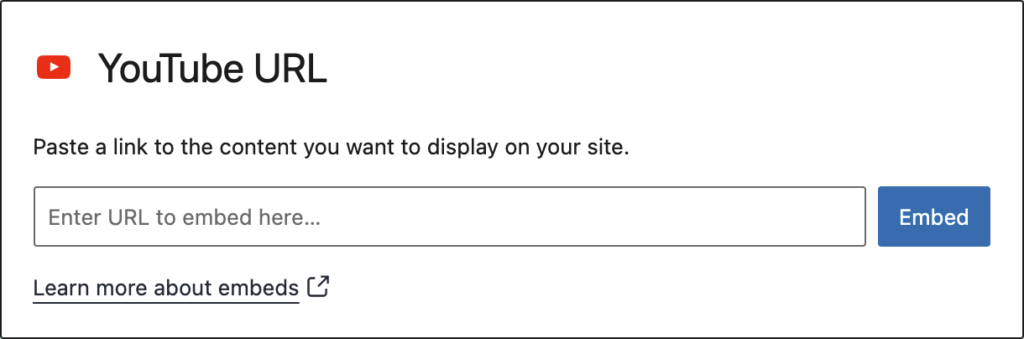
There are over 70 services that you can choose and insert the content into your document. For example, to embed a youtube video into your document, you would choose the youtube block and insert a youtube url that you want displayed.
BLOCK EDITOR GLOBAL SHORTCUTS
The Keyboard shortcuts button when clicked gives you a list of short codes that you can use which are built in hot keys. Here are Some shortcuts you can use when your creating posts,(and pages) in the WordPress visual editor. The WordPress Shortcuts this list are from the official codex. You can find it hereBlock Editor Global shortcuts:
| Keys | Action |
|---|---|
| Shift+Alt+H | Display this help |
| Ctrl+S | Save your changes. |
| Ctrl+Z | Undo your last changes. |
| Ctrl+Shift+Z | Redo your last undo. |
| Ctrl+Shift+ | Show or hide the settings sidebar. |
| Shift+Alt+N | Navigate to the next part of the editor. |
| Shift+Alt+P | Navigate to the previous part of the editor. |
| Ctrl+Shift+Alt+M | Switch between Visual Editor and Code Editor. |
Selection shortcuts:
| Keys | Action |
|---|---|
| Ctrl+A | Select all text when typing. Press again to select all blocks. |
| Esc | Clear selection. |
Block shortcuts:
| Keys | Action |
|---|---|
| Ctrl+Shift+D | Duplicate the selected block(s). |
| Ctrl+Alt+Backspace | Remove the selected block(s). |
| Ctrl+Alt+T | Insert a new block before the selected block(s). |
| Ctrl+Alt+Y | Insert a new block after the selected block(s). Change the block type after adding a new paragraph. |
Text formatting
| Keys | Action |
|---|---|
| Ctrl+B | Make the selected text bold. |
| Ctrl+I | Make the selected text italic. |
| Ctrl+K | Convert the selected text into a link. |
| Shift+Alt+S | Remove a link |
| Shift+Alt+D | Add a strikethrough to the selected text. |
| Shift+Alt+X | Display the selected text in a monospaced font. |

Important Concept – Categories, and Tags
In WordPress, you can organize your content into categories and tags. Categories are generally broader topics, and tags are items that pertain to the post. One example would be a blog that contains recipes. Categories might be Entrees, Desserts, Appetizers, etc… Tags might be ingredients that pertain to the dish – eggs, flour, butter etc…
Categories can also be hierarchal, In other words, you can have sub-categories. So if you were writing about dogs, you could structure your categories like so:
Dogs
- Large Breed
- Afgan Hound
- American Foxhound
- Bearded Collie
- Small Breed
- Boston Terrier
- Pug
Tags are not hierarchal, so they can’t form “sub-tags” – So on an article on “How to lose 10 lbs in 30 days” you may have the tags – “weight loss”, “1 month”, “exercise”, “health”. Generally, you want to think of items that pertain to your post, but that isn’t necessarily important enough to place into a category.
You can find out more about WordPress Categories and Tags here.
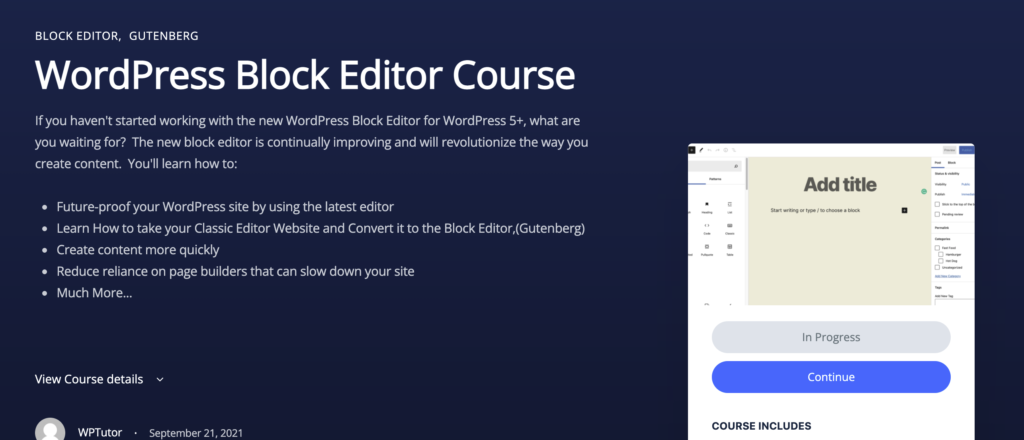
Our Block Editor WordPress Tutorial Course will show you the in’s and Outs of the Block Editor – Click the Image Below
Block Patterns
Block Patterns are one of the most powerful and exciting features of WordPress 5.0 +. Essentially Block Patterns are combinations of different blocks that are set in a pre- arranged pattern for you.
That makes things extremely easy for you because you can leverage someone else’s expertise to build your web- page. All you need to do is click on the associated block and change to content to whatever you want.
This is extremely powerful because you can add sections, pages, or even whole websites with a couple of clicks. To use block patterns first, go to the post or page block editor screen and click the block selector icon.


WordPress has gone all-in on block patterns. If you feel that your theme is limited in the designs, or you just want some design inspiration, visit https://wordpress.org/patterns
MOVING A BLOCK IN THE BLOCK EDITOR
STEP 1:
First hover your cursor over the block you would like to move. When you hover a block, you will see arrows on the left side of the block. The arrows will allow you to adjust your blocks (clicking the up arrow will move it up by one space, click the down arrow twice will move the block down by two spaces).

STEP 2:
You can also move you block by dragging it and dropping it to your desired location. First hover your cursor over the block you would like to move. When you hover it, your cursor will appear as an open hand icon. Click and hold on the block and place where you would like it to go.
While you’re holding the block you should also see a blue line. The blue line represents where the block will be placed after you let go of the mouse. The blue line will move as you move up or down the page within the Gutenberg editor.


GETTING ARTICLE’S WORD COUNT WITH THE BLOCK EDITOR
STEP 1:
Hover your mouse over the information icon (the circle with an “i” inside of it.). When you click on it, you will get information about your page (headings used, word count, paragraphs, etc.)

ADDING TEXT WITH THE BLOCK EDITOR
STEP 1:
Hover your mouse over the Add Block icon (the plus sign in the upper left hand corner within the Gutenberg editor).
STEP 2:
Select Blocks. Then scroll to Common Blocks. Under that section you will see Paragraphs. Select Paragraphs.
Hint
You can also type “Paragraphs” in the search bar to quickly get to the button option.

STEP 3:
A paragraph block will appear within the editor. Enter your text within the editor. You also have other options to style your text (text alignment, bold text, underline, italicize, link, strikethrough). Also within the settings menu, there are other customization items for paragraphs (background color changes, text color, text sizes, adding css classes).

ADDING AN IMAGE TO THE PARAGRAPH BLOCK
STEP 1:
Write Your paragraph(s) using the paragraph block.

STEP 2:
Create an image block using an image of your choosing.


STEP 3:
Using either the up and down keys OR dragging and dropping, move the image ABOVE the paragraph that you want the image to align into.
STEP 4:
On the image block , click the right align button, that will place the image inside of the paragraph block below it. The image will be on the right side of the text. If you want it on the left side of the text, then click the left align button.

STEP 5:
If you want to move the image to a different block, then click the align center button and then the image can be dragged to another block.
USING THE CLASSIC BLOCK WITH THE BLOCK EDITOR
STEP 1:
Hover your mouse over the Add Block icon (the plus sign in the upper left hand corner within the Gutenberg editor). Scroll to Formatting. Select Classic.
STEP 2:
The classic block will appear. You’ll see the original toolbar with all the basic functions and formatting options.


CREATING CONTENT WITH THE CLASSIC EDITOR
You may have to work on a WordPress site that doesn’t have the new block editor enabled. This section describes how to use the older editor, also called the classic editor. If for some reason you have to disable the block editor, you can read our WordPress tutorial on disabling the block editor, or watch the video below:

Title — Enter a title for your post. After you enter a title, you’ll see the permalink below, which you can edit.
Post editor — Enter the text for your post. There are two modes of editing: Visual and Text. Choose the mode by clicking on the appropriate tab.
Visual mode gives you an editor that is similar to a word processor. Click the Toolbar Toggle button to get a second row of controls.
The Text mode allows you to enter HTML along with your post text.
You can insert media files by clicking the icons above the post editor and following the directions. You can align or edit images using the inline formatting toolbar available in Visual mode.
You can enable distraction-free writing mode using the icon to the right. This feature is not available for old browsers or devices with small screens, and requires that the full-height editor be enabled in Screen Options.
Keyboard users: When you’re working in the visual editor, you can use Alt + F10 to access the toolbar.
You can upload and insert media (images, audio, documents, etc.) by clicking the Add Media button. You can select from the images and files already uploaded to the Media Library, or upload new media to add to your page or post. To create an image gallery, select the images to add and click the “Create a new gallery” button.
You can also embed media from many popular websites including Twitter, YouTube, Flickr and others by pasting the media URL on its own line into the content of your post/page. Please refer to the Codex to learn more about embeds. You can watch the WordPress Tutorial Below:
You can also follow the same process for for audio in this WordPress Tutorial:
WORDPRESS POST EDITOR BUTTONS (CLASSIC EDITOR)
These are the buttons that you’ll see when creating content in WordPress
Bold Button
BOLD darkens the text

Italic Button
Italic – Slants the text

Strike-Through Button
STRIKETHROUGH Adds a line through the text

Bulleted List Button
The Bulleted List button adds bullets beside each row of text.
- Bulleted List sample text
- Bulleted List sample text 2

Numbered List Button
The Numbered List Button adds a number beside each row of text.
- Numbered List sample text
- Numbered List sample text 2

Block-Quote Button
Adds a block quotation to the left of text
SAMPLE BLOCK QUOTE TEXT

Horizontal Line Button
Adds a horizontal line under the text or paragraph

LEFT Align Button
Aligns the text to the left
Lorem ipsum dolor sit amet, consectetur adipiscing elit.

Align Center Button
Aligns the text in the center
Lorem ipsum dolor sit amet, consectetur adipiscing elit.

Align Right Button
Align the text to the right.
Lorem ipsum dolor sit amet, consectetur adipiscing elit.

Insert / Edit Link Button
Aligns the text in the center
Adds a link to a website,page, or document

Remove Link Button
Removes the link to a website,page, or document from the text. Text changes from blue to black.

Proofread Writing Button
The Proofread button searches for misspelled words.

Full Screen Button
The Full screen mode button allows you to view the whole page so that you are able to type without having to scroll down.

Toolbar Toggle Button
The Tool Bar Toggle Button enables a second row of editing buttons

Paragraph Button
The Paragraph Button also know as the styles button allows you to change the formatting of the text.

Add Underline Button
The add underline button adds an underline directly under the text

Justify Button
Justify aligns both sides of the text

Paste as text button
The Paste text button does a cleanup process that will remove any special formatting and HTML that would change the formatting of the text so that it can appear exactly as you expect it

Text Color Button
The text color button allows you to change the color of the text.

Special Character Button
The Special Character Button allows you to add special characters to your text
for example: ¥, Ä, ∑

Clear Formatting Button
The Clear Formatting Button removes any special formats from the text such as bold, italics, strike-through etc..

Increase Indent Button
The increase indent moves the text further to the right

Decrease Indent Button
The decrease indent button moves the text further to the left

Undo Button
The undo button undoes your last action

Redo Button
The redo button redoes your last action

Here are some other Block Editor (Gutenberg) Links:
- WordPress Tutorial: Multiple Columns in Gutenberg
- WordPress Tutorial: Embedding Videos in WordPress’ Block Editor
- WordPress Article: Over 13 Places to get Gutenberg Blocks for WordPress
CLASSIC EDITOR KEYBOARD SHORTCUTS
The Keyboard shortcuts button when clicked gives you a list of short codes that you can use which are built in hot keys. Here are Some shortcuts you can use when your creating posts,(and pages) in the WordPress visual editor. The WordPress Shortcuts this list are from the official codex.
Default shortcuts, Ctrl + letter:
| Letter | Action |
|---|---|
| c | Copy |
| v | Paste |
| z | Undo |
| b | Bold |
| u | Underline |
| Letter | Action |
|---|---|
| x | Cut |
| a | Select All |
| y | Redo |
| i | Italic |
| k | Insert/edit link |
Additional shortcuts, Shift + Alt + letter:
| Letter | Action |
|---|---|
| 1 | Heading 1 |
| 3 | Heading 3 |
| 5 | Heading 5 |
| l | Align left |
| r | Align right |
| d | Strikethrough |
| u | Bulleted list |
| a | Insert/edit link |
| m | Insert/edit image |
| h | Keyboard Shortcuts |
| p | Insert Page Break tag |
| Letter | Action |
|---|---|
| 2 | Heading 2 |
| 4 | Heading 4 |
| 6 | Heading 6 |
| c | Align center |
| j | Justify |
| q | Blockquote |
| o | Numbered list |
| s | Remove link |
| t | Insert Read More tag |
| x | Code |
| w | Distraction-free writing mode |
When starting a new paragraph with one of these formatting shortcuts followed by a space, the formatting will be applied automatically. Press Backspace or Escape to undo.
| * | Bulleted list |
| – | Bulleted list |
| 1. | Numbered list |
| 1) | Numbered list |
The following formatting shortcuts are replaced when pressing Enter. Press Escape or the Undo button to undo.
| > | Blockquote |
| ## | Heading 2 |
| ### | Heading 3 |
| #### | Heading 4 |
| ##### | Heading 5 |
| ###### | Heading 6 |
| — | Horizontal line |
Focus shortcuts:
| Alt + F8 | Inline toolbar (when an image, link or preview is selected) |
| Alt + F9 | Editor menu (when enabled) |
| Alt + F10 | Editor toolbar |
| Alt + F11 | Elements path |
To move focus to other buttons use tab or the arrow keys. To return focus to the editor press Escape or use one of the buttons.
WordPress Tutorial for Beginners by WP-Tutoring.Com – Copyright 2021
WORDPRESS MEDIA LIBRARY

WordPress Media Library is a link in your WordPress admin sidebar which is used to manage user uploads (images, audio, video, and other files).
Media is more than just video
In WordPress media is considered to be audio, video, images and documents. There are certain file types that WordPress will accept for upload.
By Default, all media is stored in the Media Library
The media library holds all of the forms of media. Once you click into the library, you can see images, video, audio, and documents in the same area.
There is an upload size limit
There is a size limit for files uploaded to WordPress which is based on your web host and or server configuration. You can tell what that size is if you upload a file to the media library. There will be a message stating “Maximum upload file size: 1 MB”. This limit can be extended via plugins and/or php configurations.
ALLOWED FILETYPES IN WORDPRESS
Images
- .jpg
- .jpeg
- .png
- .gif
- .ico


Document
- .pdf (Portable Document Format;Adobe Acrobat)
- .doc, .docx (Microsoft Word Document)
- .ppt, .pptx, .pps, .ppsx (MicrosoftPowerPoint Presentation)
- .odt (OpenDocument Text Document)
- .xls, .xlsx (Microsoft Excel Document)
- .psd (Adobe Photoshop Document)
Audio
- .mp3
- .m4a
- .ogg
- .wav


Video
- .mp4, .m4v (MPEG-4)
- .mov (QuickTime)
- .wmv (Windows Media Video)
- .avi
- .mpg
- .ogv (Ogg)
- .3gp (3GPP)
- .3g2 (3GPP2)
Frequently Asked Question
Can you upload video to WordPress?
Yes, you can. The real question is should you upload videos directly into your WP install. Videos are generally large and if multiple people access the same video(s) at the same time, it may slow down your site. Using a video hosting service such as Youtube, Vimeo, Wistia, or others will generally yield better results.
Watch the video on how to add YouTube and Vimeo videos to WordPress

WordPress Tutorial for Beginners by WP-Tutoring.Com – Copyright 2021
What is a Page in WordPress?
WordPress Pages are meant for more “static” content, or content that doesn’t change often. For example- “About us” and “Contact us” are generally created as pages. The monthly newsletter, however, is generally done as a post, because the information changes on a regular basis.
Pages are generally for “static” content.
When you think of a Page in WordPress think of the following types of pages – “About Us” , “Contact Us” , “Employee Directory” etc. Pages are what allow WordPress to be more than just a blogging platform, and allow it to be able to create full blown websites.
Pages are edited the same way posts are.
If you can create a post in WordPress, you can create a page. There are only a handful of different metaboxes, but the method to add text and media, or to publish it publically or privately are the same.
Examples of when you would use a page verus a post.
About Us, Contact Us, Events Pages
When you want to create private content.

All Pages shows a listing of your pages the same way all posts is listed. You can filter, edit and delete posts by using the “Bulk Actions” dropdown.

Image from WordPress Codex
The WordPress Page Editor
If this screen looks familiar, there is a reason. This is essentially the same screen as the WordPress Post Editor.
The reason for this is that the WordPress folks maintained the “if it ain’t broke, don’t fix it” mentality. This also provides continuity.
Page Attributes
Parent
Pages in WordPress can be heirarchal. In other words, you can make pages into a main page or parent, and sub pages which relate to the main page in some way.
An example could be a page about the United States would be a parent page, and the sub pages or child pages would be the individual states.
This is really a great way to keep your pages organized and provide a good SEO structure for your site.
Template
WordPress Themes can have different page templates that create alternate layouts.
A common example of this is Default Template layouts, which generally have sidebars and Fullwidth layouts which have no sidebars at all. You can click the dropdown in order to use the different templates that your theme provides.
LET’S PUBLISH ALL OF OUR GREAT CONTENT!

Published Pages
A Published status means the page has been published on your blog (or website), for all to see.
Save Draft
Draft means the page has not been published and remains a draft for you. No one will be able to see it until you make it “published”.
Preview
You can preview changes made to your page before publishing it by clicking the “Preview” button. The button will open up the preview in a new page.
Status
If you select a specific publish status and click the update page or Publish button, that status is applied to the page.
For example, to save a page in the Pending Review status, click Edit link of Status and select Pending Review from the drop-down box.
Next click OK to close the drop-down box and click Save As Pending button.
(You will see all pages organized by status by going to Pages > All Pages).
Visibility
This determines how your page appears to the world.
Public pages will be visible by all website visitors once published.
Password Protected pages are published to all, but visitors must know the password to view the page content.
Private pages are visible only to you (and to other editors or admins within your site)
Schedule
WordPress allows you to schedule when a post or page should be published.
To schedule a page for publication on a future time or date, click “Edit” in the Publish area next to the words “Publish immediately”.
You can also change the publish date to a date in the past to back-date pages. Change the settings to the desired time and date.
You must also hit the “Publish” button when you have completed the page to publish at the desired time and date.
WordPress Tutorial Articles for More Info
Creating a New Page in WP
Setting the Front Page of Your WordPress Site

Comments in WordPress
Interactive WordPress Tutorial on Managing Comments (sound enabled)
1. In order to manage comments, you must first click comments from the WordPress Dashboard menu.
2. A comment that is highlighted yellow is an unapproved comment. In order to approve a comment so it will be shown on your site, click Approve.
3. If for some reason you want to remove a comment from your site, but not delete it, click on the Unapprove link.
4. In order to reply to a visitor comment, click on the Reply link.
5. You now have an input box that will allow you to reply to your visitor’s comment. Anything that you type here will be shown underneath your site visitor’s original comment.
6. Once you have typed your reply, click the Approve and Reply button.
7. There may be times when you want to edit a comment that a visitor made. One way to do so is by clicking the Quick Edit link.
8. You are now presented with an input box that contains the original comment. You may edit or append to the comment, as well as modify the name, email address, and url of the comment.
9. To save your changes, click the Update Comment button.
10. If you want to change the status of a comment, click on the Edit link.
11. From this screen, you can now change the status of your comment to either approved, pending, or spam. You may also modify the submitted on date by clicking the edit link.
12. To save your changes, click the Update link.
13. To mark a comment as spam, just click the red Spam link.
14. To remove a comment from spam, click Undo.
15. To trash a comment click on the red Trash link.
16. To remove a comment from the Trash, click Undo.
17. You should periodically delete your trashed comments by clicking on the Trash link in the comments menu and clicking delete permanently.
Here’s an interactive tutorial
https://www.iorad.com/player/1849256/Manage-Comments
Comments are a way to allow your visitors to engage your website. Many site owners grow their outreach through commenting. Comments are generally allowed on the bottom of posts and can be nested many levels deep.
Comments can be turned on or off.
If your site is a site that doesn’t need to take user comments, then you can turn them off altogether on your site.
Reduce Spam comments by using plugins
Certain spam comments can be reduced through the use of plugins such as Akismet. The use of recaptchas also help deter spammy comments on your site
Comments can be handled by external applications.
You can allow applications such as Jetpack and Disqus to handle comments for your site. It takes the load off of your hosting.

Pending
Pending comments are those that are waiting to be approved, classified as spam, or deleted. They don’t show up on the front end of your site.
Approved
Approved comments are those that you have deemed acceptable to be viewed publicly on the front end of your site.
Spam
Spam comments are those that have been flagged by WordPress for some reason or another, (too many outgoing links for example, or certain keywords) Spam comments are classified that way until approved, or trashed.
Trash
Of course, comments that are sent here are not seen on the site until you remove them from the trash and approve them. You can empty the trash which will permanently delete the comment from your WordPress database.
A red bar on the left means the comment is waiting for you to moderate it.
In the Author column, in addition to the author’s name, email address, and blog URL, the commenter’s IP address is shown. Clicking on this link will show you all the comments made from this IP address.
In the Comment column, hovering over any comment gives you options to approve, reply (and approve), quick edit, edit, spam mark, or trash that comment.
In the In Response To column, there are three elements. The text is the name of the post that inspired the comment, and links to the post editor for that entry. The View Post link leads to that post on your live site. The small bubble with the number in it shows the number of approved comments that post has received. If there are pending comments, a red notification circle with the number of pending comments is displayed. Clicking the notification circle will filter the comments screen to show only pending comments on that post.
In the Submitted On column, the date and time the comment was left on your site appears. Clicking on the date/time link will take you to that comment on your live site.
Many people take advantage of keyboard shortcuts to moderate their comments more quickly. Use the link to the side to learn more.
A note about SPAM
Spammers often like to target blogs in order to attempt to link to other websites to bolster their own web traffic. There are a number of plugins that can help combat the problem.
For more info – visit the codex here- https://codex.wordpress.org/Comment_Spam
Love our Free WordPress Tutorial? Get more WP Goodness.
Download the 60+ Page PDF
Get all this great WP Tutorial material in PDF Format.
Get Live WordPress Training Online
Get Online WordPress Training tailored to your specific needs.
Get WordPress Deals
We’ve procured some special deals for you through our affiliate partners.
WordPress Tutorial for Beginners by WP-Tutoring.Com – Copyright 2021
WORDPRESS USERS
Let’s Manage who can log in and out of our site

WordPress Tutorial on How to Add a User
1. The first step is to open Dashboard ‹ — and with your mouse, hover Users
2. Click Users
3. Click Add New
4. Enter Text in each field
5. Click Add New User
6. That’s it. You’re done.
Here’s an interactive tutorial
https://www.iorad.com/player/1734114/-How-to-Add-a-User
WordPress Users
Depending on your site, you’ll have to have other people who can log in to your site. WordPress has a very robust user login system with different user levels and permissions.
By Default, WordPress Users are able to Login to your site
WordPress users have at minimum a username, email address, and password to log into your website. As we’ll see, they can also have other information such as a website, avatar, and other associated items with their Profile.
Users Have Roles
By Default in WordPress Users can have one of 5 different roles. Each role is given a certain levels of permissions in order to perform certain things on your website. The lowest level can just read content, while the highest level can change everything on your site up to deleting it altogether.
Multiple users can have the same role
For instance, if you are running a news-style site, you can have one editor and 5 contributor users. The contributors would write and submit articles, while the editor would be able to edit all of the contributor’s posts as well as delete them. The contributors would only have the ability to submit and edit their own posts.
Administrator
An administrator is able to edit every part of a WordPress site. They can change themes, plugins, and edit code. Additionally, they can create, update and edit posts. Administrators can also add and delete users. You should have as few users with administration permissions as possible for security reasons.
Author
An author can create, edit, and delete their own posts. They can also upload files.
Subscriber
A subscriber can read posts but have no ability to create or edit posts.
Editor
An editor can create, edit, and delete their own AND other’s posts. Additionally, they can upload files.
Contributor
Contributors can create, and edit their own posts, they cannot, however, publish their own posts. They also cannot upload to the site either. They need someone of the editor level to publish their posts for them. This level is good for those who will guest post on your blog, but you want to have someone else publish it to the world.
WordPress Tutorial for Beginners by WP-Tutoring.Com – Copyright 2021
WORDPRESS PLUGINS
Plugins are part of what make WordPress Great – Let’s learn how to use them

WordPress Plugins
WordPress Plugins are like “apps” for your WordPress site.
WordPress Plugins extend your website’s functionality
WordPress by default doesn’t come with certain functionality such as google maps, or calendars. This can be handled very easily by installing plugins.
There are 1000’s of plugins available for free or pay
The WordPress Plugin Directory has over 49k plugins to do pretty much anything you need. Many plugins are free or “freemium” and give you great functionality without having to hire a coder.
Plugins sometimes don’t play well together – look at reviews carefully
Plugins are developed by coders of varying experience. Sometimes a plugin can clash with another one giving unexpected results. You want to check reviews before installing them.
49K PLUGINS TO PLAY WITH
WordPress.Org is where the plugin repository is located. WordPress has a built in plugin installer that gives you access to those plugins without having to leave your WordPress install.

Interactive WordPress Plugin Tutorial (Sound Enabled)
1. Click Plugins
2. Click Add New
3. Click Search Plugins
4. Type WP Forms
5. Click Install Now
6. Click Activate Contact Form by WPForms – Drag &…
7. Click Add New
8. Click Upload Plugin
9. Click Plugin zip file
10. Click Install Now
11. Click Activate Plugin
12. Click Update now
13. Click Enable auto-updates
14. Click Deactivate WPForms Lite
15. Click Delete WPForms Lite
16. That’s it. You’re done.
Here’s an interactive tutorial
https://www.iorad.com/player/1768564/Plugin-Skills
INSTALLING A PLUGIN
STEP 1:
First thing you need to do is go to your WordPress Dashboard area and click on Plugins » Add New.

STEP 2:
Find the plugin by typing the plugin name or the functionality you are looking for.

STEP 3:
Click the Install Now button to install it for your site.

STEP 4:
WordPress will now download and install the plugin for you. After this, you will see the success message with a link to Activate the plugin or Return to plugin installer.


Jetpack Use it or Skip??
Jetpack, the “Swiss Army Knife” of WordPress
Jetpack is a plugin by Automattic, that offers WordPress.Com functionality to your WordPress self-hosted site. Jetpack has cloud-based features for:
- Image hosting
- Image hosting
- Over 100 free themes
- Basic search analytics
- Uptime Monitoring
- Social Publicizing features
This is a massive plugin, but because it works on the cloud, it can possibly help take the load off of your shared hosting account. Click the logo on the left to get more info.
Some Essential WordPress Tutorial Plugin Recommendations
Here’s a list of the best WordPress Plugins for Beginners:
Disable Comments
Sometimes you don’t want,(or need) comments on your site, this plugin disables comments site-wide, so you don’t have to deal with “comment spam”
From WordPress.Org-
This plugin allows administrators to globally disable comments on any post type (posts, pages, attachments, etc.) so that these settings cannot be overridden for individual posts. It also removes all comment-related fields from edit and quick-edit screens. On multisite installations, it can be used to disable comments on the entire network.
Gotten this far into our WordPress Tutorial? Great, Here are some quick links to help you jump back to the top if needed.
Need WordPress Tutoring, Support, or Development? Connect with us (844) WP-Tutor.
Glossary of Important WordPress Tutorial Terms
A
- Admin Bar – The admin bar is the black bar across the top of the screen that appears when a WordPress user is logged in. The bar has links to various areas of the WordPress Dashboard and front end of the site. You can view an image of the admin bar here.
- Administrator – The highest user role within a standard WordPress site. The administrator has access to all of the WordPress settings and code. Generally, you should only give administrators level access to those who need full control of the site.
- Audio Block – This block will embed an audio player into your content. This is perfect for placing podcast episodes, or music files into your page.
- Author– A WordPress Author can create, edit, and Publish their own posts. They cannot edit or publish other’s posts.
B
- Block Editor – Also known as the WordPress Editor, this feature was introduced in WordPress 5.0. It replaced the Classic Editor which was loosely based on a Microsoft Word inspired interface with a new editing system based on blocks in which every component is considered a block such as paragraphs, images, and video. Blocks can be re-arranged within your document and combined to create complex layouts.
- Block Menu – The block menu is a block editor feature that displays all of the available blocks, block patterns, and reusable blocks in one scrollable menu. It is accessed by clicking on the blue plus icon in the upper left hand side of the block editor screen.
- Blog – A blog is a collection of WordPress posts, that can be categorized or uncategorized. They are usually listed in reverse-chronological order meaning the most recent blog post is at the top and older blog posts are listed beneath.
C
- Category – A WordPress category is essentially a way to group various posts on a site. For example if you have a recipe blog, your categories may be entrees, desserts, and sides. Categories are also hierarchal, which means you can make them parent and child terms, (or categories and sub-categories). For example underneath entrees, you might have poultry, fish, and beef. Then under poultry you might have chicken, turkey, and hen.
- Classic Editor – The classic editor is a pre-WordPress 5.0 way of creating content on your WordPress site. It uses an editing window with Microsoft office-style icons in order to interact with the content. It has since been replaced by the WordPress, (Block) Editor.
- Comments – Comments are responses to WordPress blog posts. Comments can be enabled and allow your site users to interact with your content. In the case that you don’t want comments enabled, you can install the disable comments plugin to disable them site-wide.
- Contributor – A WordPress contributor can write and edit their own posts, but they cannot publish their own posts. Someone with an editor level or higher must publish their content for them.
D
- Dashboard – The WordPress Dashboard is the place where you can configure your site, add content, and update themes, plugins, and core. You can access the dashboard by typing in your url followed by /wp-admin. For example, https://mysite.com/wp-admin.
- Database – WordPress uses a database in order to store information and configuration options for your site. The database along with the file structure is what makes your website work.
E
- Editor – A WordPress editor has the second-highest level of access on a WordPress site. In essence, an editor can do essentially everything except modify code and add themes and/or plugins. This should be someone who can update their own posts and pages and also the posts and pages of other users on the site.
F
- Featured Image – A featured image is an image that is added to a WordPress post and generally represents what the post is about. Depending on the theme or the page configuration, the featured image may show up in various places in the post. Also the featured image is used as a thumbnail picture for various social media sites whenever a post is shared.
H
- Heading Block – The Heading block is meant to highlight important sections of your post or page, (think about an outline that’s divided into different topical headings). The heading sizes of H1-H6 correspond to the HTML versions of the heading tags. Heading blocks allow for better readability as well as better separation of content for search engines.
- Hosting – In order for WordPress code to run, it needs a web server(computer specially purposed for working with the web), to run on. A web host “rents” space on these servers for either a monthly or yearly fee. Two webhosts we recommend are Flywheel and WP Engine.
M
- Multisite – WordPress Multisite is an installation of WordPress that allows for multiple instances of WordPress to run while sharing the same database and core code. Multisite can be done in a subdomain style, (ex. subdomain.mysite.com) or subfolder style (mysite.com/subfolder).
P
- Paragraph Block – The paragraph block is the main block that you’ll be using for adding text to your WordPress post or Page when using the Block Editor,(Gutenberg).
- Password Protected– A password protected post is one that you have to enter a password to view the post or page content. An administrator or editor can set a password on the post.
- Permalink – The Permanent Link of an article or page in WordPress. It is meant to be unchanged for a long time. This link is what most think about when talking about a url. For instance, https://wp-tutoring.com/wordpress-tutorial
- PHP– Hypertext Preprocessor. This is a server side programming language on which much of WordPress is written. Depending on your hosting provider, you might see a notice in your WordPress Dashboard stating that you need to update your version of PHP. It is essential that you upgrade the version in order to keep your WordPress site performing properly.
- Plugin – Think of WordPress plugins as “apps” that you can add to your WordPress site in order to extend its functionality. In reality, they are miniature programs written in php and javascript. There are over 50,000 free plugins in the WordPress Repository.
- Post Status– A WordPress post or page can have one of 3 default post status’. A post or page can either be Draft, Published, or Private. This goes hand in hand with Post Visibility. Post visibility also adds password protected.
Q
- Query Loop Block – The query loop block is a block that allows you to display a list of content on your site. The query block essentially “queries”, or asks the WordPress database for a list of items based on the criteria that you set. For instance, you can configure the query block to display the latest 5 posts in the “recipes” category. You can also configure the block to display the featured image, author, title, and the like. It can also display the information in a “grid” or in a “list” format.
S
- Shortcode – A special code that you can use in WordPress to insert a pre-determined value. Shortcodes have brackets with content in between them such as [form]. WordPress processes the value and displays whatever the shortcode is supposed to display. Many plugins use shortcodes to display things such as forms, cart pages, lessons, etc…
- Subscriber – A subscriber has the lowest level of access on a WordPress site. Essentially, they can only log in and view content. They are able to comment on blog posts, but not able to create posts or pages, or manage other’s posts and pages.
- Super Admin – A super admin is a special access level for WordPress Multisite. A super admin has access to all of the WordPress functions, and code, as well as access to all sub-sites on that network.
T
- Tag – A tag is essentially a keyword that describes the content of a post or page. Unlike categories, tags aren’t hierarchal, meaning that you can’t have tags and sub-tags, in the same way that you can have categories and sub-categories. In general, use tags to describe your content when you don’t have something that is important enough to turn into a category.
- Theme – A WordPress theme is a set of files that are uploaded to WordPress that control the look and feel of your website. Themes have a widely varying group of capabilities and looks. You can choose a theme based on functionality, purpose of your site, or a “general purpose” theme that can be used for multiple types of websites.
U
- User Roles – There are five default user roles in WordPress, Administrator, Editor, Author, Contributor, Subscriber. In the case of a multisite there is a Super Admin section.
W
- Widget – A widget is pre defined code that can be placed into a “widget area”. WordPress has pre-defined widgets that you can use, such as: recent posts, recent comments, and categories. Widgets can also be added to your website when various plugins are installed. For instance, WooCommerce adds widgets to your site. With WordPress 5.0+, there is a move to Widget Blocks, in which any block can be added to a widget area.
- Widget Area – A widget area is an area on a page where you can place pre-defined widgets, or widget blocks, onto a page. The best way to think about this concept is the sidebar of a blog post. Many times there are advertisements, links, etc, that are placed in the sidebar. In this case, the sidebar is a “widget area”. Widgets or widget blocks can be added, removed, and relocated within the widget area.
- Widget Block – A widget block is a pre-defined block in WordPress that you can place within a widget area.
WordPress Tutorial Frequently Asked Questions
List of Popular WordPress Tutorials
- WordPress Tutorial – Installing A WordPress Plugin
- WordPress Tutorial – Creating a New Post
- WordPress Tutorial – Creating a New Page
- WordPress Tutorial – Adding a Table in Gutenberg
- WordPress Tutorial – How to Use the WordPress Health Check
- WordPress Tutorial – Embedding YouTube and Vimeo videos in WordPress
Looking for live online WordPress Tutoring and Training?
call – (844) WP Tutor (978-8867)
Need WordPress Support and Maintenance? Let us handle your site, you handle your business.
(833) Help4WP (833)435-7497
Thank you for viewing our WordPress Tutorial.
For more information on the Block Editor (Gutenberg) Please download our Block Editor Gutenberg ebook and/or visit our website
Our site uses cookies and all information is for educational purposes only. Users of this site and WordPress tutorial assume all risk. There is no warranty concerning any of the information contained on this site.
DISCLAIMER: WordPress® and its related trademarks are registered trademarks of Automattic, Inc. This website is not affiliated with nor sponsored by Automattic, Inc. or the WordPress Open Source project. This site and the products and services offered on this site are not associated, affiliated, endorsed, or sponsored by WordPress, nor have they been reviewed, tested, or certified by WordPress.
© Byrivers Tech LLc and WP-Tutoring.com, 2021. Unauthorized use and/or duplication of this material without express and written permission from this site’s author and/or owner is strictly prohibited. Excerpts and links may be used, provided that full and clear credit is given to Byrivers Tech LLc and wp-tutoring.com with appropriate and specific direction to the original content.
This site contains affiliate links – We may receive a small commission on any purchases you make via those links. We only recommend services that we have tested and found beneficial to our customers and viewers.
Selected WordPress Tutorial Comments
If you have any questions, suggestions or tips, feel free to post them here.
Spam or harassing comments will be deleted. Subscribe You are logged in as WPTutor | Log out

{}[+]4 COMMENTSOldest

WPTutorAuthor 5 months ago
Hey guys, get 3 months of Free Premium WordPress Hosting from WP Engine using the link below.
Get 3 Months Free at WP EngineLast edited 5 months ago by WPTutor0 Reply
WPTutorAuthor 5 months ago
Get 4 Months free on flywheel hosting with this link –
4 Months free flywheel hostingLast edited 5 months ago by WPTutor1 Reply
WPTutorAuthor 5 months ago
Here are 5 reasons why you need a WordPress Tutor – along with places to learn WordPress.
WordPress Tutor – 5 reasons you need one0 Reply
WPTutorAuthor 4 months ago
WordPress Version 5.6 is out! This brings new enhancements such as the 2021 theme and improved block editor,(Gutenberg) experience. We’ll be releasing an article about it soon. Stay tuned!0 Reply
WPTutorAuthor 3 months ago
Here are some of our more popular articles-
- WordPress Tutorial – Disabling the Block Editor
- WordPress Tutorial – Multiple Columns in Gutenberg
- WordPress Tutorial- Adding a button in Gutenberg
WPTutorAuthor 2 months ago
View our post on WordPress Frequently Asked Questions0 Reply
WordPress Tutoring links
Share this Tutorial
FacebookTwitterLinkedInRedditEmailWordPressShare
WordPress Tutorial by WP-Tutoring.Com Copyright 2021. WP Tutoring and ByRivers Tech LLc are not affiliated with WordPress or Automattic. All Trademarks and images are property of their respective owners.