Adding File in Gutenberg
Step 1
Hover your mouse over the Add Block icon (the plus sign in the upper left hand corner within the Gutenberg editor).
Step 2

Select Blocks. Then scroll to Common Blocks. Under that section you will see File. Select File.
Hint: You can also type “file” in the search bar to quickly get to the file option.
Step 3
A file block will appear within the editor. Click on Upload to upload a file from your computer. Click on Media Library to select a file that you’ve previously uploaded to your media library.
Step 4
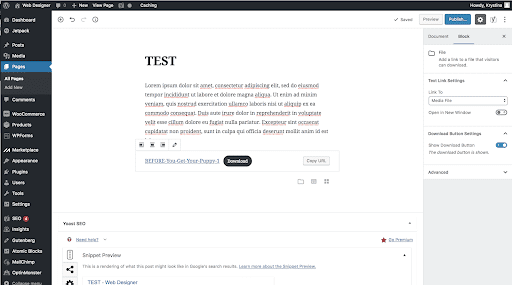
Once you have uploaded a file, you will see a link to your file and a button. If you would like, you can change the button text and remove the hyperlink. You can make the button link to your file instead of using a hyperlink.
Step 5
On the right hand side is a sub menu to help customize how your file block works. The Link to drop down menu allows you to make your link direct to the file itself or the page that has a file attached to it. The Open in New Window allows you to set the link to open in your current browser window or open it in a new one. You can also use the show download button toggle to display or hide your button.
Step 6
Remember to publish your page to save your settings


Copyright ByRivers Tech LLC/ WP-Tutoring.Com All Rights Reserved.
