Table of contents
Orders are where a store becomes real — and refunds are where customer trust is won. WooCommerce handles both from one screen. Shot on WooCommerce under WordPress 7.0, August 2026.
- Orders live under WooCommerce → Orders; click one to see everything about it.
- Statuses drive emails and stock: Pending → Processing → Completed.
- Refund in the order screen does partial or full refunds, per line item.
- "Refund manually" records only; gateway refunds move actual money.
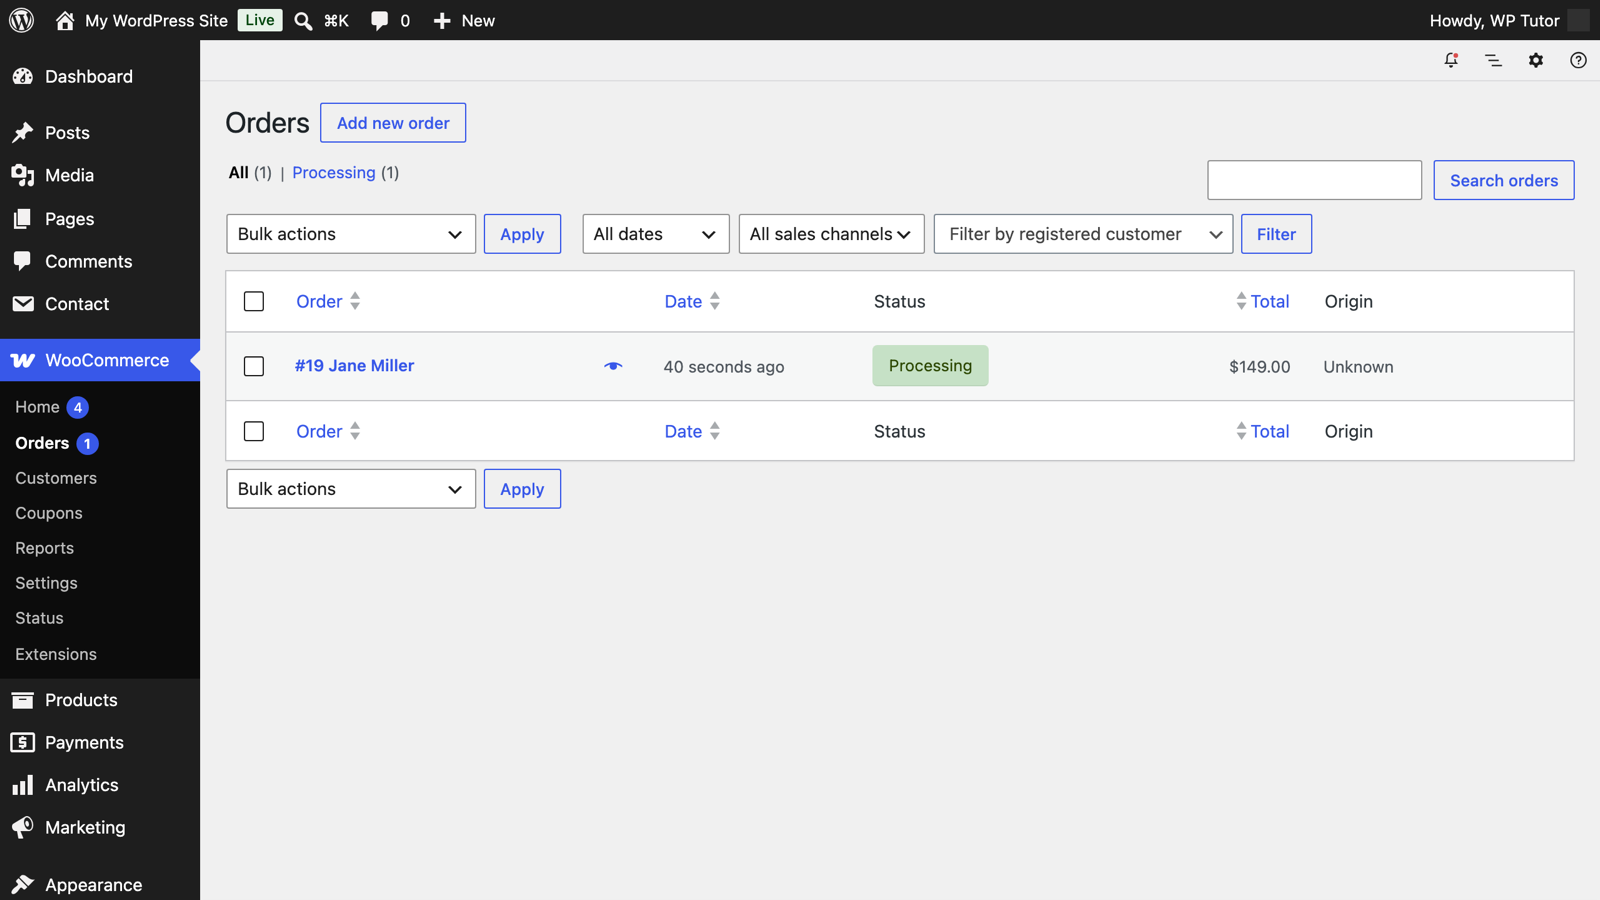
WooCommerce → Orders shows every order with status, customer, total, and date. Click any order number to open it.
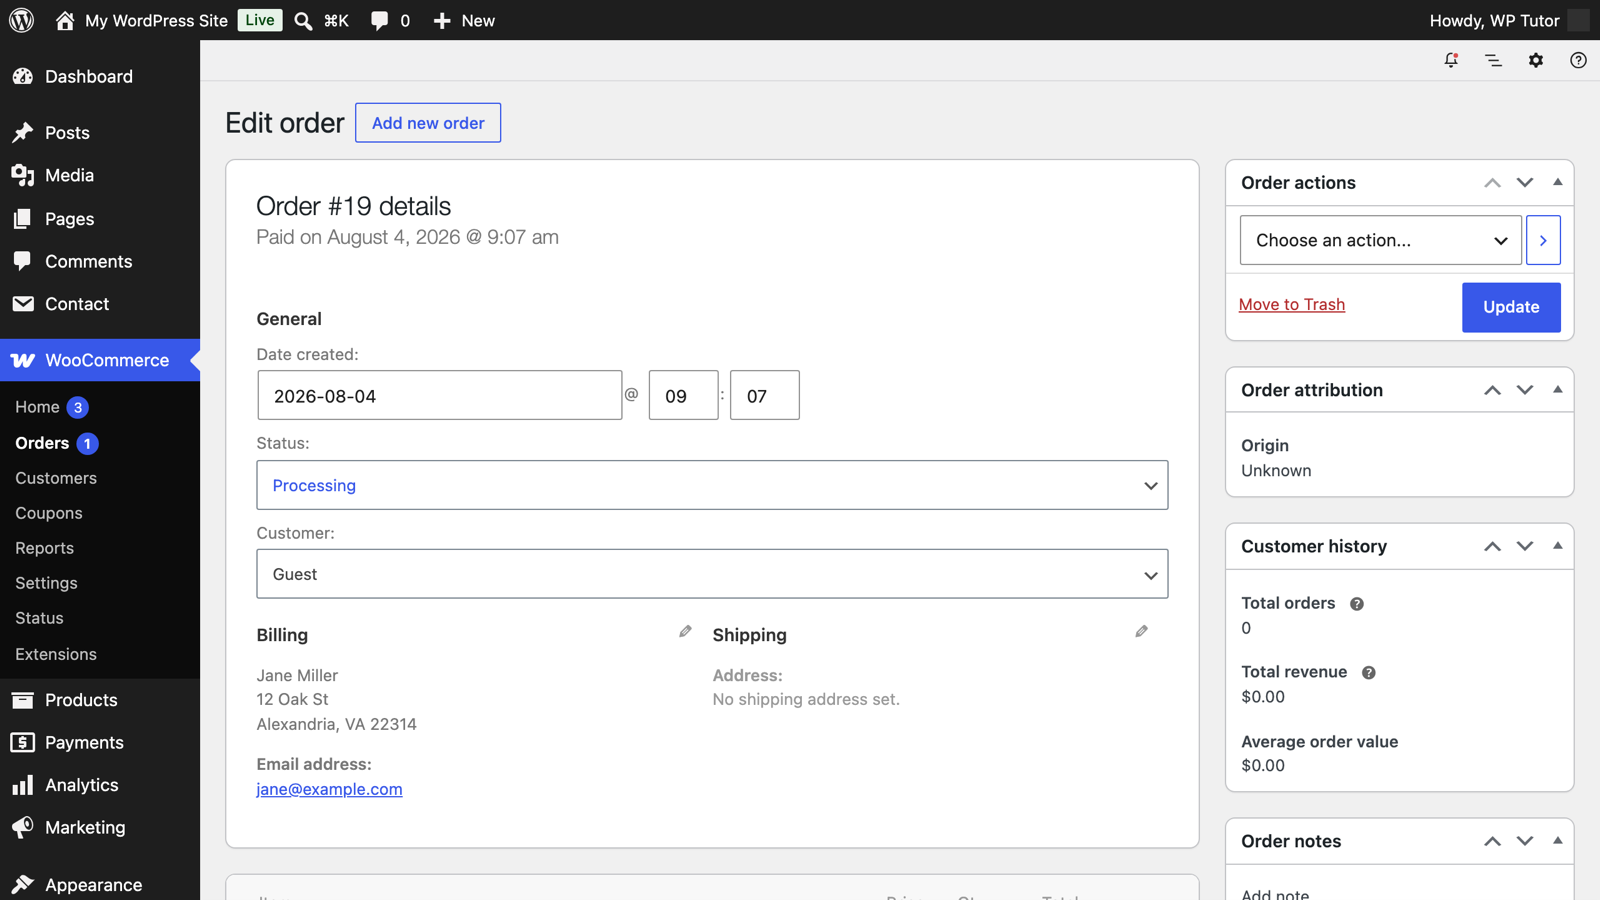
The order screen is mission control: billing and shipping details, line items, an order-notes timeline on the right (every status change and email is logged there), and the Status dropdown. Moving Processing → Completed sends the customer their "order complete" email.
Click the Refund button below the line items. Enter quantities or amounts per line (partial refunds are fine), decide whether to restock the items, and add a reason for your records.
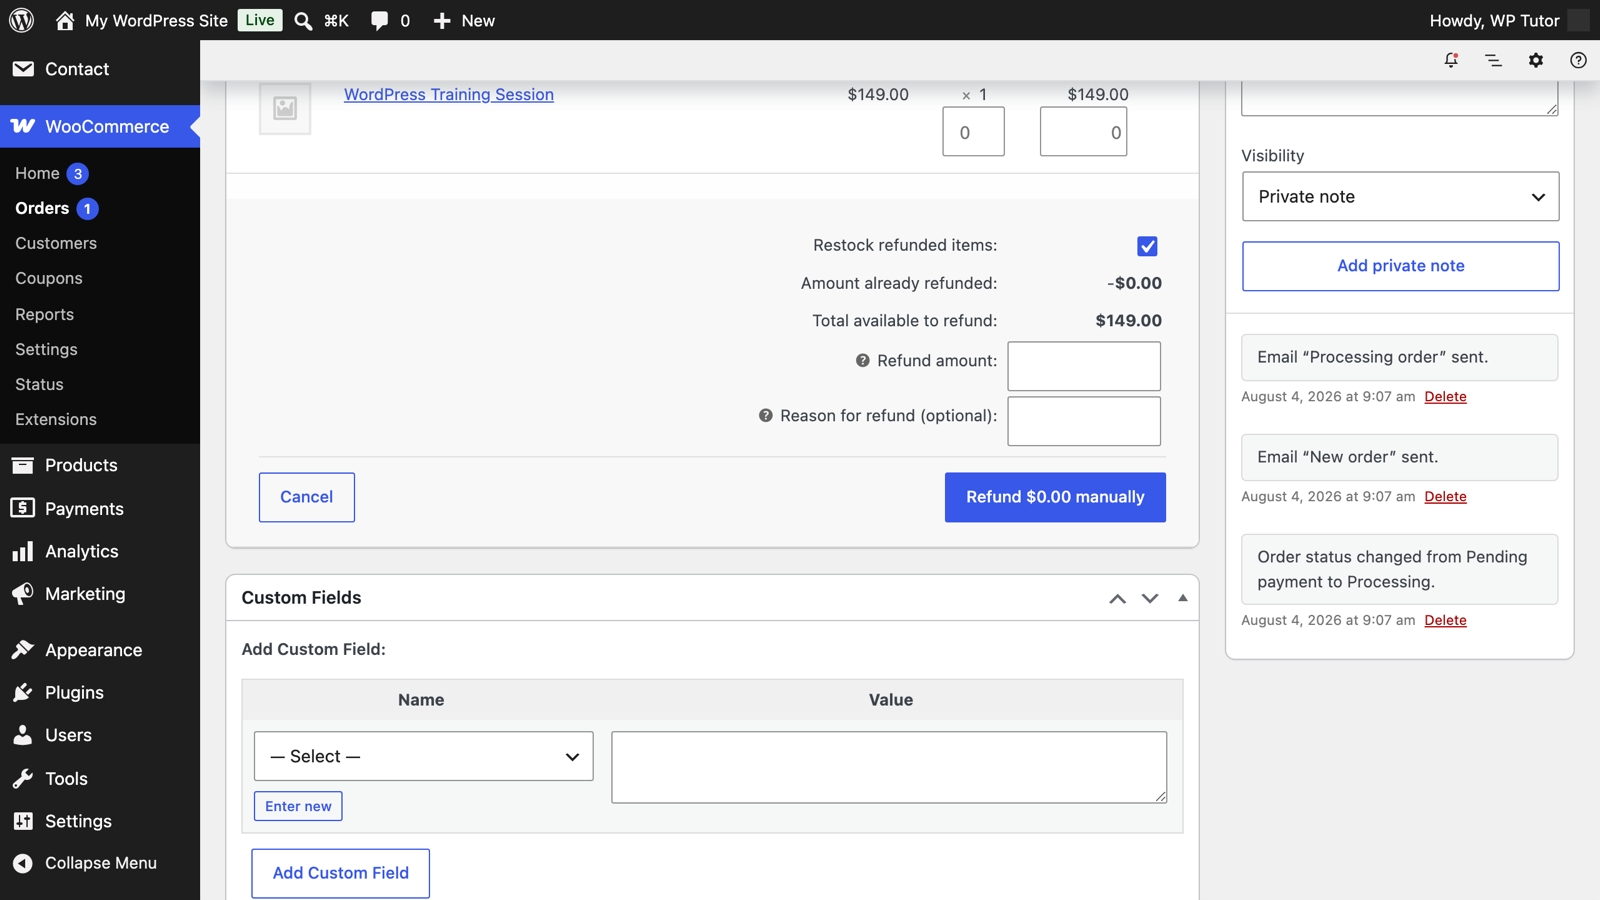
Then choose the button that matches reality:
- Refund via [your gateway] — appears when your processor supports API refunds; actually returns the money.
- Refund manually — records the refund in WooCommerce only; you move the money yourself (right choice for bank transfer / cash orders).
The order status flips to Refunded automatically on a full refund.
The most common refund mistake: clicking "Refund manually" for a card order and assuming the customer got paid back. They didn't — that button is bookkeeping only. If you use a card gateway, use its refund button so the charge is actually reversed.
Keep learning
- Creating a simple WooCommerce product
- Top 10 free WooCommerce plugins
- What is SMTP — make sure order emails arrive
Leave a comment