Step-by-Step Guide to Creating a Simple WooCommerce Product
Creating a Simple WooCommerce Product is a foundational skill for any online store owner. Let's dive into the process:
1. Login to Your WordPress Dashboard: To start your Simple WooCommerce Product creation, first, log into your WordPress dashboard with your admin credentials.
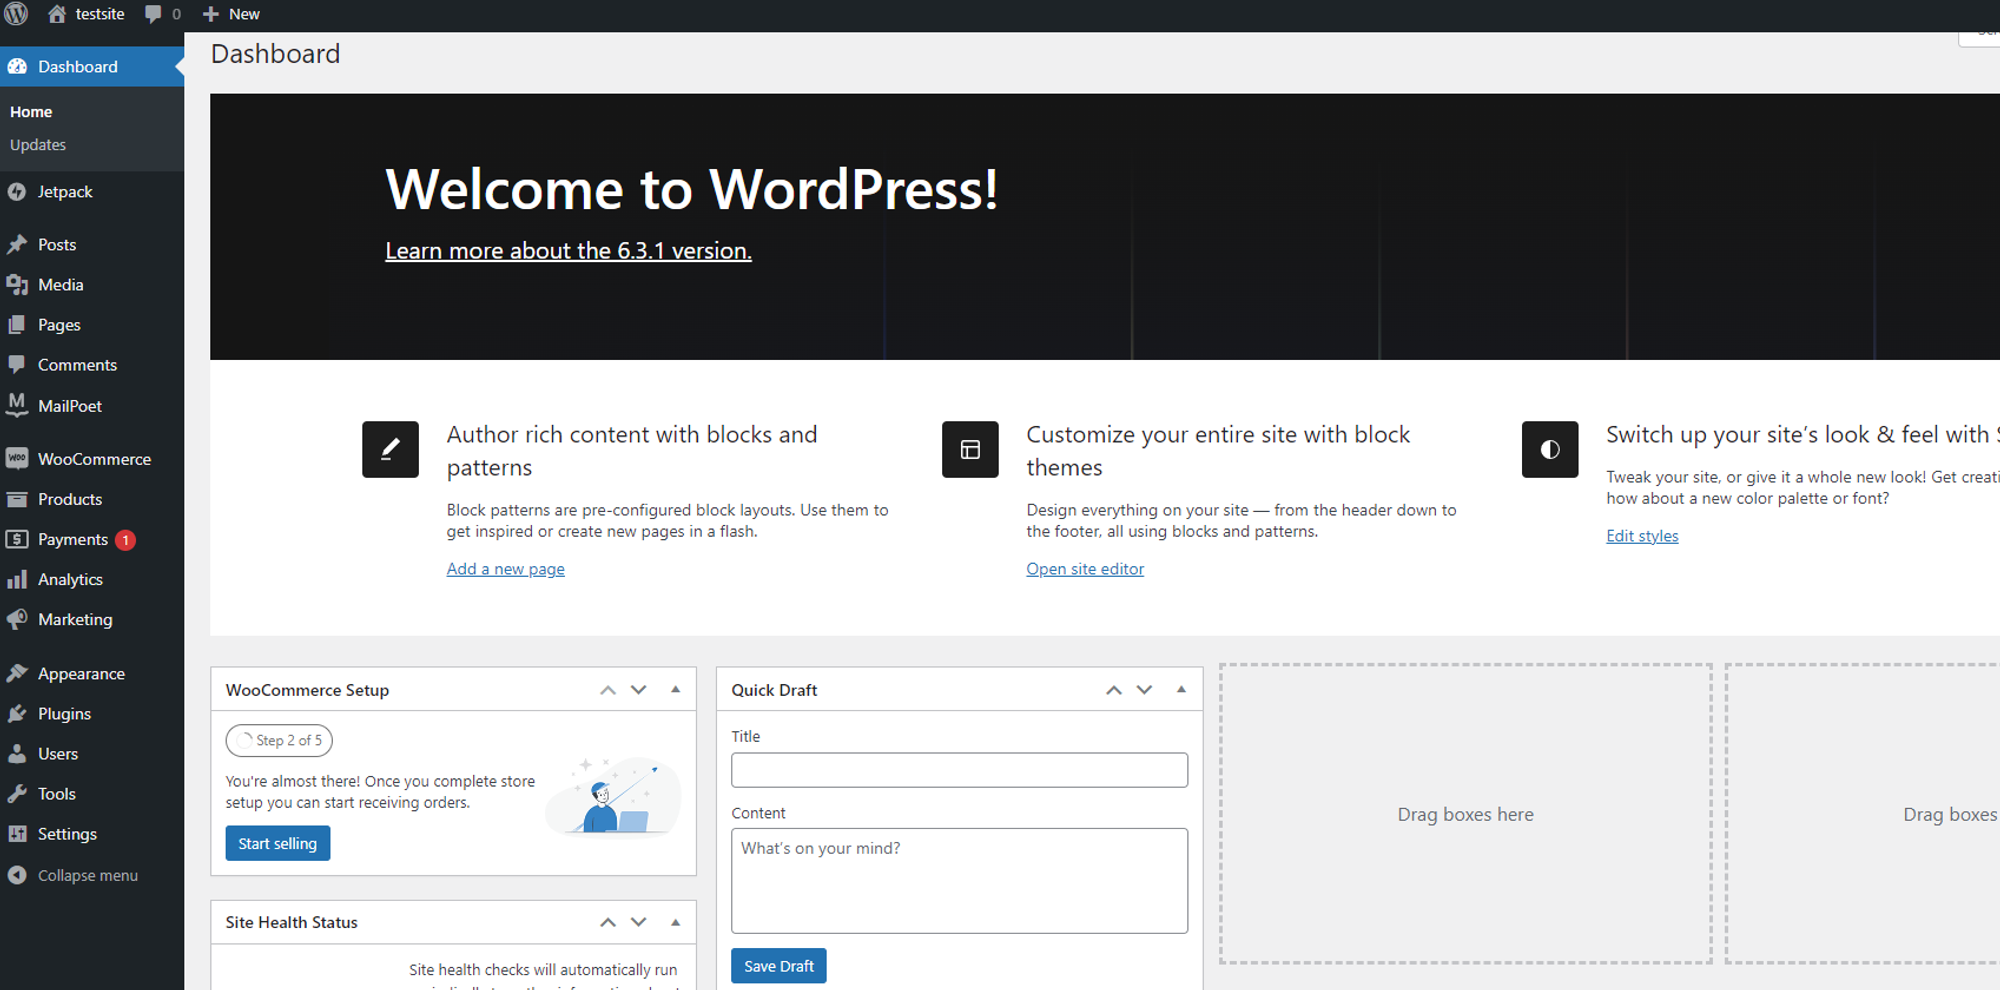
2. Navigate to WooCommerce: On your dashboard's left-hand sidebar, hover over 'WooCommerce' to see the dropdown.
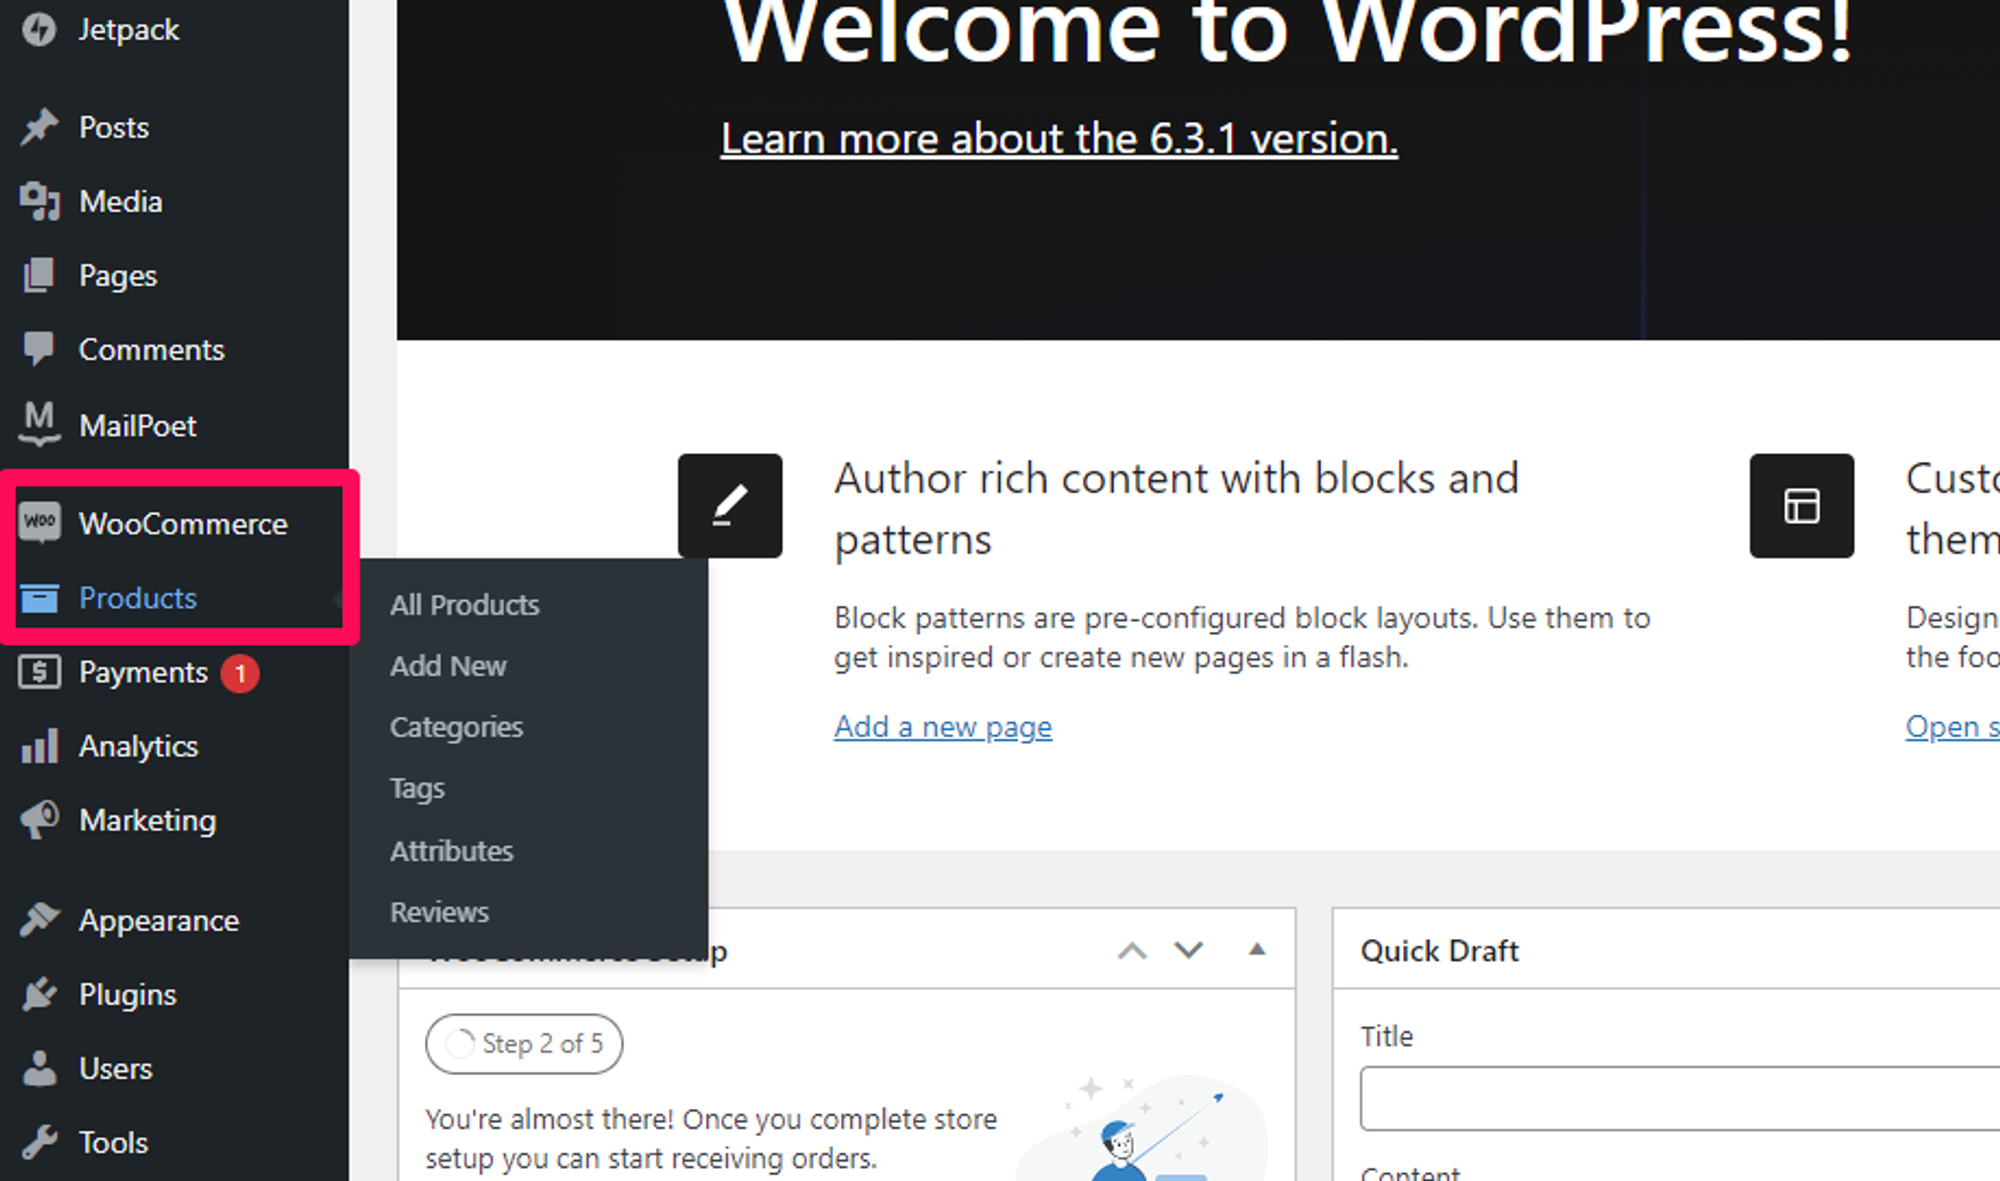
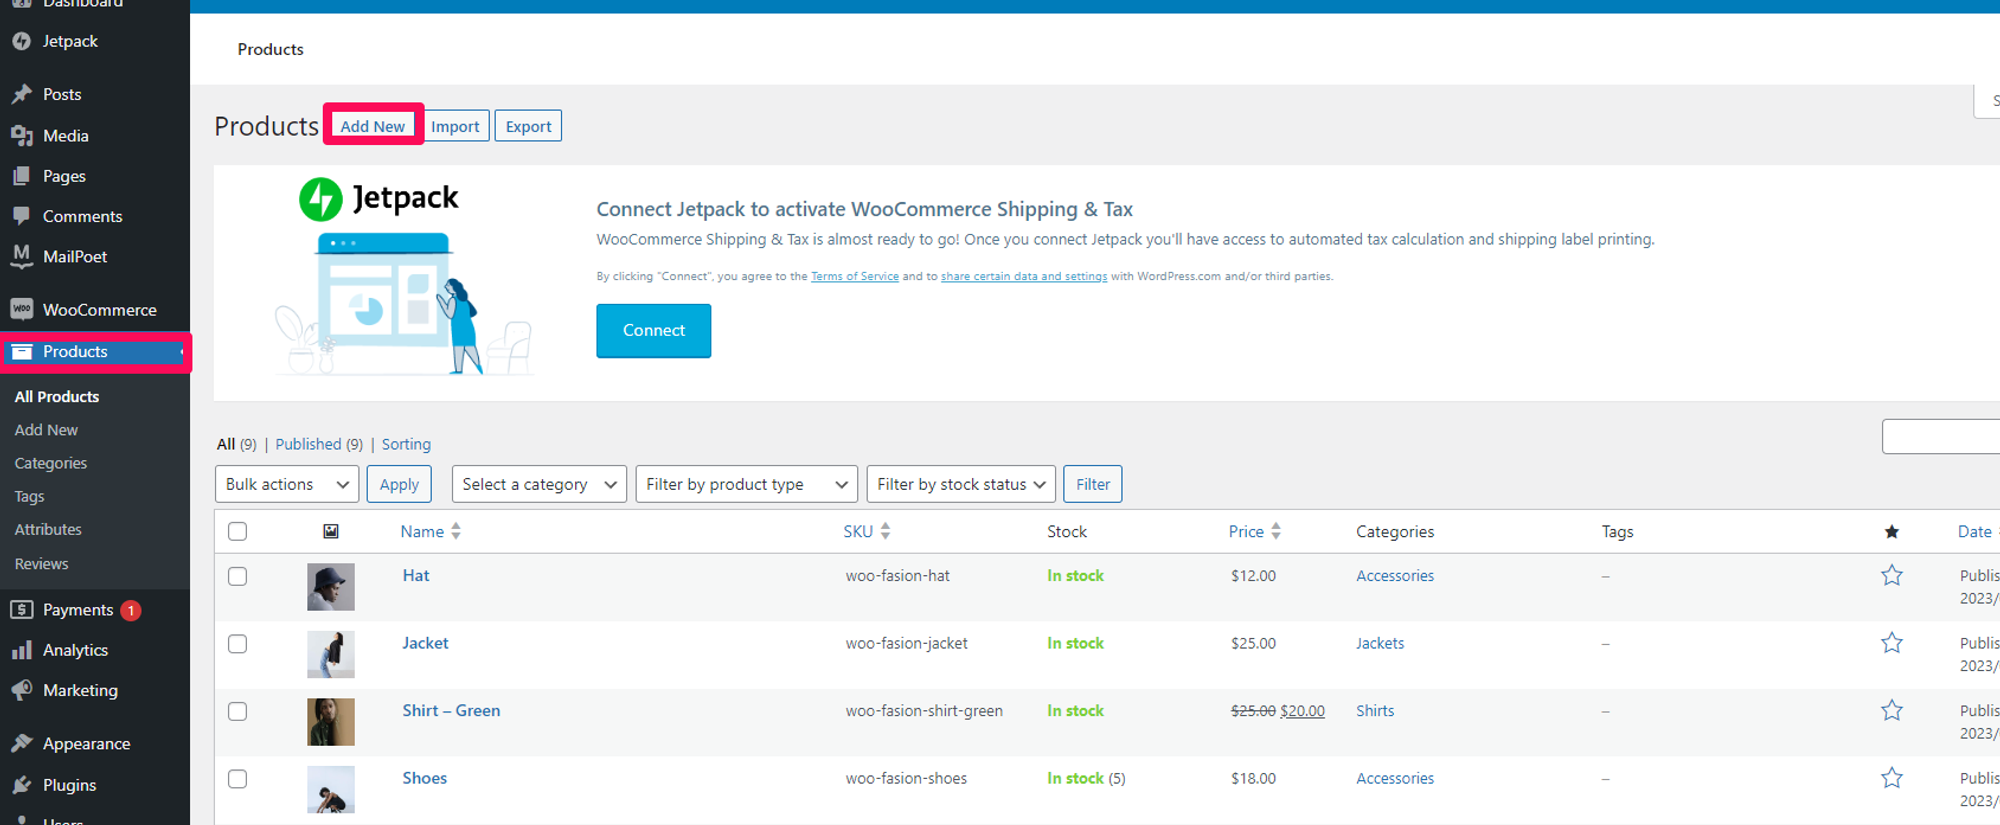
3. Start Your Simple WooCommerce Product Addition: Click 'Products' and then 'Add New'. This opens up the primary setup page for your new Simple WooCommerce Product.
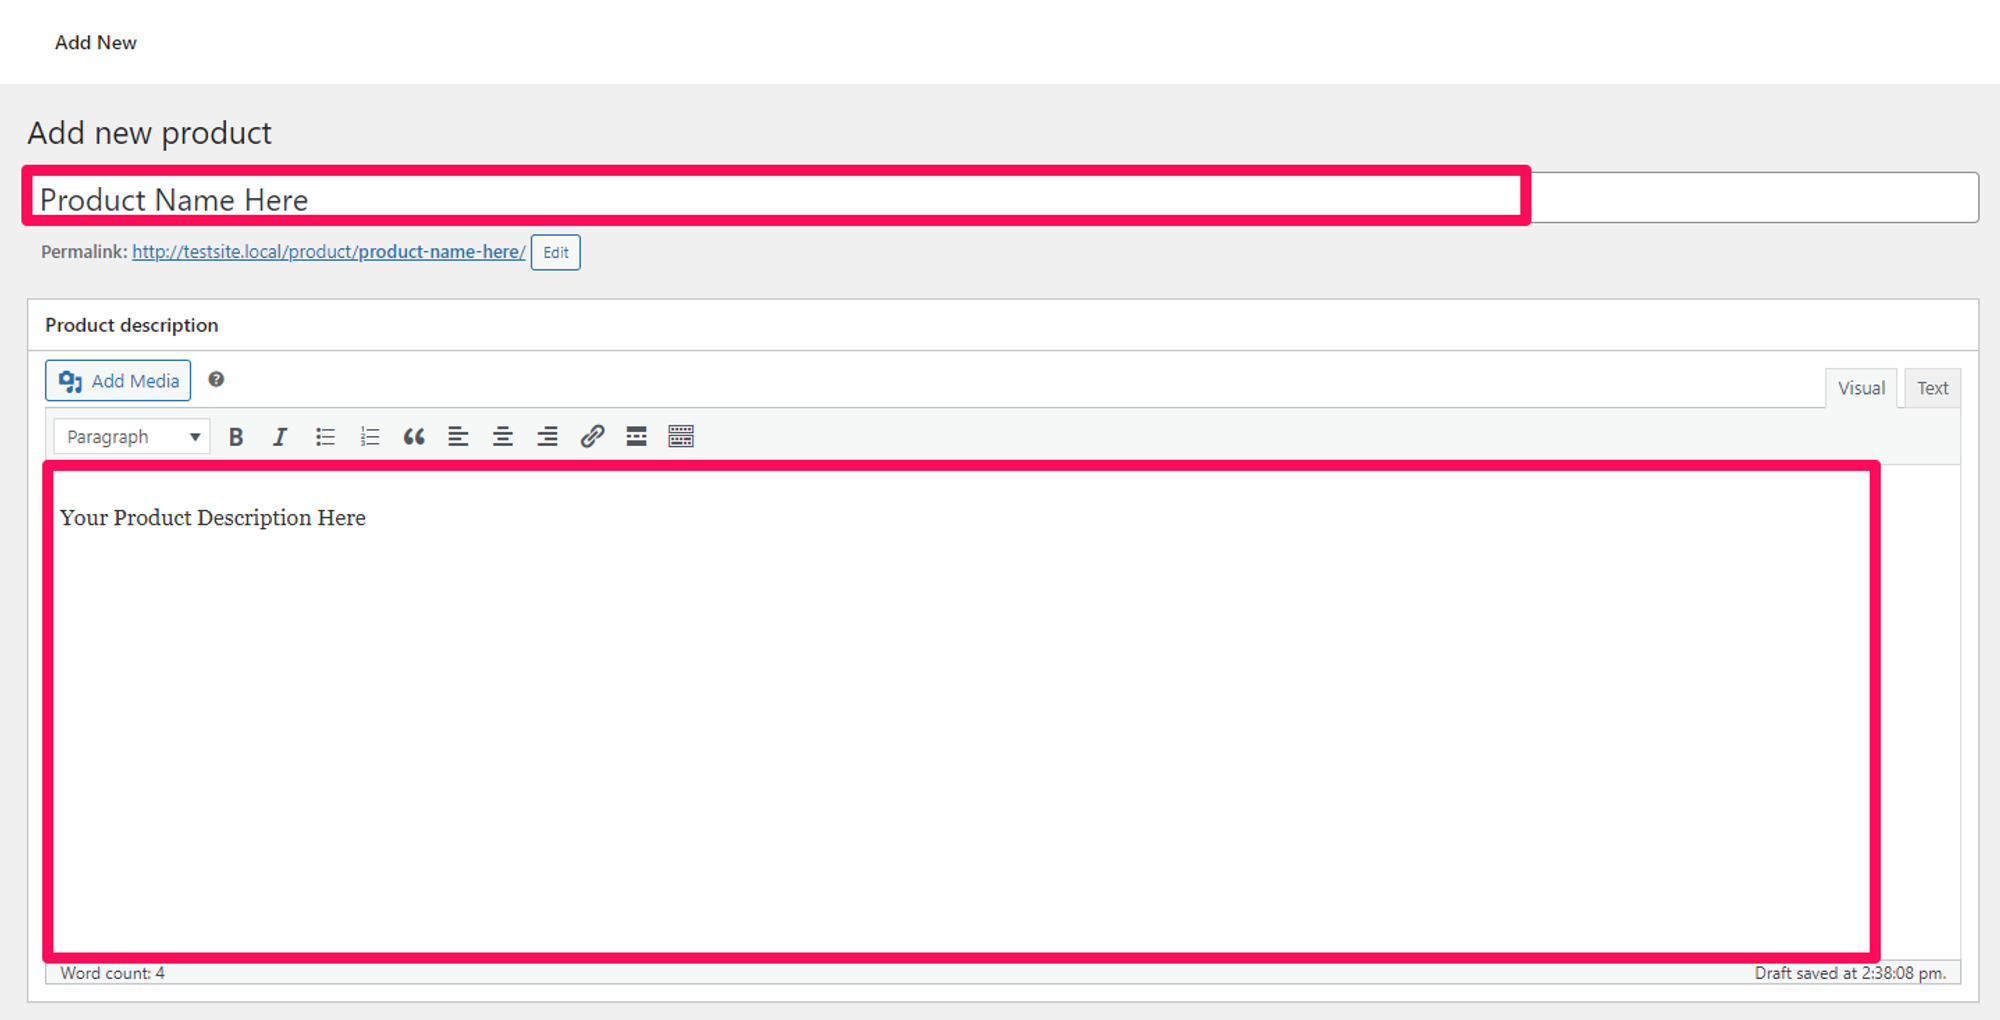
4. Fill in Your Simple WooCommerce Product Details:
- Product Name: Type the name of your product in the title field.
- Description: Below the product name, provide a detailed description. This will help customers understand more about your Simple WooCommerce Product when they're browsing.
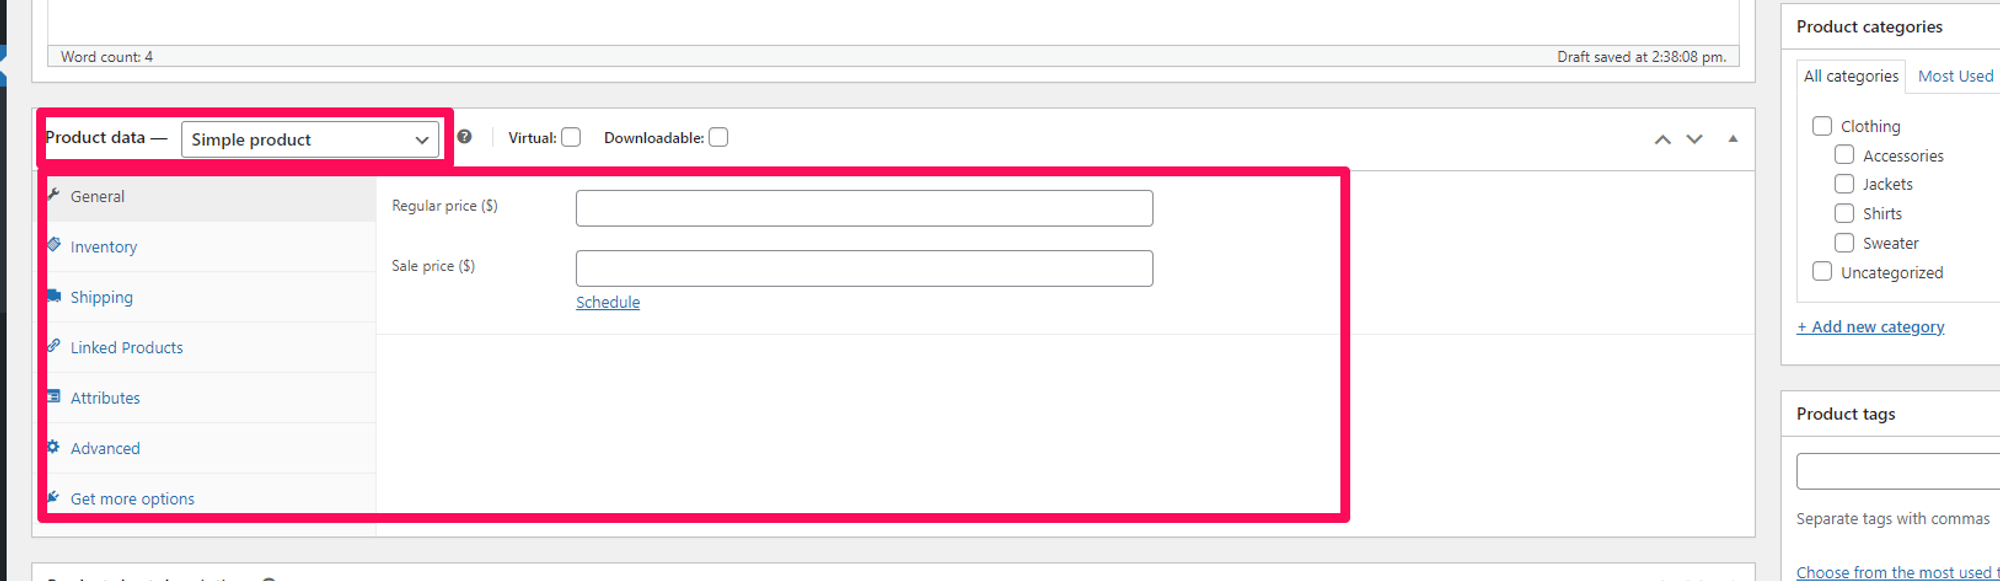
5. Detail the Product Data Section: Below the main description is the 'Product Data' box:
- Type: For a Simple WooCommerce Product, select 'Simple Product' from the dropdown.
- Regular Price: Provide the product's price. If there's a sale, mention the sale price too.
- Inventory: To manage stock for your Simple WooCommerce Product, click the 'Inventory' tab. Enter the SKU (if you have one) and decide on the stock status.
- Shipping: Fill in any relevant shipping data, like weight or dimensions, under the 'Shipping' tab.
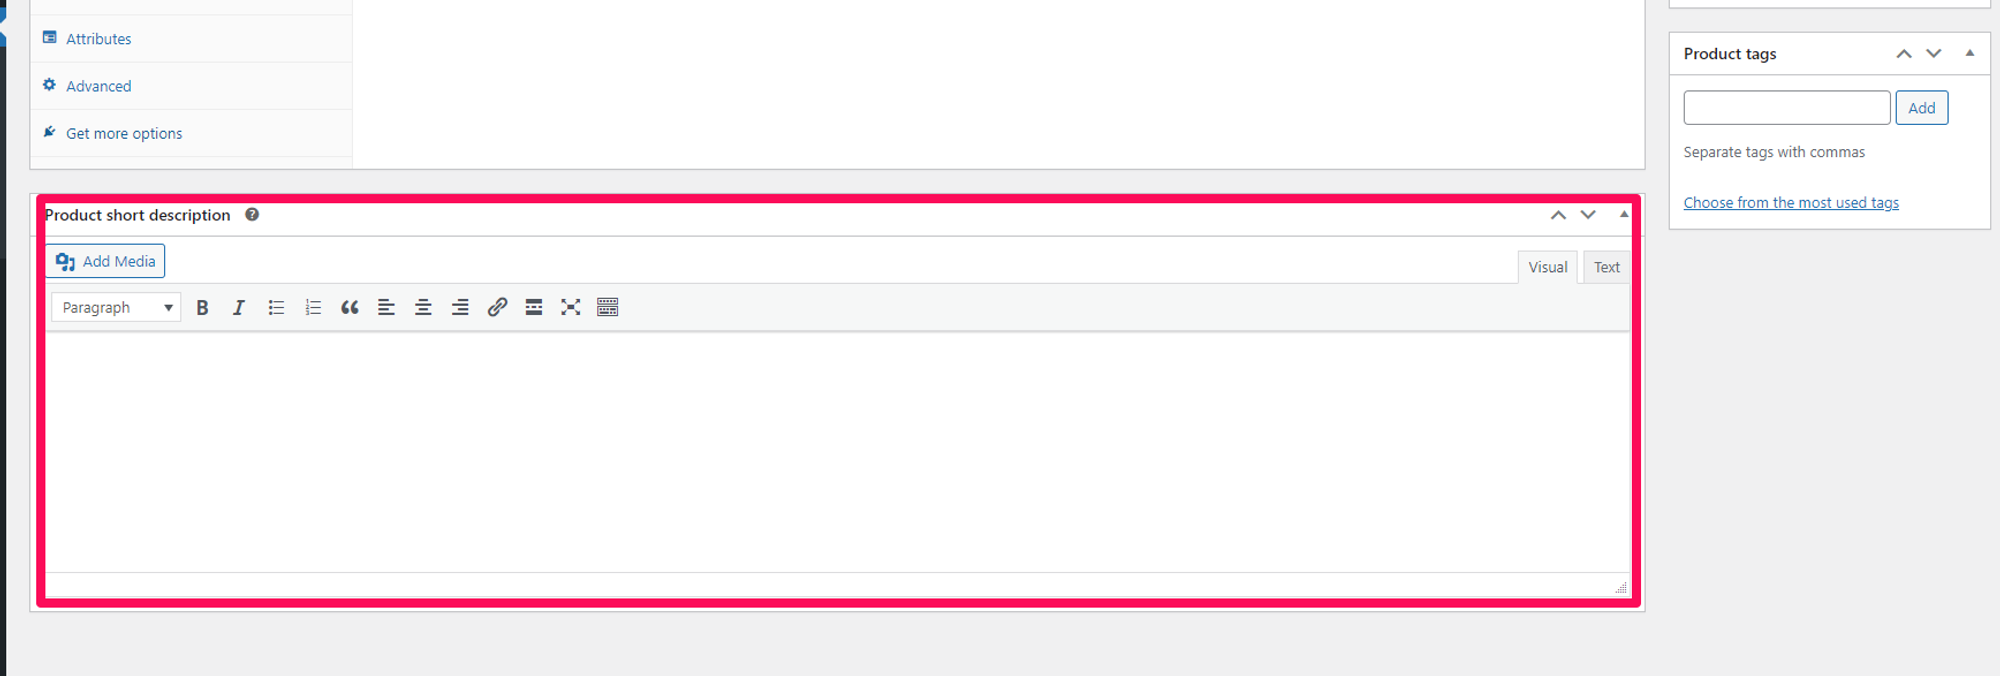
6. Add a Brief Description: On the right, there's a space for a short description. This gives a quick overview of your Simple WooCommerce Product on listing pages.
7. Organize with Categories & Tags: On the right side:
- Categories: Choose or create a category for your product.
- Tags: Add relevant tags, enhancing your Simple WooCommerce Product's visibility in searches.

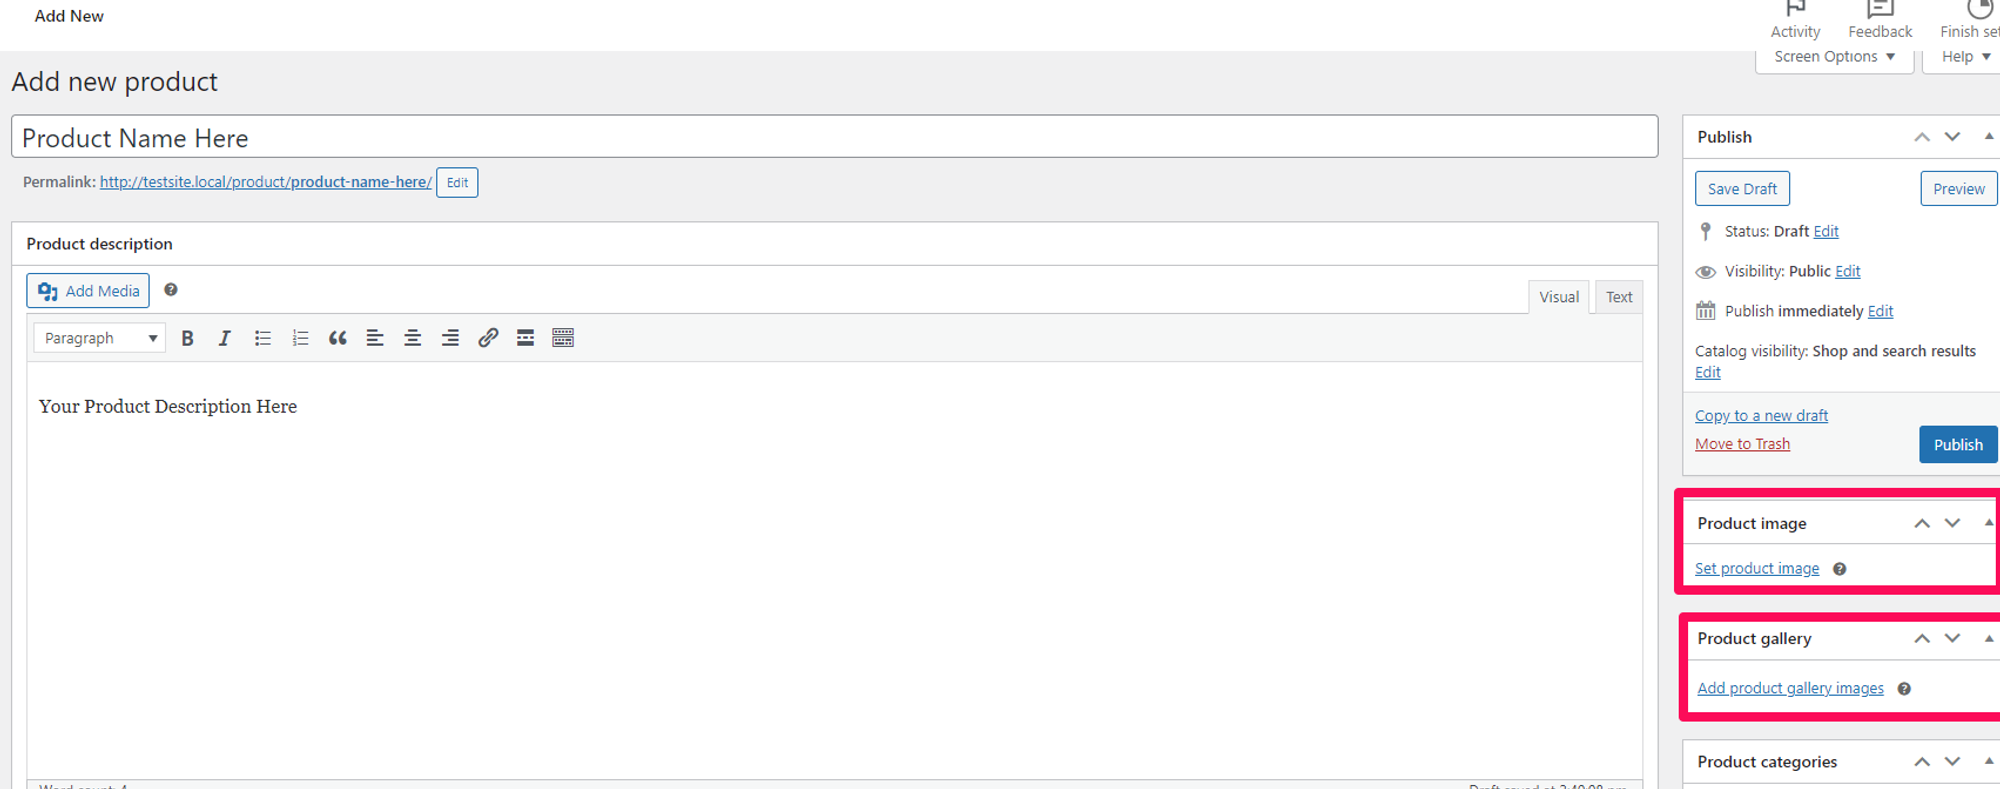
8. Visualize with Product Images:
- Set Product Image: This is your product's primary image. Click 'Set product image', then select or upload an image.
- Add Product Gallery Images: For a comprehensive view of your Simple WooCommerce Product, upload multiple images showcasing different features or angles.
9. Go Live: Once all details are filled in, click 'Publish'. Your Simple WooCommerce Product is now live!
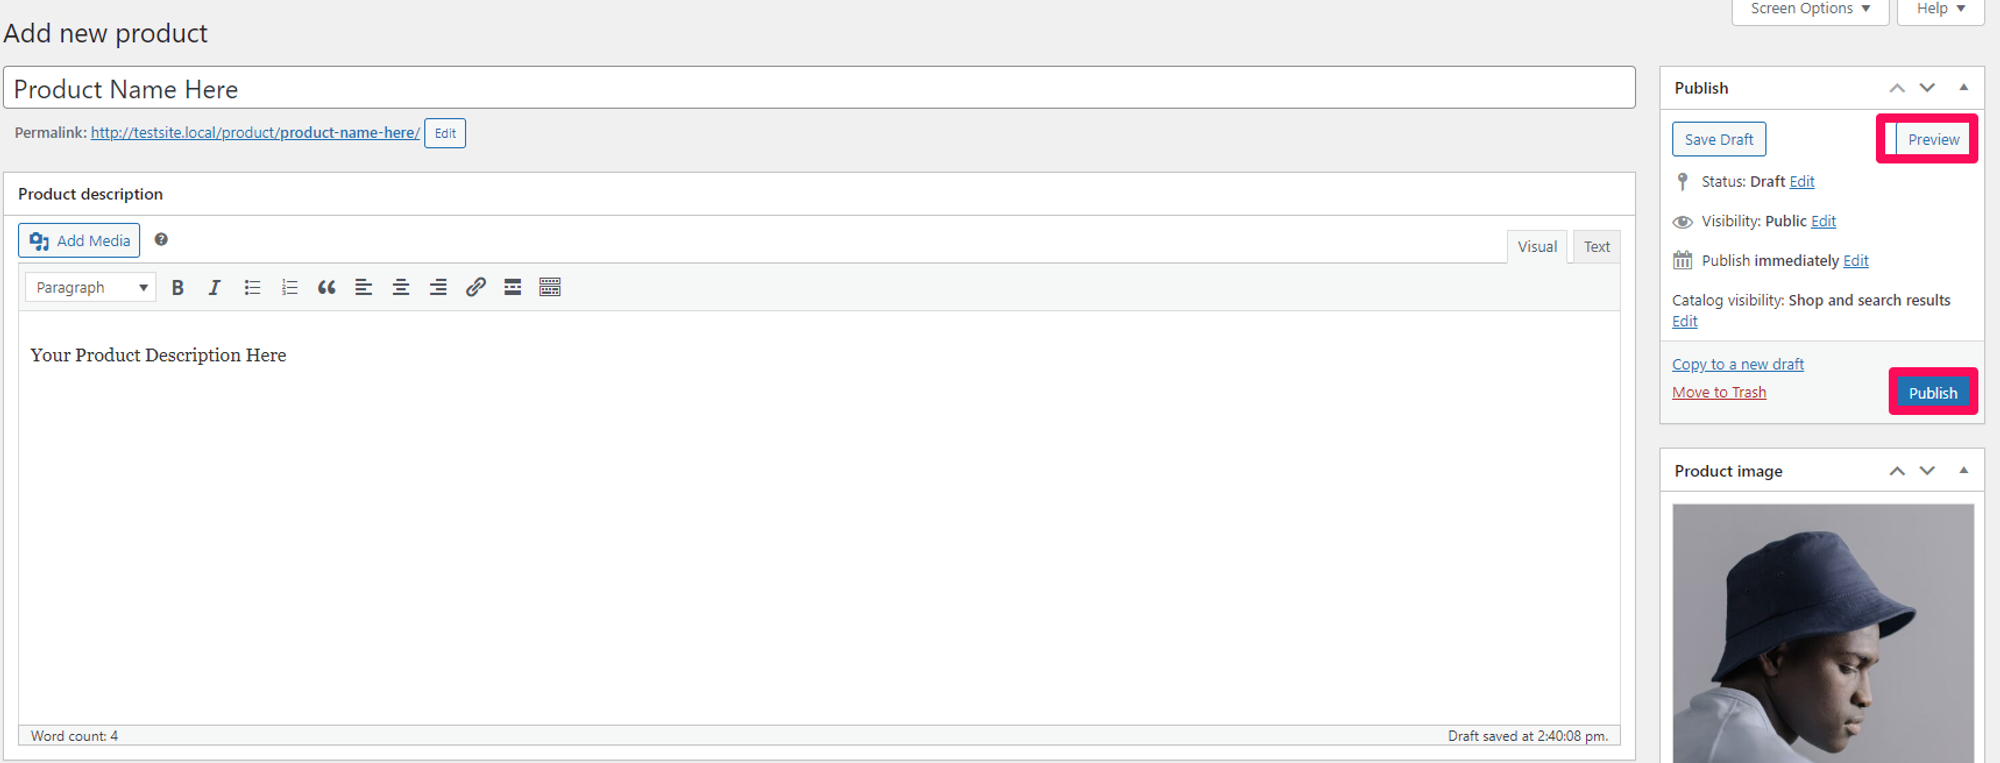
10. Preview: Click 'Preview' to admire your work and see how your Simple WooCommerce Product appears to customers.
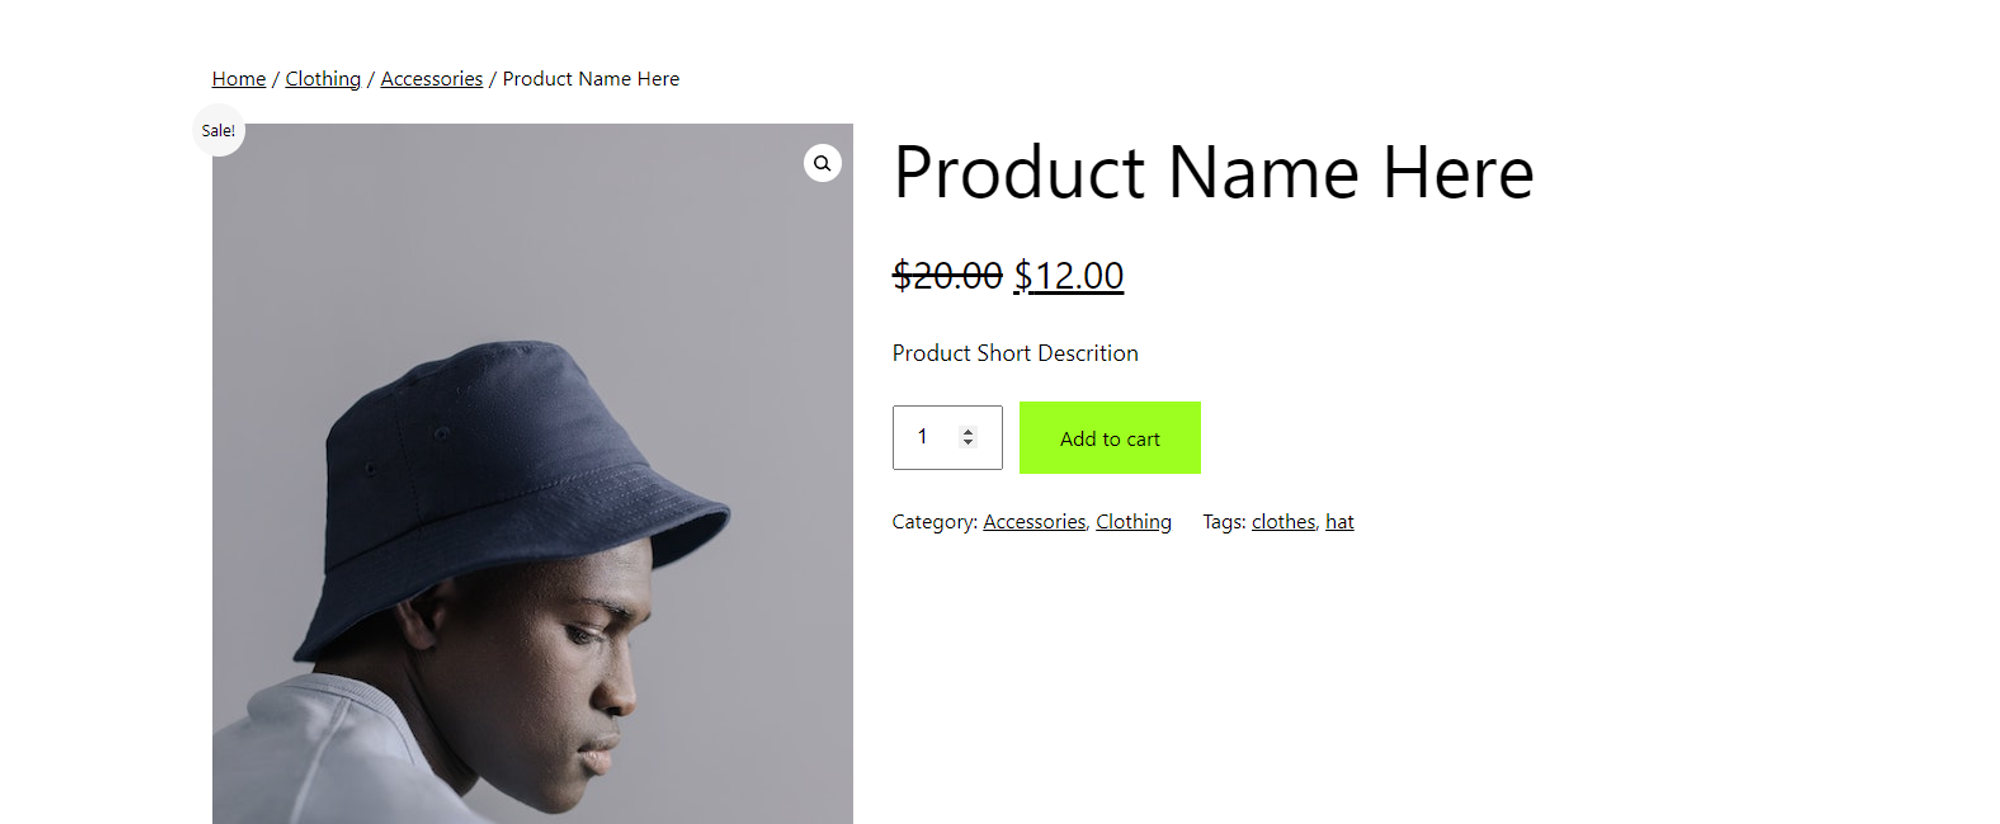
Wrap-Up: Creating a Simple WooCommerce Product is straightforward with this guide. As you get used to the platform, consider exploring advanced features to make your online store even more dynamic. Regularly updating and revisiting your products ensures a fresh and relevant customer experience. Happy e-commerce journey!

Leave a comment