
Scheduling Posts or Pages in WordPress can come in handy. Essentially, if you are someone who writes content in “blocks” or alot of content at a time, it may be advantageous to break the publishing up into multiple future dates.
Doing so ensures that your readers won’t feel overwhelmed by a ton of content coming at them at one time. Here is how you schedule your WordPress content.
WordPress Tutorial – Schedule a Post or Page in WordPress
Step by Step Instructions on how to schedule a post or page in WordPress
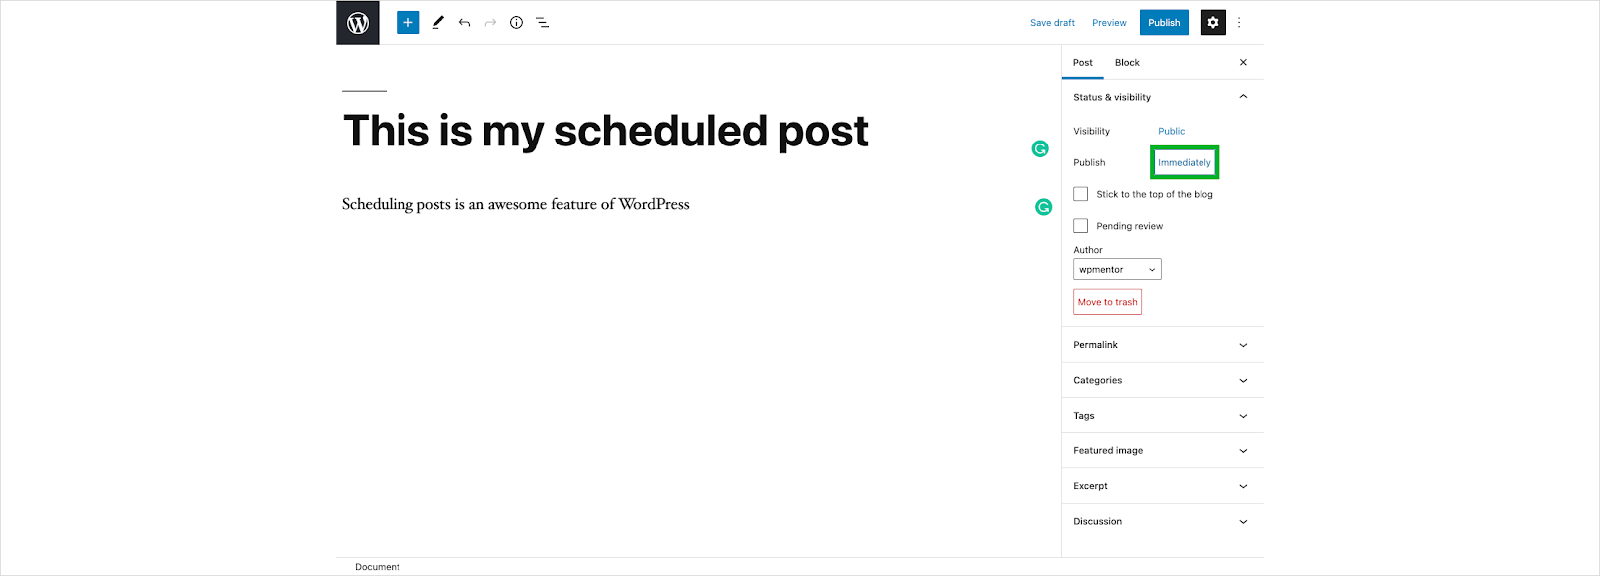
| From your WordPress Page or Post, go to the Post menu. Click on Immediately next to the publish option. |
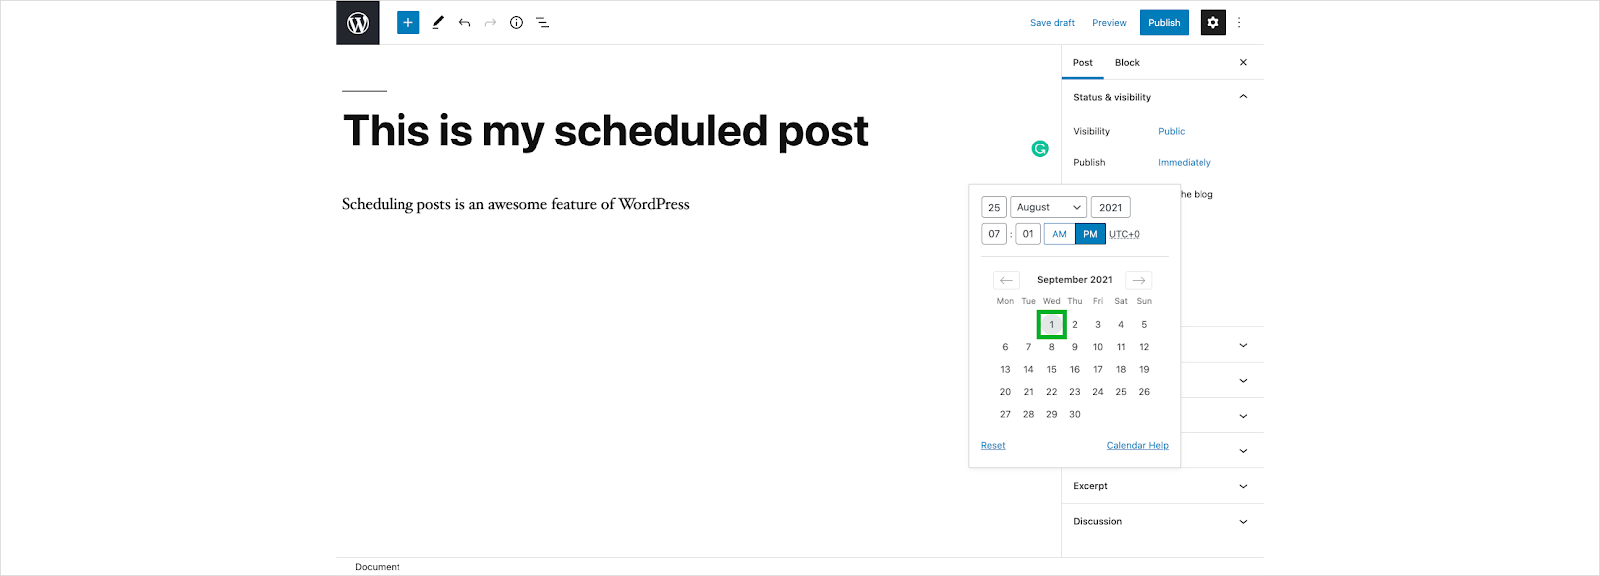
| You’ll now see a popup calendar. In order to change the month, click on one of the arrows. |
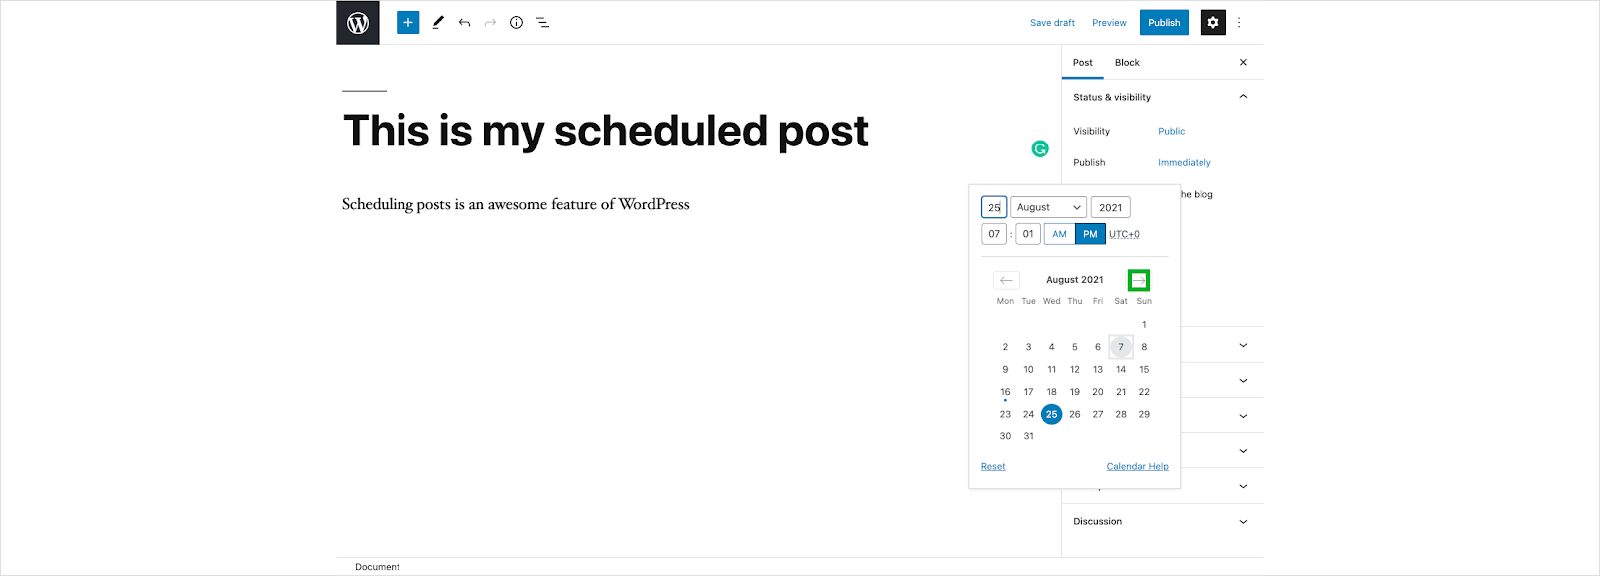
| Click on the day that you want your page or post to go live. |
| Click on and type in the Hour you want. |
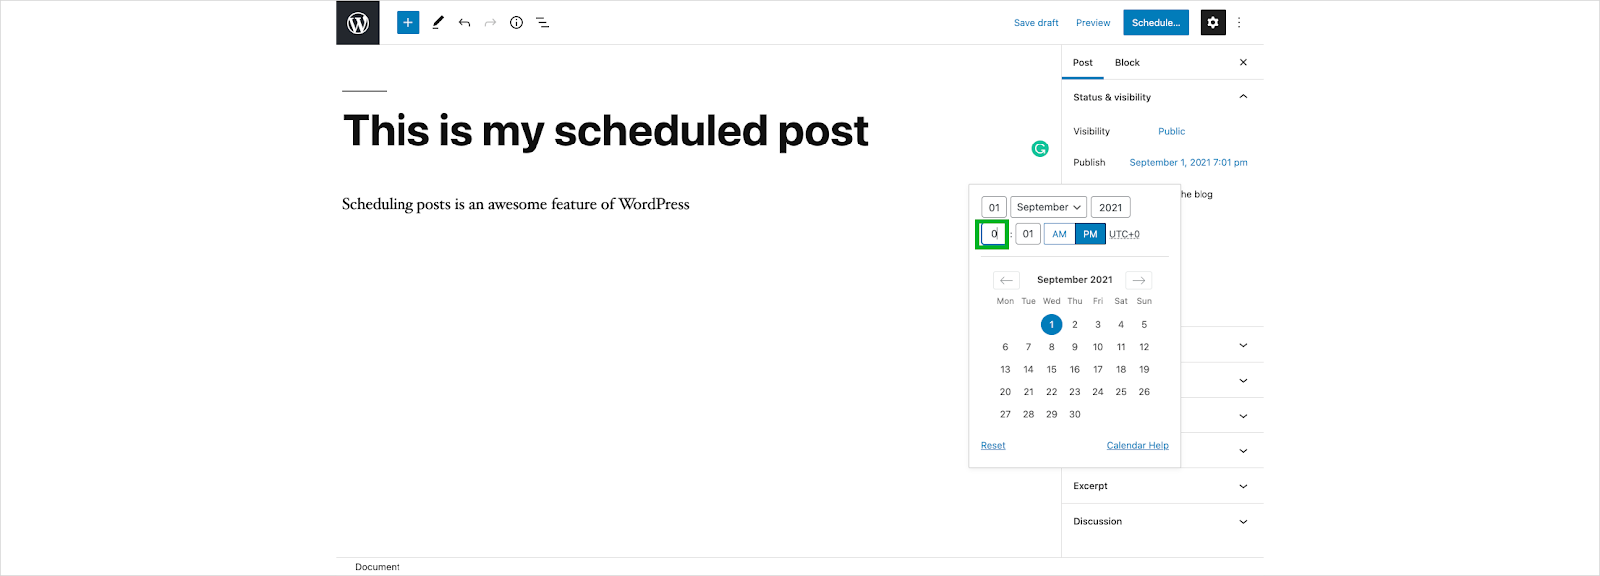
| Click on and type Minutes if so desired. |
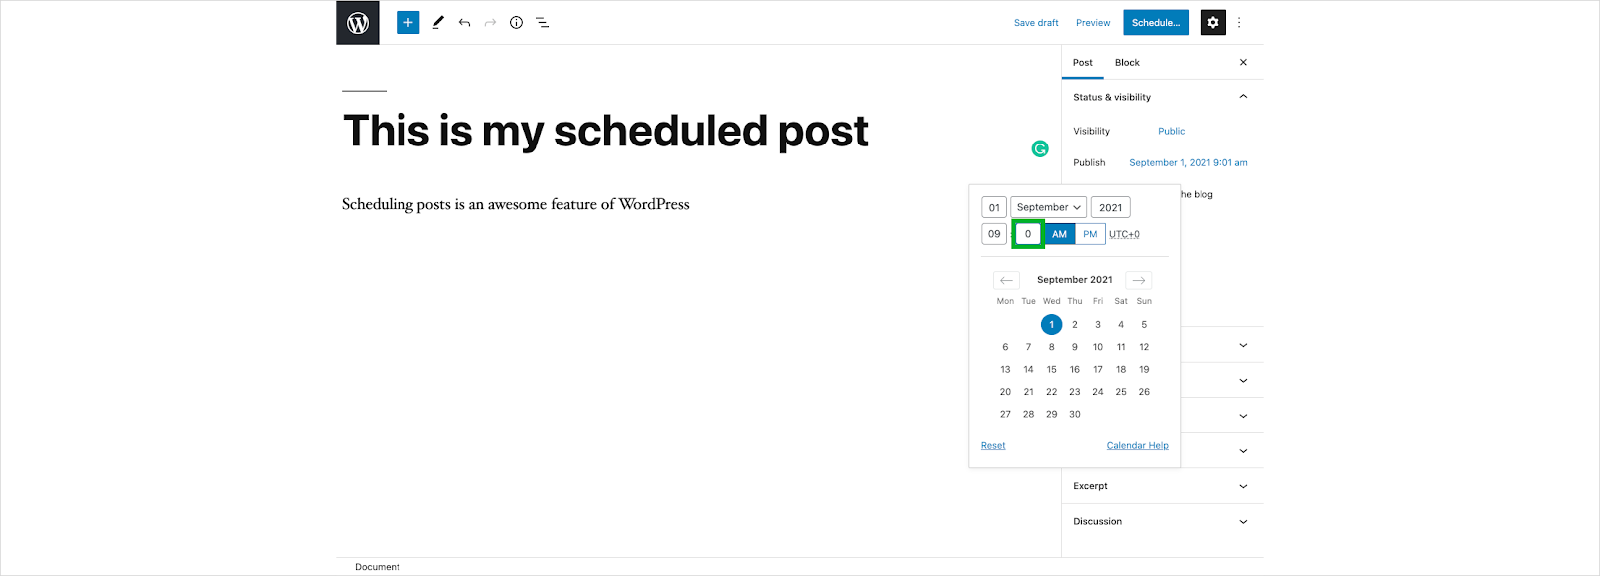
| Choose AM or PM. |
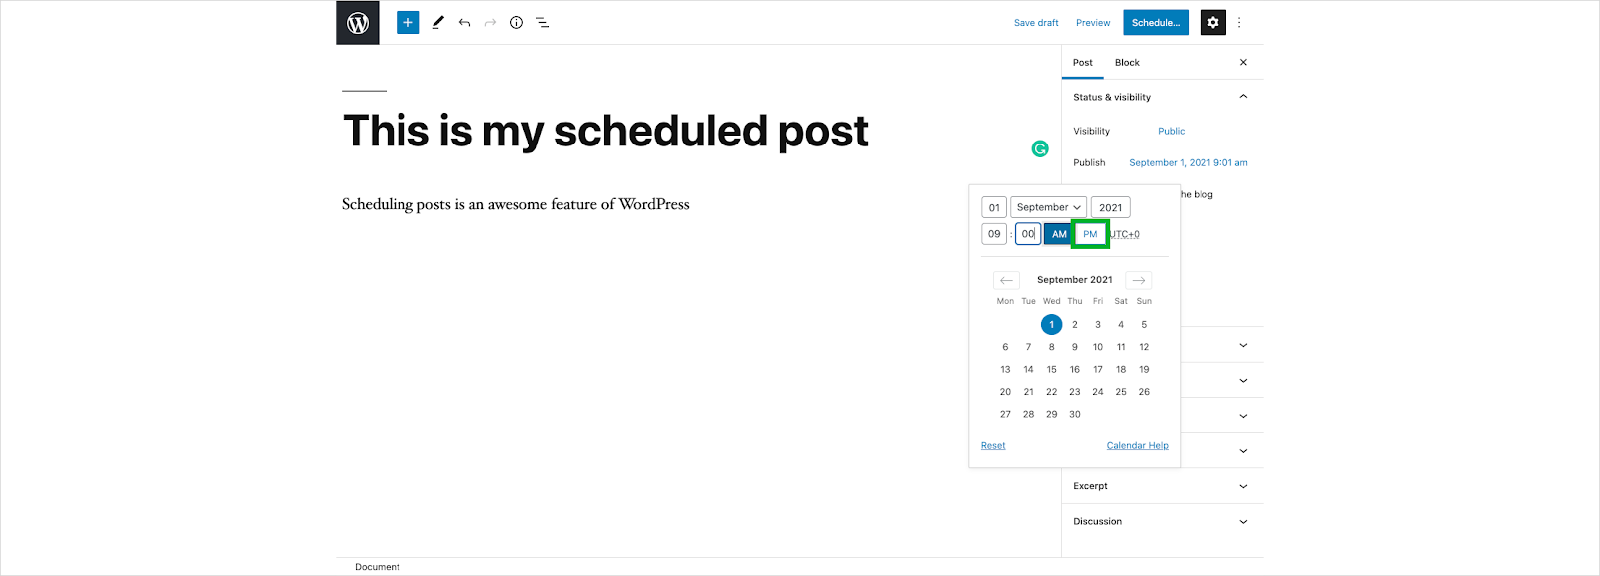
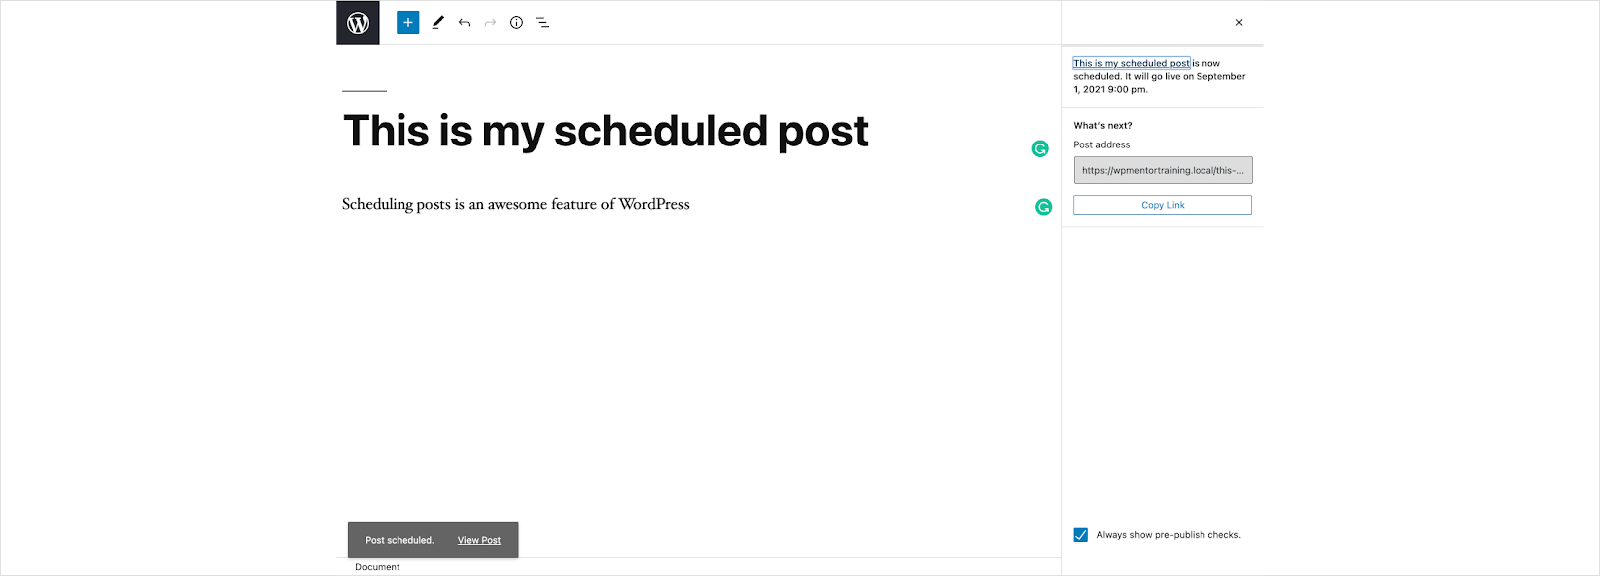
| Click on the Schedule button. |
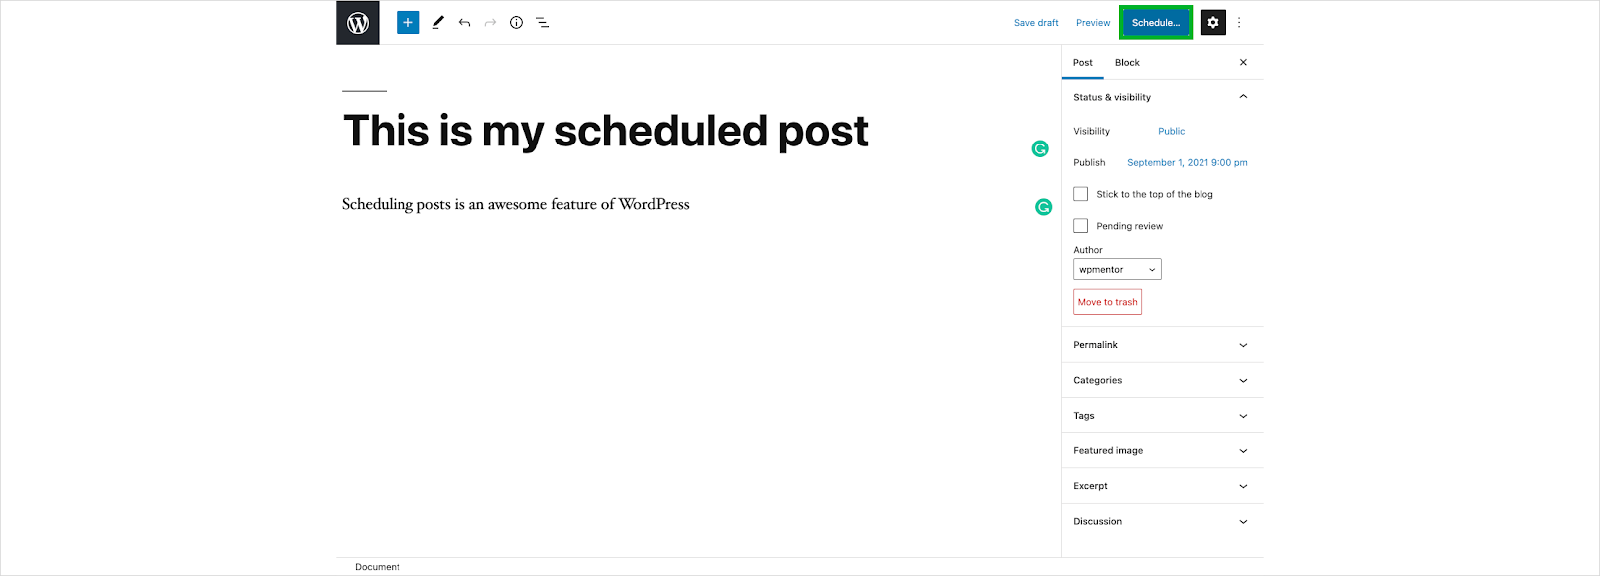
| Verify that you have scheduled your post correctly, and then click the schedule button again. |
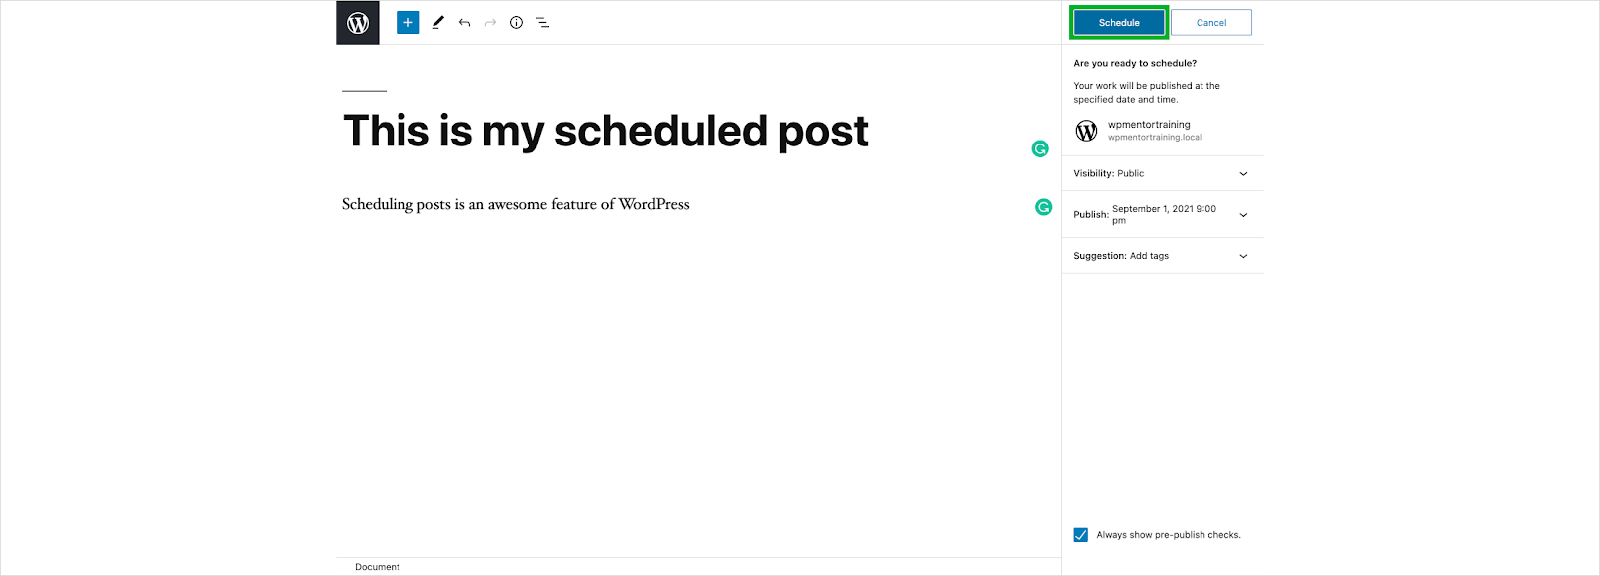
| Your post is now scheduled and will be published on the date that you selected. |
Important Note about Scheduling:
You’ll want to make sure your website is set to the correct timezone and time in order for this to work. Otherwise, your content may publish too soon, or too late.
In order to set your WordPress timezone view our tutorial here.

Copyright ByRivers Tech LLC/ WP-Tutoring.Com All Rights Reserved.
