Table of contents
Creating a WooCommerce variable product allows you to offer a set of variations on a product with control over prices, stock, images, and more for each variation. For example, if you're selling t-shirts, they might come in different sizes and colors.
Here's a step-by-step guide on how to set up a WooCommerce variable product:
1. Install and Activate WooCommerce:
If you haven't already, first ensure that you've installed and activated the WooCommerce plugin on your WordPress website.
2. Create a New Product:
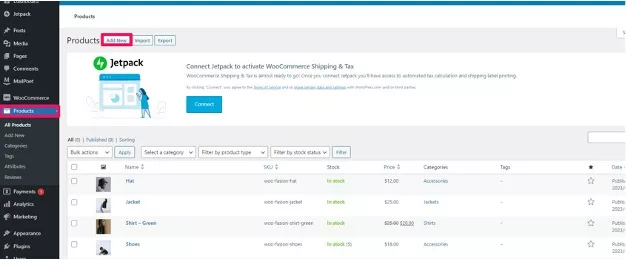
From your WordPress dashboard, navigate to Products > Add New.
Add your product title and description as you would with any other type of product.
3. Select 'Variable Product':
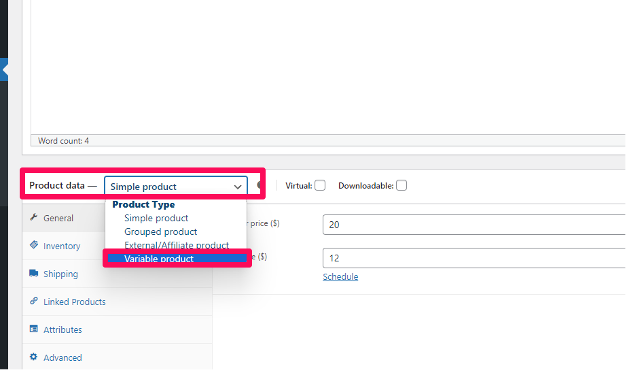
In the 'Product Data' dropdown (located in the central panel), select 'Variable product'.
4. Add Attributes:
Attributes are the features that your product variations are based on, such as size or color.
In the 'Product Data' section, click on the 'Attributes' tab.
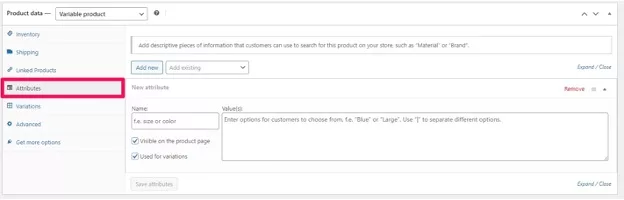
Click on 'Add' to add an attribute.
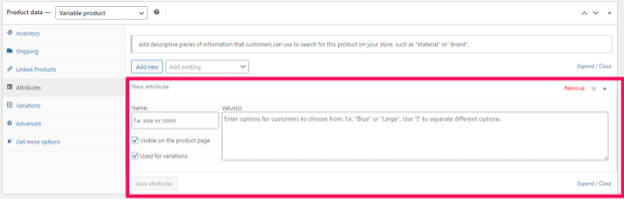
Give the attribute a name (e.g., "Color").
In the 'Values' field, input the terms for that attribute (e.g., "Red | Blue | Green").
Separate each value with a vertical bar . Check the 'Used for variations' checkbox. Click 'Save attributes'.
If you have another attribute (e.g., "Size"), you would add it similarly.
5. Add Variations:
After setting up your attributes:
Click on the 'Variations' tab in the 'Product Data' section.
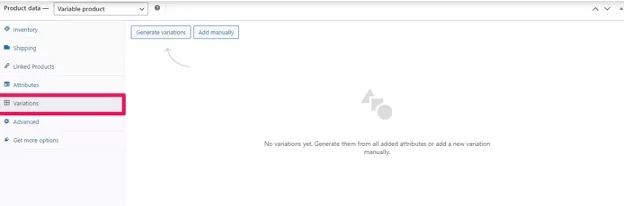
Click on 'Go' after selecting 'Create variations from all attributes' from the dropdown. This action will create a variation for each combination of attribute values.
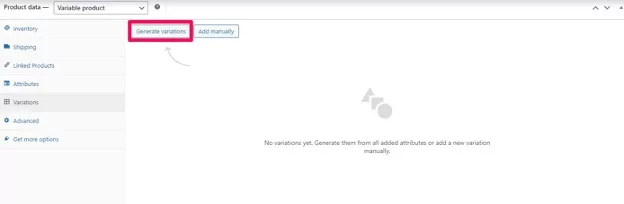
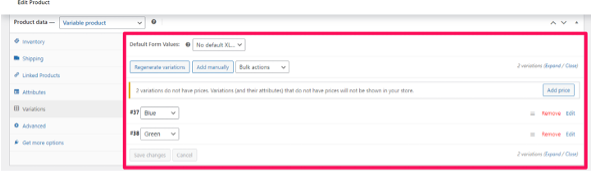
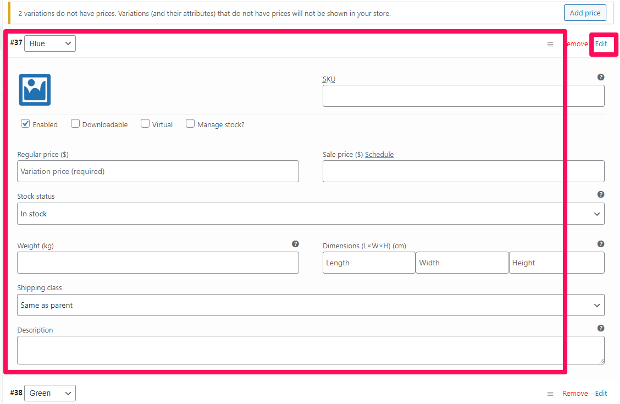
Once the variations are generated, you can set individual prices, stock status, and other data for each variation. Click on the triangle icon to expand each variation and adjust as needed.
For instance, you might want to specify a different price or stock quantity for the "Red, Small" t-shirt vs. the "Blue, Large" t-shirt.
6. Product Image:
In the right-hand side panel, you can set the main product image (this is the default image).
For each variation, you can also set a specific image. This means when customers select a specific variation (e.g., "Blue" t-shirt), the corresponding image will be shown. You can set these by expanding each variation in the 'Variations' tab and selecting 'Upload an image'.
7. Other Product Details:
You can also fill in the other regular product details such as: Product Categories & Tags
Short Description
SEO settings (if you have an SEO plugin installed)
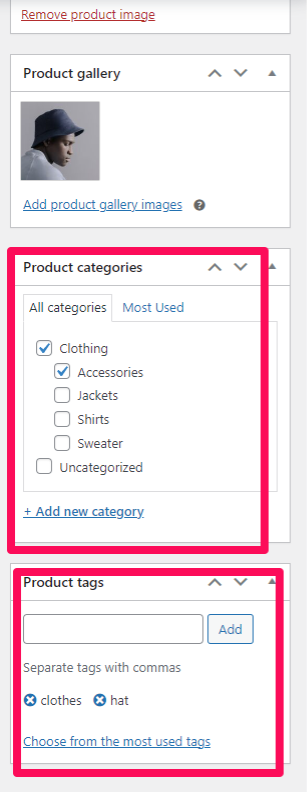
8. Publish:
Once you're satisfied with the product details and variations, click the 'Publish' button to make the product live on your website.
And that's it! Your variable product is now set up and customers can choose their desired variation when visiting the product page.

Leave a comment