Helping site owners learn WordPress since 2012 · (844) WP-TUTOR
WordPress Basics

Adding a Table in Gutenberg

Learn how to add a table in the WordPress Gutenberg editor using the Table block, including adding rows and columns, styling text, and CSS classes.

WT
WP Tutoring TeamWordPress Instructors
Updated Oct 16, 2018
1 min read

**
Adding a Table in Gutenberg**

There are some times when you'll need to use a table to display your data and information properly.  Gutenberg makes this easy with the Table Block.

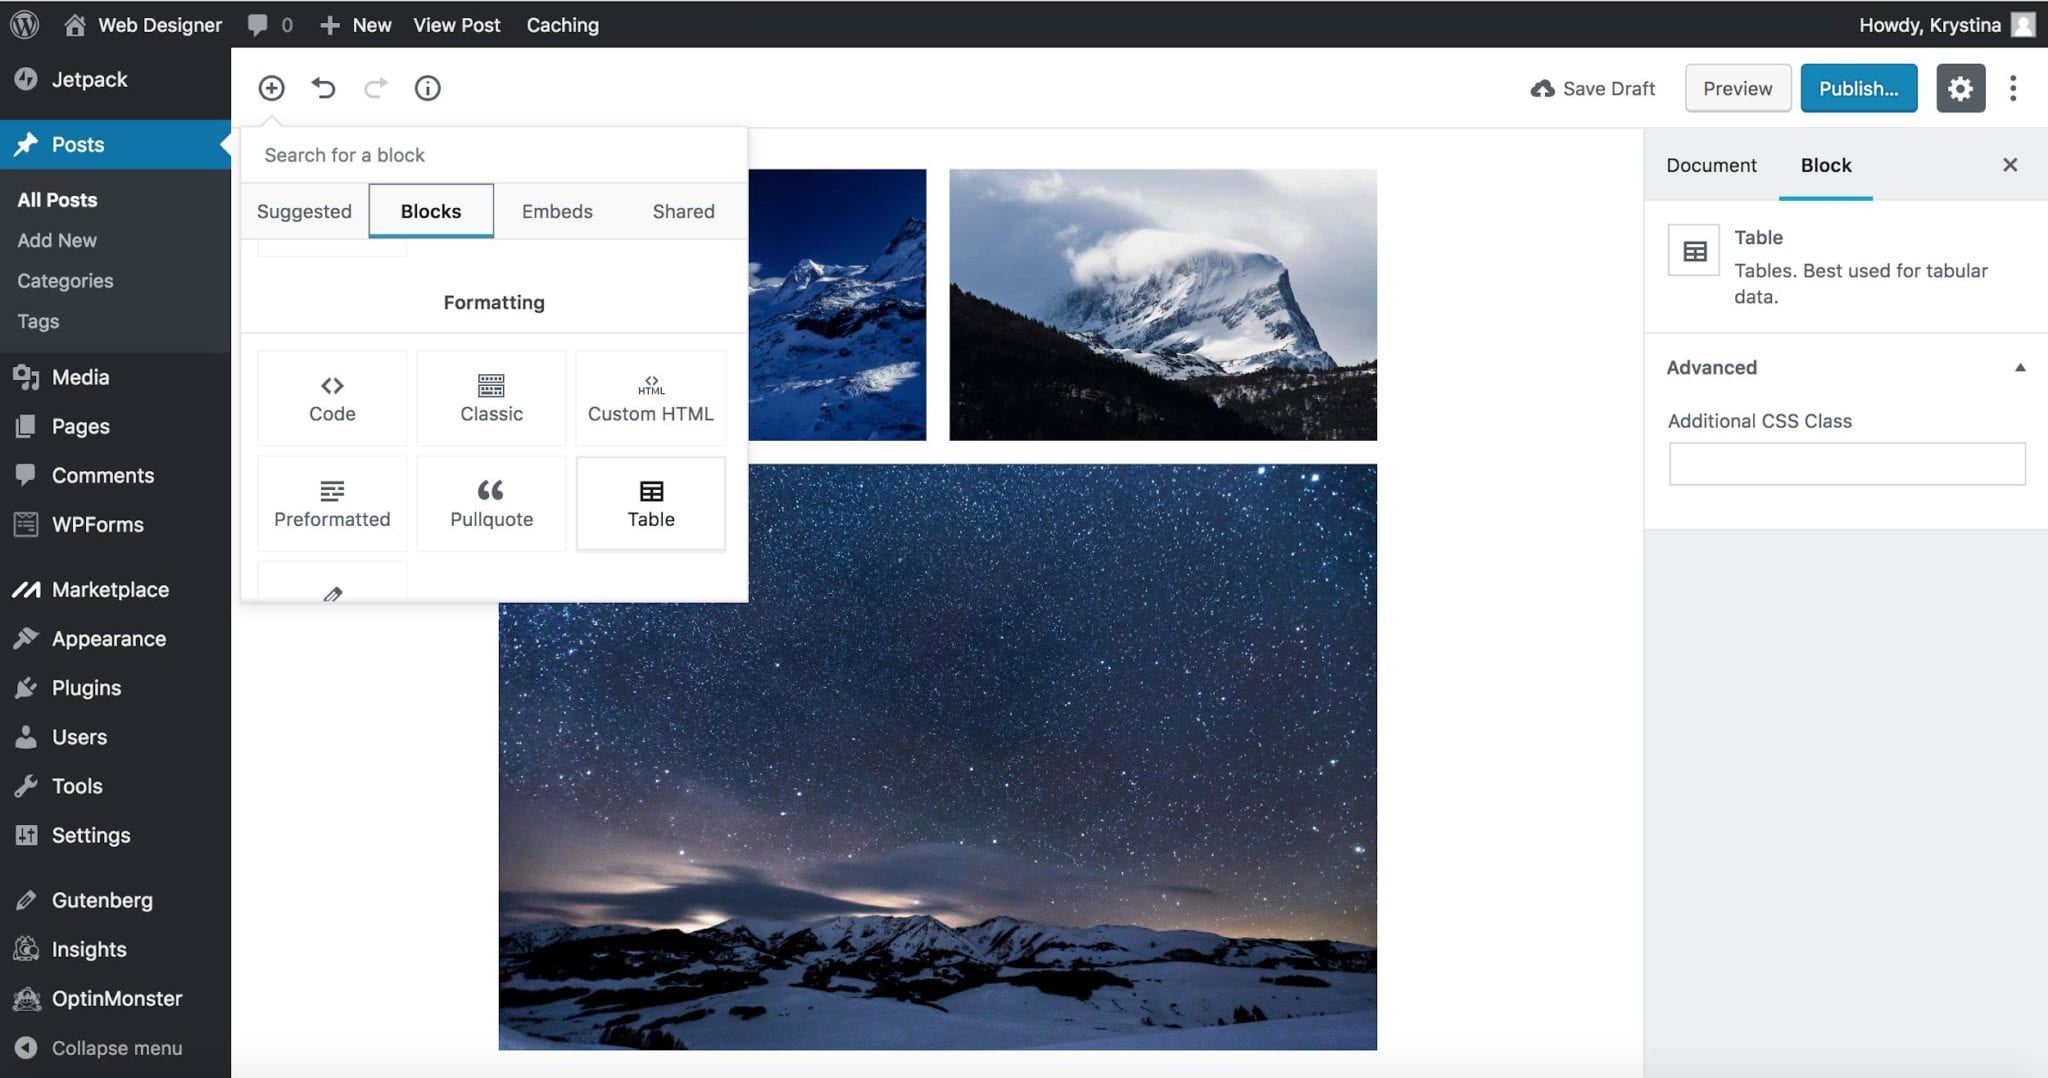
Step 1 Hover your mouse over the Add Block icon (the plus sign in the upper left hand corner within the Gutenberg editor).

Step 2 Select Blocks. Then scroll to Formatting. Under that section you will see Table. Select Table.

Hint: You can also type “Table” in the search bar to quickly get to the table option.
 

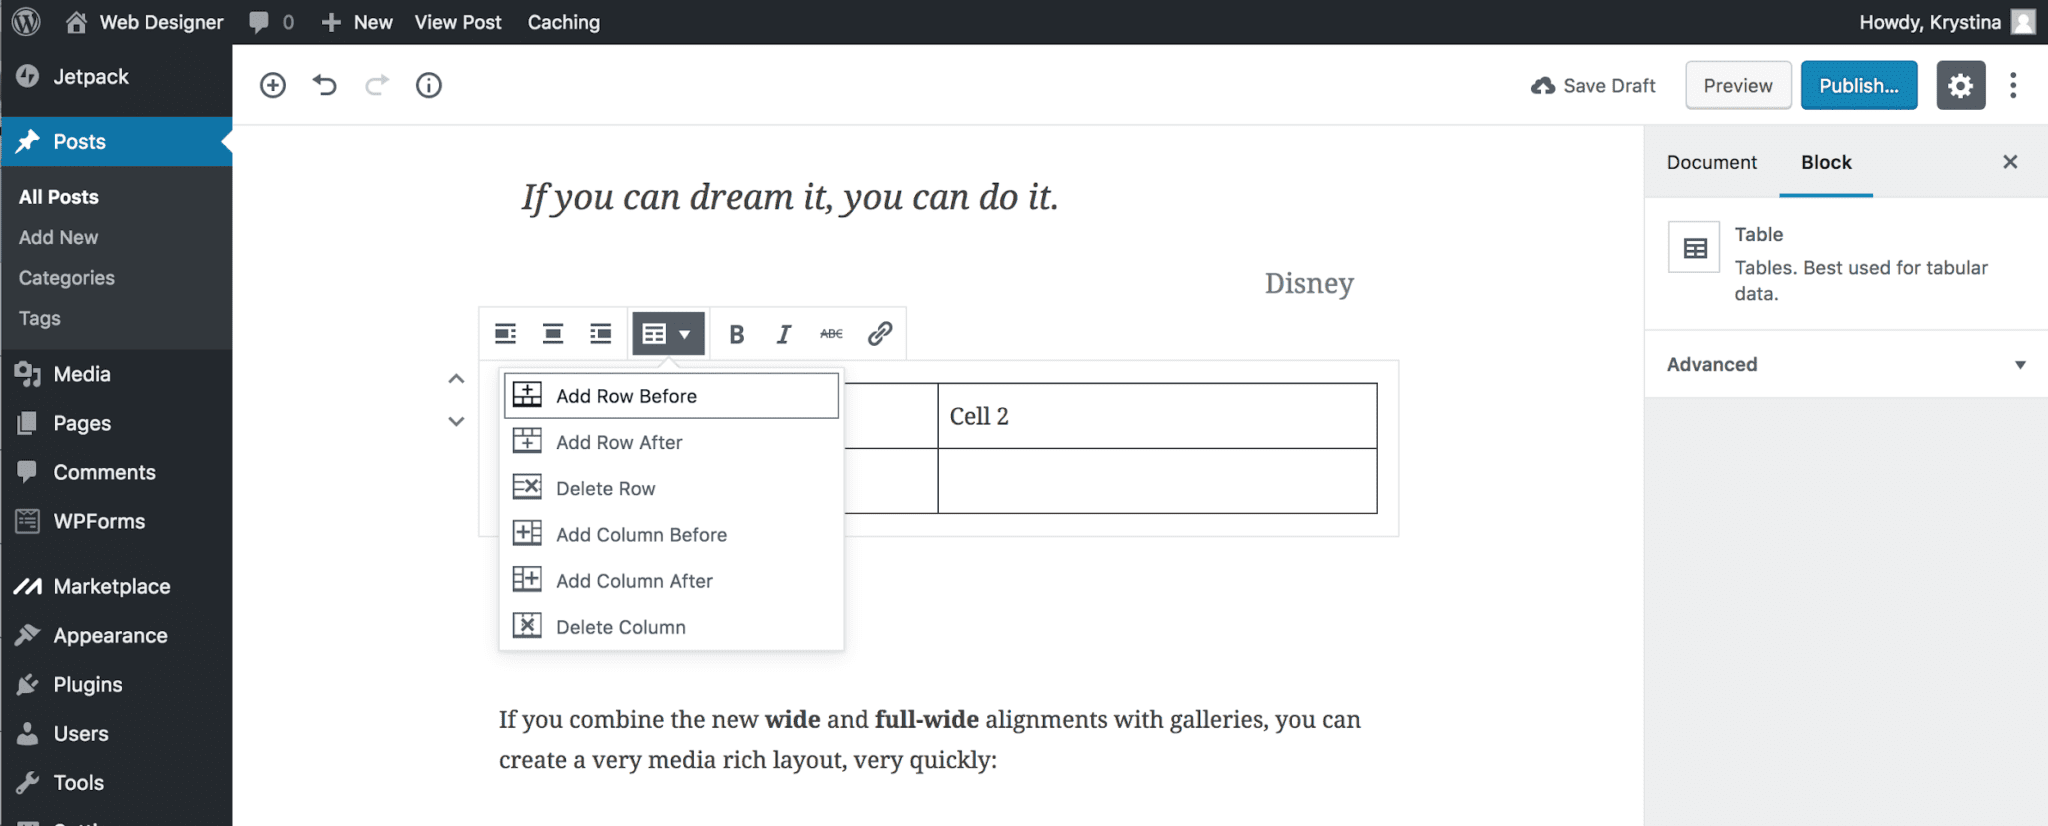
Step 3 The table edit window will appear. At the top of the table, you’ll see a few options at the top. Those options will allow you to customize your table (add extra rows, or columns, and style the text within the table). To further design your table, you can add CSS classes in the settings window under advanced options.
 

WT

WP Tutoring Team

WordPress Instructors

We’ve been teaching WordPress to individuals and businesses since 2013 — through step-by-step tutorials and 1-on-1 tutoring sessions.

Leave a comment

Comments are reviewed before they appear.

Get our free WordPress starter guide

Join thousands of site owners and get step-by-step WordPress tutorials in your inbox, plus printable cheat sheets.

Beginner-friendly, no jargon
Printable cheat sheets & checklists
Unsubscribe anytime

Request your session

We’ll reply quickly — usually the same business day.

By using this form you agree with the storage and handling of your data by this site.