
With the Columns block, you can quickly and easily adjust your page’s layout.
The Columns block in WordPress’s Gutenberg editor is a versatile tool that lets you create column-based layouts for your content. Here’s a step-by-step tutorial on how to use the Columns block and customize its options:
Step-by-Step Tutorial on Using the Columns Block in Gutenberg:
- Adding the Columns Block:
- Create or edit a post/page in your WordPress dashboard.
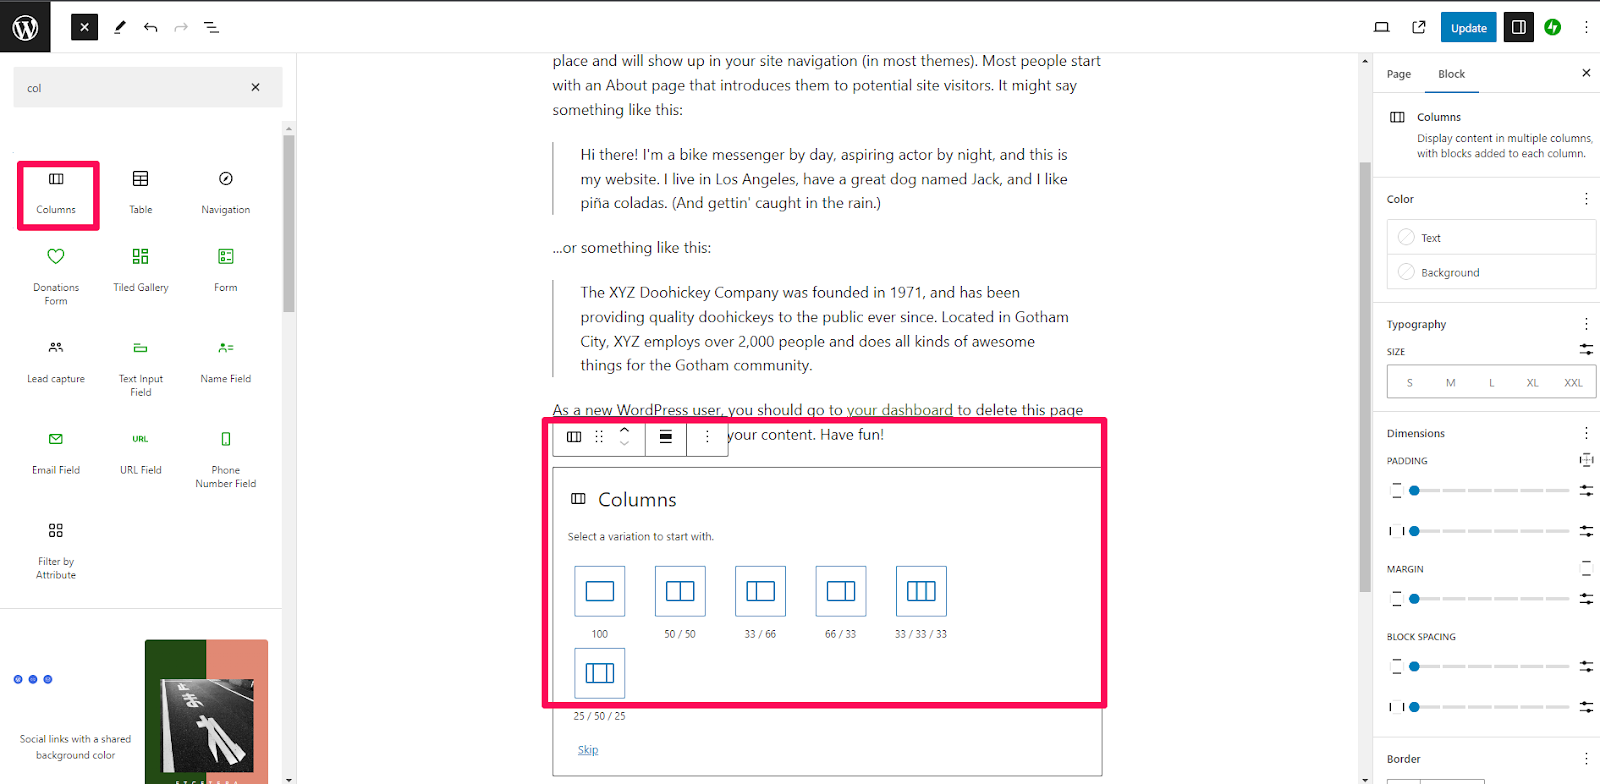
- Click on the ‘+’ button to add a new block.
- Use the search bar and type in “Columns” or scroll through the available blocks under ‘Design’ to find the ‘Columns’ block.
- Click on it to insert it into your post or page.

- Selecting a Column Pattern:
- Once you’ve added the Columns block, Gutenberg might offer predefined column patterns (like two equally divided columns, or a smaller column on the left with a wider one on the right, etc.).
- Click on your desired pattern. If you don’t select a pattern, Gutenberg will default to two equal columns.
- Adding Content to Each Column:
- Click inside a column to add content.
- You can insert any type of block within a column (e.g., paragraphs, images, videos, etc.). Simply click the ‘+’ button inside the column and choose your desired block.

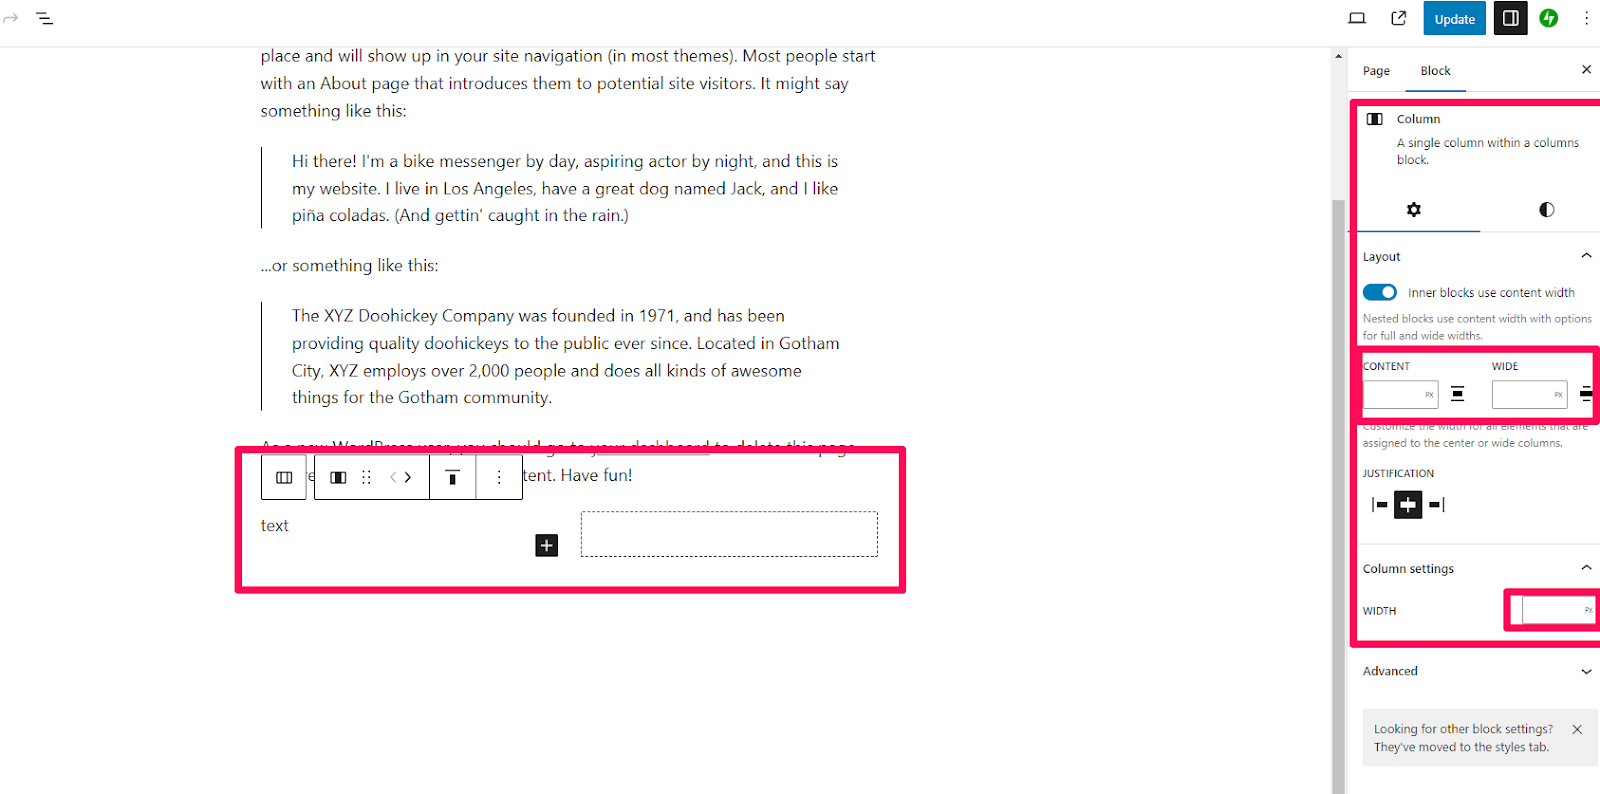
- Adjusting the Column Width:
- Select the column you’d like to adjust.
- An editing toolbar will appear at the top. Drag the column border left or right to adjust its width, or use the percentage slider in the block settings sidebar on the right.
- Column Block Options & Settings:
- Click on the overall Columns block (not just an individual column) to see its settings in the right sidebar.
- Under ‘Block’, you’ll see options like:
- Columns count: Increase or decrease the number of columns.
- Stack on mobile: Toggle this on to stack columns vertically on mobile views for better responsiveness.
- You can also adjust the vertical alignment of content within columns. For instance, you can align content to the top, center, or bottom.

- Styling & Advanced Settings:
- With the Columns block selected, navigate to the right sidebar.
- Under ‘Styles’, you can set background colors and text colors.
- If you’re familiar with CSS, under the ‘Advanced’ tab, you can add a CSS class for further styling.

- Reordering Columns:
- Hover over a column.
- Use the up and down arrows in the toolbar to move the column’s position left or right.

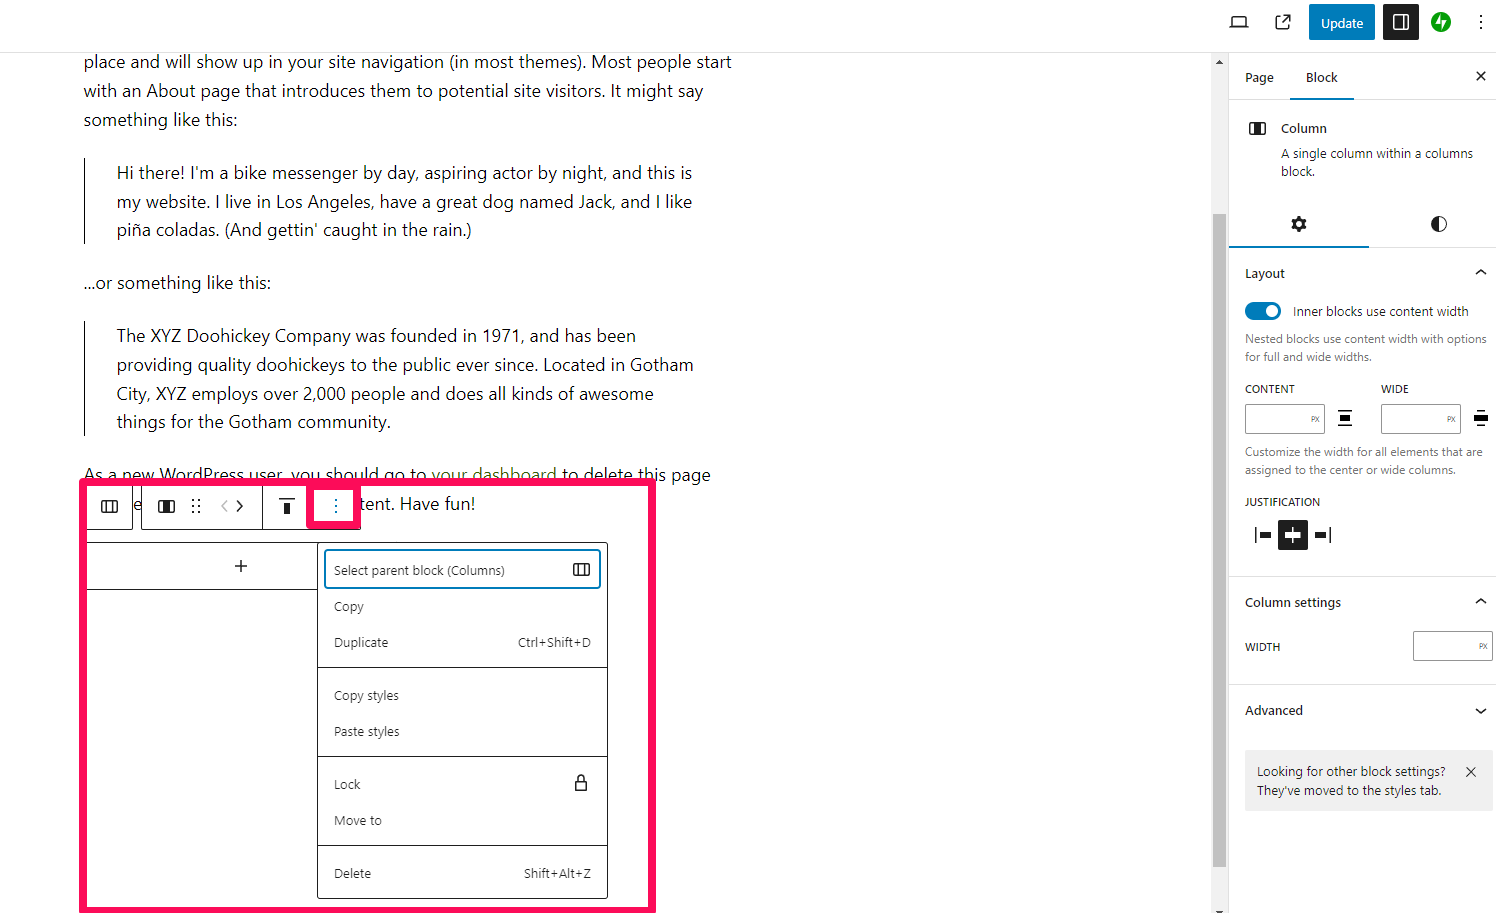
- Removing a Column:
- Click on the column you want to remove.
- Click on the three dots (more options) in the toolbar and select ‘Remove Block’ from the dropdown.
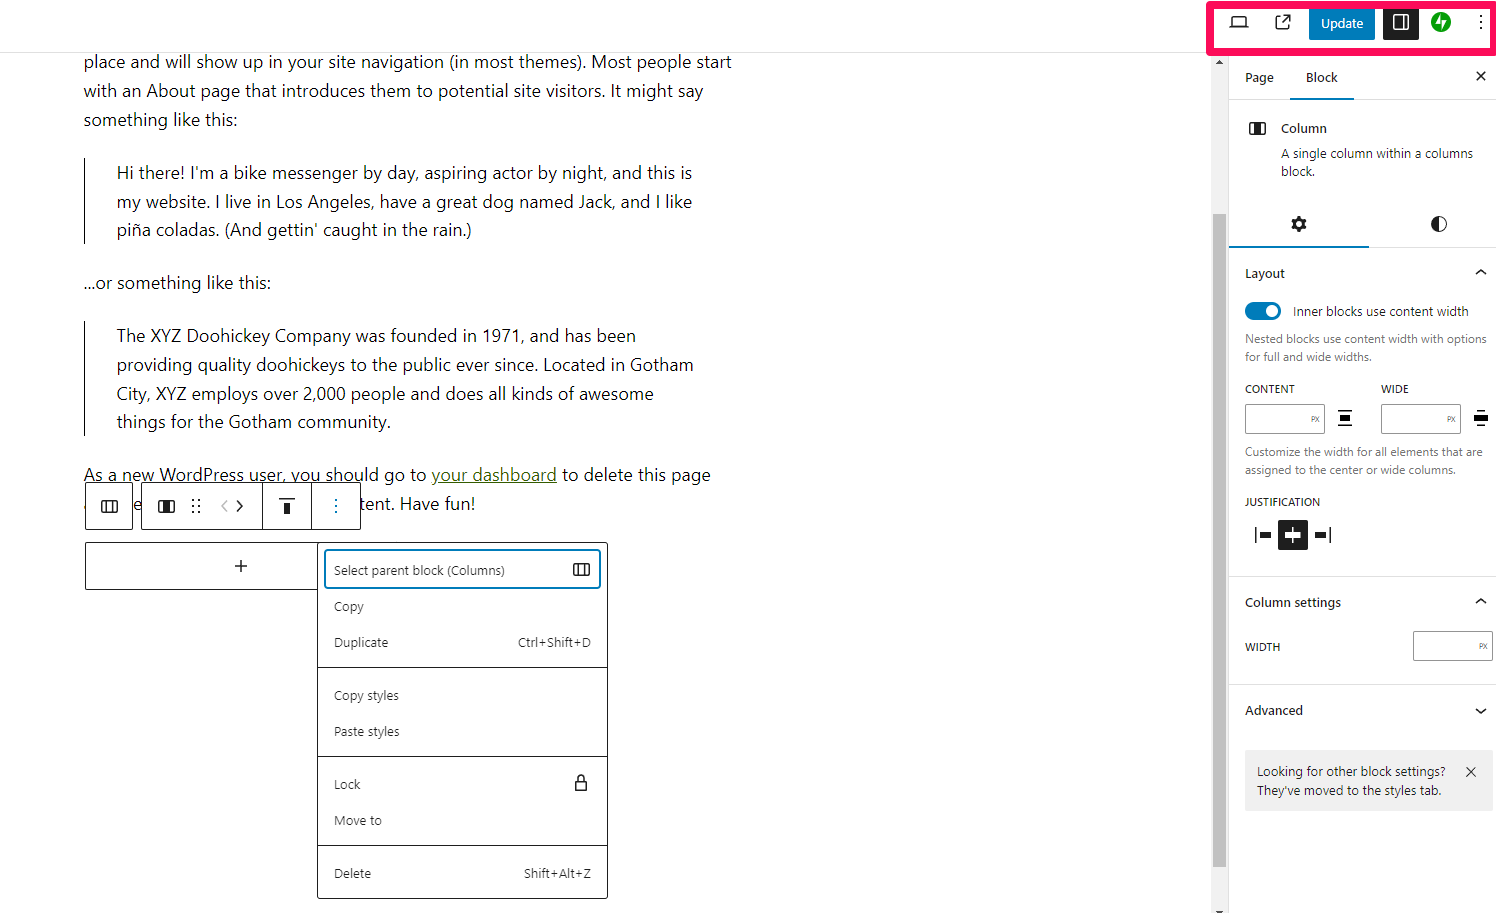
- Saving & Previewing:
- Once you’re satisfied with your columns and content, click on ‘Preview’ to see how it looks live.
- If everything looks good, click ‘Update’ or ‘Publish’ to save your changes.
That’s a basic introduction to using the Columns block in Gutenberg! With practice, you’ll get more comfortable with the block and its various options, and you can create visually appealing layouts for your WordPress content.


Copyright ByRivers Tech LLC/ WP-Tutoring.Com All Rights Reserved.
